Category Archives: Dinner

Garlic, Chickpeas, Broccoli and Politics

This slideshow requires JavaScript.

Previously, the only thing that George HW Bush and I had in common was our dislike of broccoli.  I’m proud to say that after eating this dish from Appetite for Reduction, I can distance myself a little  more from HW, with only a slight dislike of broccoli and have narrowed it down to  when it is 1) overdone or 2) raw.  I love broccoli in this dish.

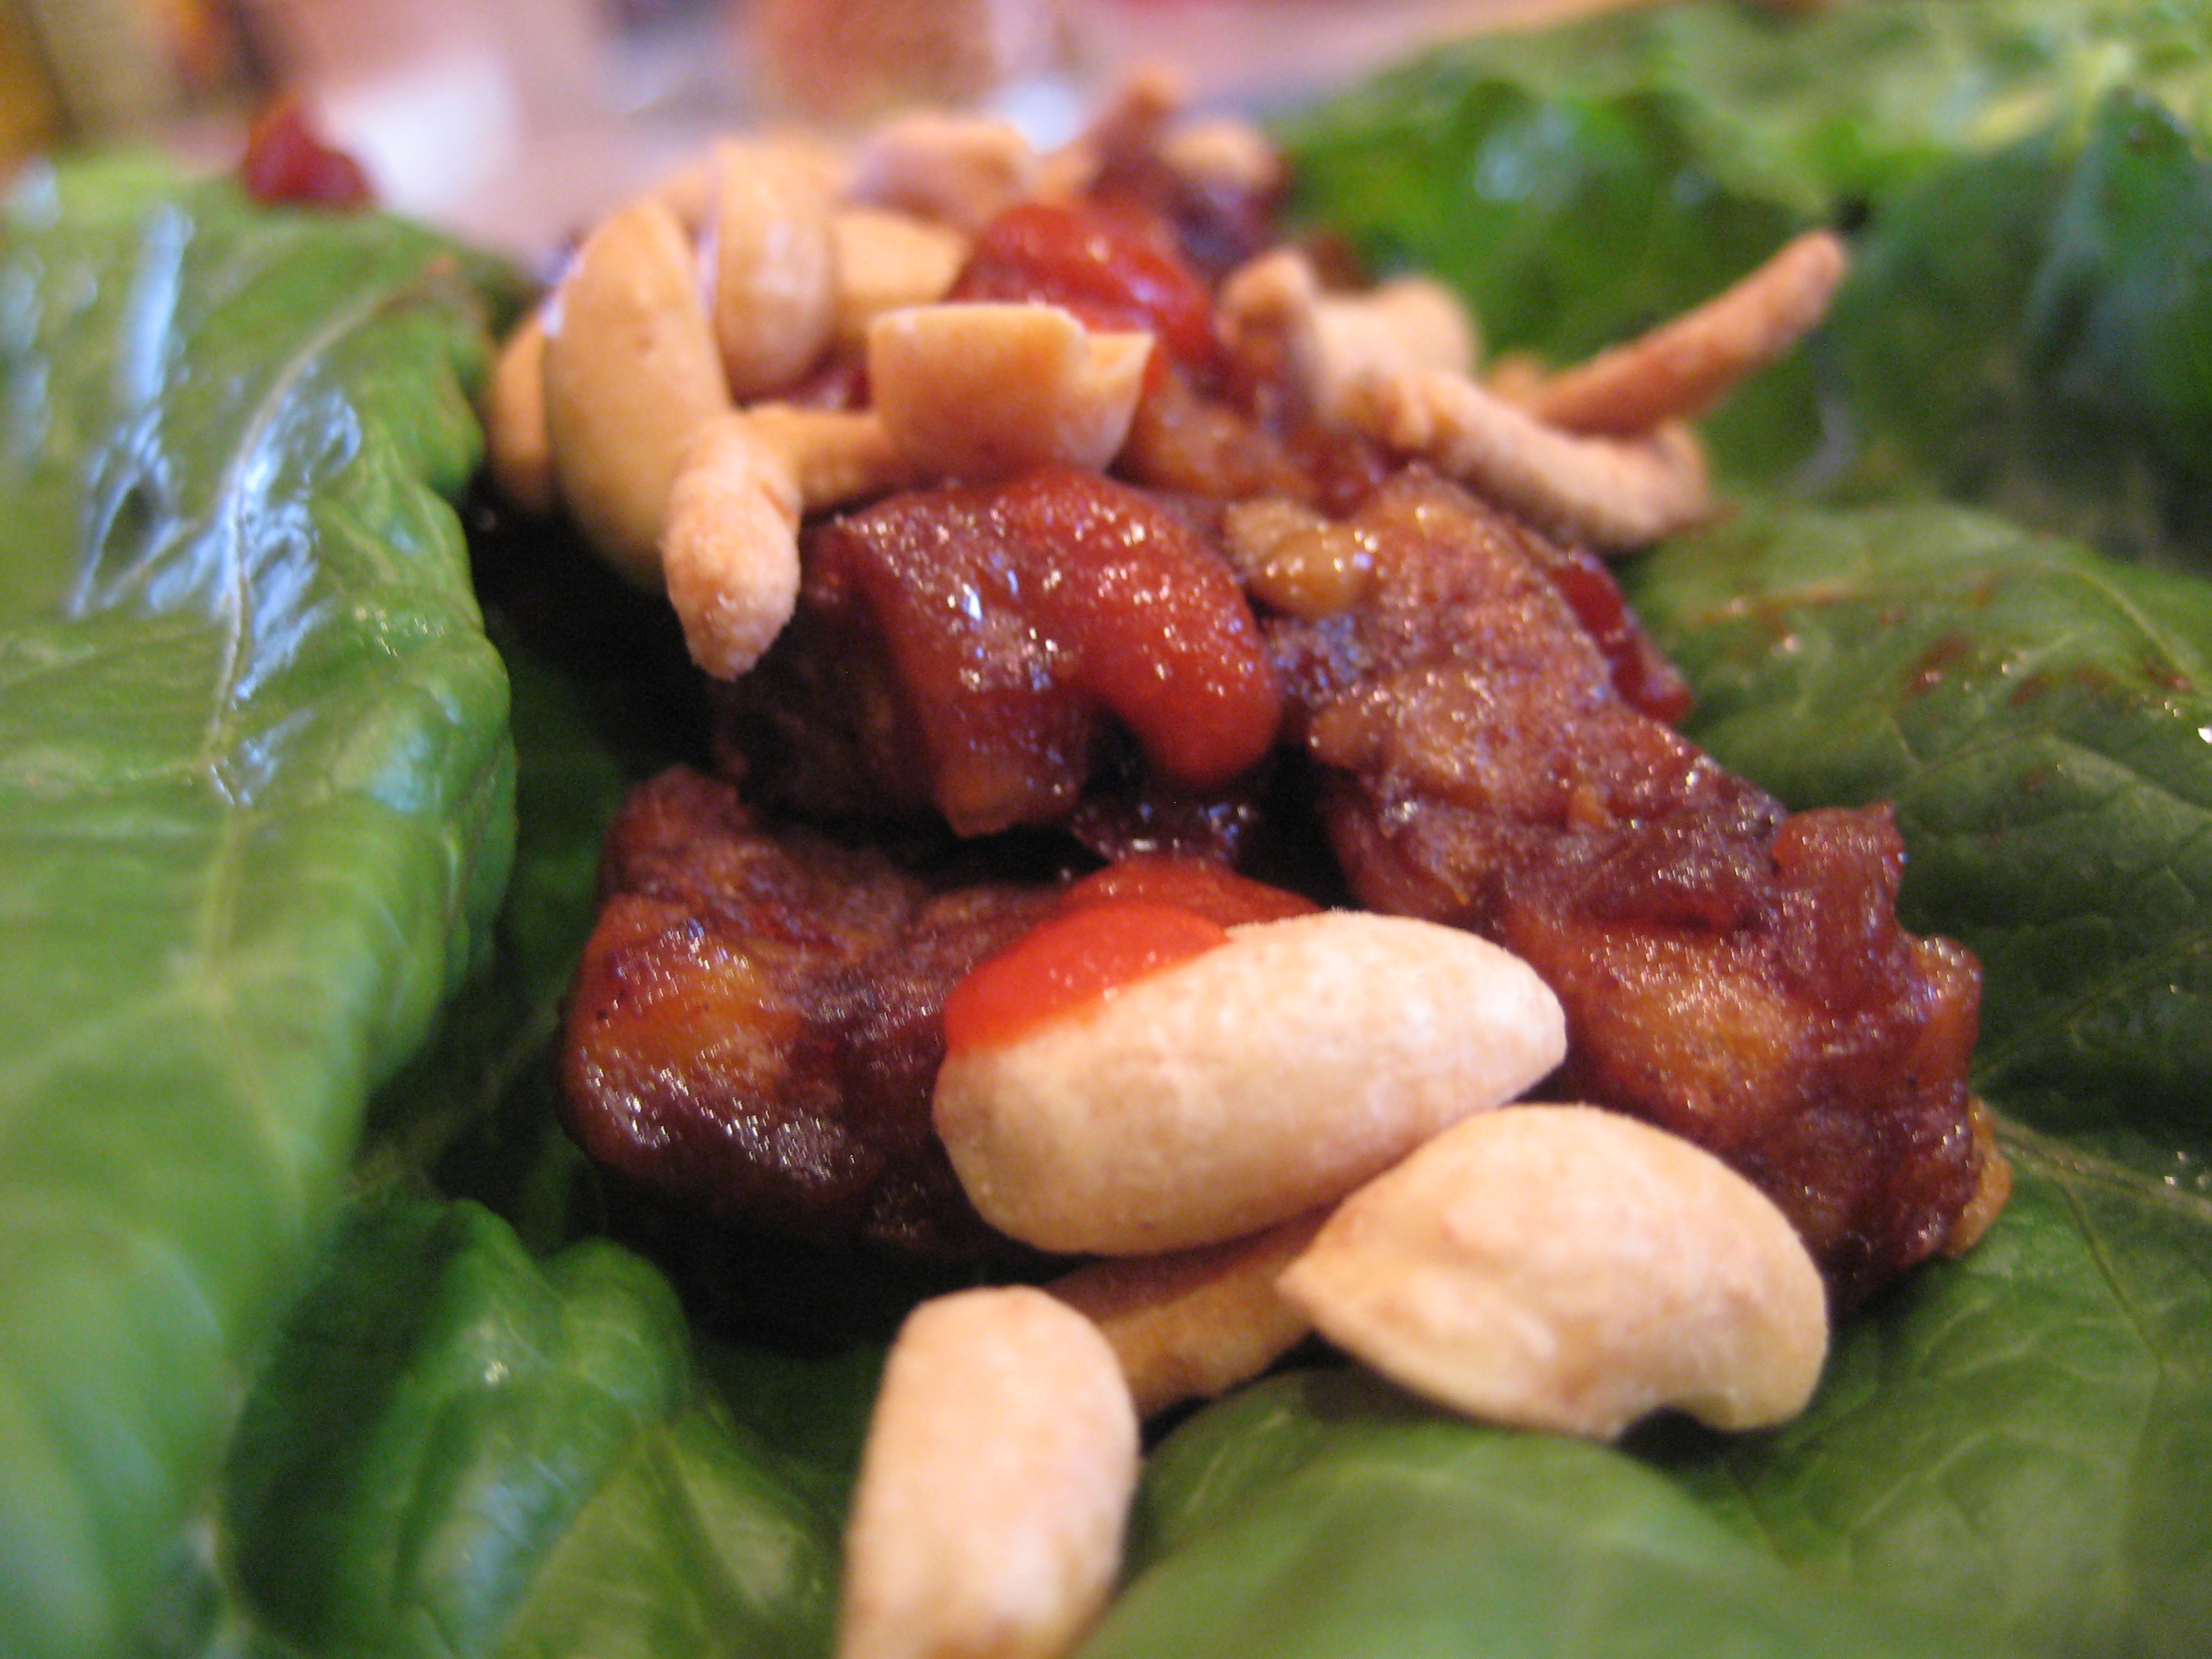
Warning, this is one ugly dish.  I mean, there isn’t a food blog around that would claim this dish a beauty.  So maybe not on the top 5 of dishes to serve when say the Queen is coming to dinner, but certainly a fail-safe dish for a busy week day dinner.  After you roast this off the possibilities are endless, it would make a great soup with some veg broth added, perhaps toss it on a piece of naan for a sandwich, over rice, lentils, quinoa, etc.  Or do as I do and just eat it off the baking sheet as you don’t want to dirty another dish.  I won’t judge you.

  • 1 lb broccoli, cut into large spears and stems chopped into 1/2-inch pieces (around 9-10 cups) – I really hate the spears, so I used just florettes out of a bag, 2 bags worth.
  • 10+ cloves garlic, peeled and smashed-use what you want.  I’ve done up to 20 and an no worse for the wear.
  • 2 cups cooked chickpeas (or a 19-oz can, rinsed and drained)
  • 2 tsp olive oil
  • 1/2 tsp salt
  • 1/4 tsp red pepper flakes
  • 2 tsp lemon zest (zest from 1 lemon) reserve the juice
  • 1 1/2 tsp dried oregano or 3 tsp fresh
  • 1 cup vegetable broth

Preheat the oven to 400F. Place the broccoli, garlic and chickpeas in a 9×13 inch baking pan. Drizzle with olive oil, salt, chili flakes, lemon zest, oregano and black pepper to taste. Toss to coat and bake, uncovered, for 30 minutes, flipping once.

After 30 minutes, mix broccoli and chickpeas again and add broth, deglazing any browned bits at the bottom of the pan. Continue to bake another 15 minutes until the garlic is tender and the broccoli is browned in some places.

I finished this dish with the lemon juice from the zested lemon, and baked for another 5-10 minutes until it was absorbed.

Adapted from Appetite for Reduction

Pasta with Citrus Sauce

This slideshow requires JavaScript.

This recipe will blow your mind.  If you followed the same path I did and made that quinoa bowl a few days ago, you should still have around a citrus sauce that is begging to be used up.  Your dinner plan will be as follows:

  1. boil water
  2. drop in store-bought tortelinni
  3. heat up store-bought baguette in 350 degree oven
  4. add dressing to cooked and drained tortelinni
  5. plate and eat (serve over a bed of arugula if you are feeling fancy)

No kidding…that’s it.  Dinner is served.

Leftovers Pita with Hummus

This slideshow requires JavaScript.

I’m rather impressed with myself right now.  I made that delicious quinoa bowl  and had lots of leftovers, so I engineered this dinner the very next night, followed by another quick dinner the night after that, stretching the sauces out over three days AND more importantly using them up, instead of wasting them (which in cooking for 2 people I’m prone to do).

This leftovers pita with hummus, takes the Tahini sauce from the quinoa bowl, and whirls it around in a food processor with 1 cup of cooked chickpeas to fatten it up a bit-making hummus.  I added just a pinch of salt and had a spread to use with the leftover bowl materials (kale, red onion, chickpeas) and pan fried some tofu in sesame oil to add a little more substance.  Served it on a whole wheat pita that I just warmed in the oven while I fried up the tofu.

Quinoa Veggie Bowl with Two Sauces

This slideshow requires JavaScript.

Once you become comfortable with having flexible items in your pantry, having no real plan for cooking isn’t very stressful.  You get to bring this kinda stuff together in a pinch.  This is a perfect no-plan panic meal.

Parm + Citrus Sauce/Dressing:

  • 1/3 cup freshly grated Parmesan cheese (make this Vegan and omit the cheese)
  • Zest and juice of 2 oranges
  • 2 tablespoons chopped shallots
  • 2T white wine vinegar
  • 1 cup extra-virgin olive oil (or half reg. + half lemon oil)
  • 2 pinches of both salt + pepper

In a medium bowl (or Mason jar) combine the grated Parmesan, orange zest and juice, and the shallots. Whisk in the white wine vinegar. Whisk in the olive oil and finish by seasoning with salt and pepper.

Tahini Dressing:

  • 1 garlic clove, smashed and chopped
  • 1/4 cup tahini
  • Zest of one lemon
  • scant 1/4 cup fresh lemon juice
  • 2 tablespoons olive oil
  • 2 tablespoons hot water
  • scant 1/2 teaspoon fine grain sea salt

In a medium bowl or Mason jar combine the garlic, tahini, lemon zest and juice, and olive oil.  Add the hot water to thin a bit and then the salt.

For the veggie bowl:

Cook up quinoa according to package directions.  Pictured here, I made a mix of common white and less common Inca red quinoa.  They cook up the same, I didn’t have a cup of either, but combining them I just made it.  Before I add the water and put it into a pan to cook, I like to rinse it through a fine mesh strainer until the water runs clear and then toast it in a saute’ pan until just barely browned.  I think it makes it taste nutty and earthy.  The end texture is also a little fluffier, less mushy like rice sometimes gets with the excess starch still attached.

In the bowl pictured, there is cooked room temperature chickpeas (mine were from frozen, but you could use canned in a pinch), raw red onion, steamed kale and steamed fingerling potatoes.  That’s what I had in my fridge that day but you can use any cooked or raw veggie you like.  The type of bowl you make is only limited by what’s in your fridge really.  Tofu would make an excellent addition to this dish.  I served my bowl room temperature for a simple dinner.

Dressings adapted from 101cookbooks.com

Curry with Cashews

Confession:  I love cooking, but I could LIVE on take out.  In particular thai take out.  My fave place in GR is Angels Thai on Monroe Center.  This is my “go-to” curry recipe adopted from Heidi Swanson’s 101cookbooks.com.  I add some more num num’s and make it for a crowd so that I have leftovers!  Curry lasts surprisingly well in the freezer and makes a great quick meal over rice or quinoa in a hurry.  I picked some hearty veggies and a sturdy bean so they stand up well later going from freezer to table later.  You can add just about anything you want into this dish.  Clean out the fridge if you like.  Just be sure to write it all down if it tastes awesome, or you won’t be able to recreate it later…this happens to me more times than I care to mention.

  • 2 cups lite coconut milk
  • 1 Tbs HOT curry powder (I use Penzeys)
  • 3 Tbs Mild or Sweet curry powder (Penzeys here too)
  • 1/2 – 1 tsp fine grain sea salt (to your taste)
  • 1 large red onion, chopped
  • 3 medium garlic cloves, chopped
  • 2/3 cup water
  • 1 block firm tofu, pressed and cut into small cubes
  • 1 cup green beans, cut into 1-inch segments
  • 2 cups cooked garbanzo beans
  • 1 1/2 cups cauliflower, cut into tiny florets (one large head)
  • 1/3 cup cashews, toasted
  • a handful of cilantro, loosely chopped

Toast the cashews in a wok briefly, until just browned.  Remove the cashews and allow to cool.  Next, toast the curry over LOW.  Do not burn it or your pan will smell and taste like burned curry for all time.  For real.  Add to the toasted curry, half of the coconut milk and bring to a simmer.  Whisk in the rest of the curry powder and salt, working out any clumps. Now stir in the chopped red onion and garlic and cook for a minute. Stir in the remaining coconut milk and the water, and then the tofu. Cook down the liquid for a couple minutes before adding the green beans, garbanzos, and cauliflower. Cover and simmer for just about one minute, maybe two – or just until the cauliflower and beans lose their raw edge and cook through a bit. Remove the pot from heat and stir in the cashews. Taste and adjust the seasoning (salt / curry powder) if needed. Serve with a bit of cilantro topping each bowl over rice or quinoa.

This slideshow requires JavaScript.

Spicy Ginger Tempeh Bowl

This slideshow requires JavaScript.

A few weeks ago I jilted  you by not including any pictures with the Spicy Ginger Sauce post.  This new post is my apology and a stir fry recipe featuring that yummy sauce. I think this sauce would even taste good on ice cream, seriously.

Spicy Ginger Bowl

  • 1 package mushrooms, any variety
  • 2 shallots, sliced fine
  • 2 tsp reduced sodium Tamari, or soy sauce
  • 1 carrot, peeled and diced
  • 1 package tempeh, steamed and cubed
  • 1 yellow bell pepper, diced
  • 1 C brown rice
  • 2 C water
  • 1 recipe spicy ginger stir fry sauce
  • roasted peanuts, for garnish

First prep the rice, that’s gonna take up the bulk of your time (around an hour) to cook.  Check out the package directions, but generally speaking, real brown rice of most kinds (Jasmine, Basmati) will take a 2:1 ratio, water to rice, and about 50-60 minutes to cook and set.  I walk in the door from work, keep my coat on, get the rice ready to go, put it on the stove, and then walk the dog.  When I come back, it feels like instant rice and I have checked something else off my list.

Steam the tempeh in a steaming device and let set.  It will need just about 10 minutes or so.  In a pinch I’ve steamed tempeh in my microwave in water, it didn’t seem to bother the outcome of the dish.   Steaming the tempeh before consuming is one of the best veg tips I ever received.  Number one, it takes out all the bitter and gives it a nice consistency and number two, some brands are not pre-cooked, and really need to be cooked prior to consumption.  My fave is the wild rice variety made by Lightlife it’s super nutty and delish.

Mushrooms are funny in stir fry, they have a TON of moisture and I don’t like ’em all gummy, spongy steamin’ up my stir fry.  I’d rather have them caramelized and yum, like candy.  For the results in the picture, I took a package of baby portobello mushrooms, dry ‘washed’ them, removed the stem, sliced them and dropped them into a hot wok with the shallots, after the water reduced and they began crusting up on the outside, I hit them with 2 tsp of reduced sodium tamari and let that reduce.  I removed them from heat, and set them aside, wiped out my wok, reheated it nice and hot again, then dropped in the diced pepper, cooked for 2-4 minutes then added the tempeh (which was already steamed, so it’s warm still and most importantly cooked).  Let all ingredients get up to the same temp and then hit the whole wok with the spicy ginger stir fry sauce, let it reduce, reintroduce your shallot mushroom mix to the saucey love and serve the whole racket over the rice that is now conveniently done because  you started it before you needed it.  Top with the roasted peanuts.

I love bowls and stir fries as they let me be a lazy meal planner, AND with just a sauce recipe, you can really add anything you want to the mix from the fridge and come out with a sound meal.  I own a nonstick wok from Pampered Chef, I’ve had it since, well, forever and it’s still nonstick.  It’s a nice size for more than just stir fry (sometimes I make soup in it if my Dutch oven is dirty-I told you I was lazy), this  brand is particularly solid, so the heat distributes well and I rarely need to use oil as long as I heat it up well before I add ingredients.   You could easily use a skillet in its place if you would like to cook in batches…too much in the skillet and your stir fry will become a stir steam.  Not good.

PF Chang’s Ain’t Got Nothin’ on Isa

Veg friends rejoice.  This is a meat-eater approved recipe (Christine tell Alex it’s good, like PF Chang’s good).  No one will look at you cross-eyed or make that funny chewing face, like when they hate it but are going to swallow it anyway just to make you feel good.  Take it to a party as an appetizer with some bib lettuce to really impress your friends, then tell them it’s tofu after they inhale it and watch them make another funny face…you know the one of shock when they realize tofu doesn’t suck.

This recipe served three as a main dish with a side of edemame with about 2 wraps to spare just using one block of tofu.

Lettuce Wraps with Hoisin-Mustard Tofu
Adapted from Appetite for Reduction

Tofu

  • 1 block (~14 oz) extra firm tofu, diced in 1/2 inch pieces
  • 2 tsp reduced sodium soy sauce

Sauce

  • 1 tsp sesame oil
  • 1 red bell pepper, seeded and diced small
  • 1 small onion, diced small
  • 3 cloves garlic, minced
  • 1 tbsp minced fresh ginger
  • 1/8 tsp red pepper flakes
  • 3 tbsp seasoned rice vinegar (mirin is recommended but I didn’t have it)
  • 2 tbsp hoisin sauce
  • 1 tsp sriracha or sambal if you prefer
  • 2 tsp prepared yellow mustard

To Serve

  • About 12 romaine (bib or iceburg will work too) lettuce leaves
  • Bean sprouts
  • Dry roasted peanuts or cashews
  • Rice noodles (the crunchy kind)

Prepare the tofu: Preheat a cast-iron or heavy-bottomed nonstick skillet over medium heat. Add the tofu and cook for about 10 minutes, flipping it once in a while, until it is browned on most sides. About midway through, drizzle with the soy sauce and toss to coat.  I had to add a smidge of peanut oil to this recipe when I flipped the tofu as it was sticking a little.  If you have great patience, and wait it out, it shouldn’t stick.  I do not have patience.  I did however have oil.

Preheat a separate large pan over medium heat with the sesame oil. Saute the red pepper, onion, garlic, ginger and red pepper flakes. Cook for about 10 minutes. The veggies should be soft and browned. Add the mirin (or rice wine vinegar would work here too) and let cook for about 3 minutes. Add the hoisin, sriracha, and mustard, and cook for another minute.  Omit sriracha if you don’t like spicy food.  In general avoid sriracha if you don’t like spice.

Add the tofu to the sauce and toss to coat. Serve alongside lettuce leaves, to stuff like tacos.  Top with the sprouts and crunchy bits.  Sidenote:  this is a great stir fry and would stand on its own over some brown rice or noodles.

Curried Tofu and Wilted Arugula Scramble

I have a mild addiction to the tofu scramble at Marie Catrib’s.  I finally got up the courage to make one at home.  To my surprise, I liked it better at home where I control the oil and tofu consistency.  Here is my adaption of Isa Chandra’s recipe found in her Appetite for Reduction cookbook.

  • 1 tsp canola or olive oil
  • 1 medium red onion, diced finely
  •  4 cloves garlic, minced
  • 1 1/2 T fresh ginger, peeled and diced
  • 1 block extra-firm tofu, pressed and cut into 1/4-1/2 inch dice
  • 2 tsp regular (sweet) curry powder
  • 1 tsp hot curry powder
  • 1/2 tsp ground cumin
  • 2 T freshly squeezed lemon juice
  • 1/2 tsp. salt
  • a few pinches of freshly ground black pepper
  • 2-3 C baby arugula or spinach
  1. Preheat a large, heavy-bottomed pan over medium-high heat. Saute the onion in oil for about 4 minutes, until translucent. Add the garlic & ginger, saute for 30 seconds. Add tofu to the pan. Cook for about 10 minutes, stirring often, until the tofu has browned on some of the sides.
  2. Add the curry powder, cumin, salt, pepper, lemon juice & a few splashed of water if it’s too dry. Mix in the arugula. Cook for 2 to 3 minutes, stirring occasionally, until the arugula is wilted (cover if you want this to go faster).
  3. Taste for spices & add another teaspoon of curry powder if needed. Serve!

This slideshow requires JavaScript.

Vegan Sweet Potato and Black Bean Enchiladas

This slideshow requires JavaScript.

Semester is finally coming to a close.  My grading is nearly finished and it’s time to get some good food up here for the month of December! This is a wonderful dish perfect for those potlucks where you can’t take another helping of green bean casserole made from gray, canned, green beans (not that those little crispy onion things aren’t delicious, but come on!).  This will spice things up.  This modified recipe is courtesy of Vegetarian Times’ reader recipe contest of 2011 and is featured on the cover of the December 2011 issue.  This recipe made enough for me to make a 9×9 pan for dinner, then freeze a fully made 8 1/2 x 11 pan for later when we have company.

Sauce 

  • 1 15-oz. can tomato sauce
  • 1 3/4 cups low-sodium vegetable broth
  • 1 tsp ancho chile powder
  • 1 tsp chili powder
  • 1 tsp garlic powder
  • 1 tsp onion powder
  • 1 tsp dried oregano
  • 1 tsp cumin
  • 1/2 tsp chipotle chile powder

Filling 

  • 1 T extra virgin olive oil
  • 1 small onion, diced (1 cup)
  • 1 1/2 lb. sweet potatoes, peeled and diced (3 cups)
  • 1 15-oz. can diced tomatoes, drained
  • 1 16-oz. jar prepared medium salsa
  • 2 cloves garlic, minced (2 tsp.)
  • 1 chipotle chile in adobo sauce, drained and minced
  • 1 15-oz. can black beans, rinsed and drained

Enchiladas

  • extra virgin olive oil, for brushing baking dish
  • 16 6-inch corn tortillas, warmed
  • 2 limes, cut into wedges, for garnish
  • 1 avocado, sliced, for garnish
  • 1/2 cup faux sour cream, for garnish
  • Cilantro sprigs, for garnish, optional

To make Sauce: Bring all ingredients to a simmer in saucepan over medium heat. Whisk to combine, then remove from heat. Season with salt and pepper, if desired.
To make Filling: Heat oil in separate saucepan over medium heat. Add onion, and sauté 3 to 5 minutes, or until soft. Add sweet potatoes, tomatoes, salsa, garlic, chipotle chile, and 1/2 cup water; bring to a boil. Reduce heat to medium-low, and simmer 30 to 40 minutes, or until sweet potatoes are soft. Mash mixture with potato masher until combined. Add black beans, and cook 5 minutes. Remove from heat.
To assemble Enchiladas: Preheat oven to 350°F. Brush 13- x 9-inch baking dish with oil. Spread 1/2 cup Sauce in bottom of dish. Fill tortillas with Filling. Roll, and pack close together seam-side down in baking dish. Top with remaining sauce.  Bake 15 minutes.  Let sit 10 minutes before serving. Garnish with lime wedges, avocado slices, faux sour cream, and cilantro sprigs, if using.

So…are you going to do it?

Chickpeas, please.

Ever since I began making chickpeas from a dried state, I have been obsessed with them.  I eat them by the handful like they are popcorn.  They’re delicious, nutty, versatile, freezable, and CHEAP (check them out at a Supermercado near you).

Here’s a super quick, frugal recipe to laugh Asian take-out prices right out the door.  It keeps well in the fridge for about a week and tastes AWESOME inside of a flour tortilla too.

Island Chickpeas

Adapted from Happy Herbivore

  • 4 C chickpeas
  • 1 1/2 C teriyaki sauce, use your fave from a bottle or better yet, make it
  • 2 T Szechuan sauce
  • 4 C cooked brown rice
  • 2 bunches Kale
  • 4 garlic cloves, chopped
  • 2 tsp olive oil
  • lime wedges
  • canned mango salsa
Combine chickpeas, teriyaki sauce, Szechuan sauce in large frying pan or wok.  Allow to marinade for 5 minutes.  Cook over medium heat, stirring regularly, until almost all of the liquid has been absorbed.  Remove from heat.
In  a saute’ pan, heat oil and garlic until sizzling, add the kale.  Saute’ until bright green and just wilted.
To plate, take 1/2 cup of brown rice, top with some kale a scoop of chickpeas and a squeeze of lime.  I also put a dollop of leftover mango salsa on mine.  Delish.
Pictured under the chickpeas is a Boca chicken patty as well.

This slideshow requires JavaScript.

Butternut Squash Surplus

Last week I was up to my ears in butternut squash.  A few from my CSA, and a few from one of my work friends (these alone were over 9 pounds each and more than 2 feet long).  I have a tendency to put these items out in the garage, and then forget about them until I can actually smell them…not good.  So this time I got a leg up on the surplus.  I roasted three baking pans of squash last night and then today made a few cups of it into butternut squash ravioli with brown butter and sage sauce, then froze the rest for soups and such.

Butternut Squash Ravioli

Inspired by this recipe from Epicurious

  • 3 cups mashed butternut squash (from roasted)
  • 1-4 oz log creamy goat cheese
  • 4 cloves garlic, chopped
  • 1/8 tsp fresh grated nutmeg
  • 1 package won ton wrappers (40-60 count)
  • 1/2 cup shallots, chopped
  • 1 stick, butter
  • 1 handful fresh sage leaves, whole
  • 1/8 tsp fresh grated nutmeg
  • pepper, salt to taste
  • handful of fresh parsley
  • parm cheese

Filling:  Saute’ garlic over medium until lightly browned, add goat cheese, squash, nutmeg and combine until creamy.  Remove from heat, let cool.  When filling is cool, drop 1 1/2 tsp in the middle of a won ton wrapper, lightly brush edges with water.  Seal by touching opposite sides together in whatever shape you like.  I touched opposite corners together to form a triangle, then flipped it like a dumpling.  Be sure to squeeze the air out of the ravioli before sealing and DO NOT overfill.

Sauce:  Combine in a frying pan over medium high heat butter, shallots, fresh sage and nutmeg.  Let this combo simmers until butter turns a nutty brown, shallots and sage crisp.  Turn off the heat.  Let hang out until your ravioli are ready to dress.

Ravioli:  Bring a dutch oven 3/4 full of salted water to a boil.  When it hits boiling, turn it down to medium heat, this is a little more gentle on your fragile raviolis.  Immerse 6-8 ravioli in the hot water so the water temp doesn’t drop but also so they do not touch the bottom, sides or each other…this would be bad. Allow the ravioli to hang out in the hot water bath for 2-4 minutes until they float or become opaque in color, remove with a slotted spoon directly into a serving dish, top with brown butter sauce, fresh parsley, a bit of parm cheese and serve.

This slideshow requires JavaScript.

Since it’s just the two of us to cook for, but this recipe makes around 45 raviolis, I made the remaining raviolis, put them on a cookie sheet and froze them for an hour.  Then I tossed them into a freezer bag and tossed into the deep freeze.  The Interwebs say that they should keep for 3 months and to make them straight from the freezer next time.  I’ll let you know how that works out later.

TVP Chili – Say That Three Times Fast

This is the chili I take tailgating.  Carnivores have no idea this doesn’t have meat in it thanks to the chipotle which adds a smokey beefy taste to the dish.  Add a little liquid hickory or hot sauce to increase the meaty factor.  I love this over vegan dogs, it makes me feel just like everyone else, which if you are veg, you know exactly what I’m talking about.

TVP Chili for Meat-Eaters

  • 1/4 C cumin
  • 1/2 C chili powder
  • 2 C cooked chickpeas
  • 2 C cooked great northern beans
  • 2 C cooked cranberry beans
  • 1-46oz bottle V8 Hot & Spicy reduced sodium
  • 1/3 of the V8 bottle, water
  • 2 medium onions, finely chopped
  • 4 T garlic, minced
  • 3 bell peppers (your choice of color), chopped
  • 1 C frozen or fresh corn off the cobb
  • 2 chipotle en adobo, chopped finely
  • 2 C whole crushed tomatoes, with juice
  • 3/4 C hot water
  • 1 C TVP
Rehydrate the TVP in a bowl with the 3/4 C hot water.  Set aside.
Saute onion, garlic, bell peppers, cumin and chili powder over medium heat until onion is soft.
Add V8, water, tomatoes, stir to loosen up the charred bits in the bottom.
Last, add the beans, corn, and TVP then stir to combine.
Let simmer for flavors to develop for 20 to 30 minutes.

This slideshow requires JavaScript.

A win for used cookbooks and TVP

I’ve had this bag of Bob’s Red Mill TVP (textured veg protein) in my freezer for about 4 months.  Sometimes things seem like a good idea when you purchase them only to get a product home and be at a total loss for usage.  I had this relationship with TVP until I stumbled upon a used cookbook that sparked my interest at Schuler’s Books:  Vegetarian Sandwiches from Chronical Books.  In it a recipe for Vegetarian Sloppy Joes.  I basically bought the book because 1) it has really great pictures in it and 2) it has 3 recipes for TVP inside, also with pictures.  Turns out, I had all of the other necessary ingredients at home in my pantry and from my most recent Doorganics delivery to make this magic happen.  I was both shocked and delighted by the authenticity of the texture that this recipe recreated.  It tastes very, very similar to sloppy joes with ground beef, but doesn’t have that super dense and filling aftermarket feeling.  The recipe as it was written was a little too sweet for my sloppy joe needs so I spiced it up a little, the adjustments are worked into the recipe below.  I’m so glad I made a double batch with the intent of taking some along to the next GVSU tailgate to share.  I’m anxious to see meat-eaters try ’em.

This slideshow requires JavaScript.

Vegan Sloppy Joes

Filling:

  • 1 C Texturized Vegetable Protein (TVP)
  • 3/4 C boiling water
  • 1 T olive oil
  • 1/2 C coarsely chopped onion
  • 1/2 C coarsely chopped bell pepper (your choice of color)
  • 4 cloves garlic, minced
  • 1 4-oz can tomato sauce
  • 1/4 C water
  • 2 T tomato paste
  • 1 T packed light brown sugar
  • 2 tsp vegan Worcestershire sauce
  • 2 tsp red wine vinegar
  • 1 tsp Sriracha
  • 2 whole chipotle en adobo, chopped finely
  • salt & pepper to taste
  • 4-6 large hamburger buns or rolls or 10-12 slider buns

Directions:  To make the filling, stir the TVP and boiling water together in a medium bowl, let this stand for 5 or more minutes until the water is absorbed and the TVP is softened.

Heat the oil in a large nonstick skillet (I used a wok) over medium-high heat.  Cook the onion, bell pepper and garlic through until the bell pepper is tender (8-10 minutes).

Stir the remaining sandwich filling ingredients together in a medium bowl.  Add this mix and the soft TVP to the skillet; stir until the mixture is bubbly.  Reduce the heat and cook, stirring for about 5 additional minutes.

To serve, spread filling onto a bun and enjoy.

Not Labor Intensive, Labor Day Chickpea Burgers

I get sick of always eating frozen veg burgers, while they are convenient, sometimes you just need something fresh.  This recipe gives you all the satisfaction of prepping burgers for the grill without the icky hamburger stuck under your nails at the end of the day.  I baked mine in the oven but you could just as easily grill these on a very hot grill…don’t mess with them too much or they will crumble apart.  Served on slider rolls, the kids didn’t miss the moo.  These would freeze nicely as well.

Chickpea Burgs

  • 2 1/2 cups canned garbanzos, drained and rinsed
  • 4 large eggs
  • 1/2 teaspoon fine-grain sea salt
  • 1/3 cup chopped fresh cilantro
  • 1 onion, chopped
  • Grated zest of one large lemon
  • 1 cup micro sprouts, chopped (try broccoli, onion, or alfalfa sprouts – optional)
  • 1 cup toasted (whole-grain) bread crumbs
  • 1 tablespoon extra-virgin olive oil (or clarified butter)

Combine the garbanzos, eggs, and salt in a food processor. Puree until the mixture is the consistency of a very thick, slightly chunky hummus. Pour into a mixing bowl and stir in the cilantro, onion, zest, and sprouts. Add the breadcrumbs, stir, and let sit for a couple of minutes so the crumbs can absorb some of the moisture (this part is CRITICAL to your success). At this point, you should have a wet mixture that you can easily form into twelve 1 1/2-inch-thick patties.  Err on the side of moist here, you can always add more bread crumbs a bit at a time to firm up the dough if need be. Conversely, a bit of water or more egg can be used to moisten the batter.

What Adrienne did:  preheat oven to 375, put burgers onto a lightly greased, foil lined baking sheet, bake until firm turning once during cooking time so as to brown both sides of the burger.  Top with your fave burger accessories.  I ate mine with a squeeze of lemon, sprouts, tomato, and a dollop of ranch dressing.

Heidi Swanson’s directions: heat the oil in a heavy skillet over medium low, add 4 patties, cover, and cook for 7 to 10 minutes, until the bottoms begin to brown. Turn up the heat if there is no browning after 10 minutes. Flip the patties and cook the second side for 7 minutes, or until golden. Remove from the skillet and cool on a wire rack while you cook the remaining patties. Carefully cut each patty in half, insert your favorite fillings, and enjoy immediately.

This slideshow requires JavaScript.

Makes 12 mini burgers.

Inspired by 101cookbooks Heidi Swanson

Cheater’s Buffalo Chicken Salad

Sometimes I just don’t have time for extensive dinner prep and if I make one more decision in a day my head will explode; enter, Cheater Buffalo Chicken Salad.

This slideshow requires JavaScript.

  • 2 Boca Spicy Chicken Patties
  • 1/2 pound mixed greens
  • 1 red bell pepper, diced
  • 5 green onions, greens only diced
  • 1 medium cucumber, seeds removed, peeled and diced
  • 1/4 C ranch or green goddess dressing, diluted with 3 T cold water or milk
  • 3 T Frank’s Red Hot sauce
  • 2 T shredded cheese
Super simple plan:  bake chicken patties according to package instructions, cut into bite-sized pieces.  Assemble veggies into 2 medium bowls, top with baked chicken pieces, top with dressing made from ranch, water and Frank’s Red Hot; plus shredded cheese.
The beauty of this salad as you can use whatever you have on hand in the fridge.  Heck you can even mix up the chicken patty for a black bean burger or any other faux veg protein for that matter.

The Kohlrabi Has Landed…

…in my CSA bag for 3 weeks in a row.  I admit, even though I’m a well-seasoned vegetarian, this odd vegetable stumped me for uses and it was necessary to run to Google and figure out finally, after 3 weeks, what in the hell to do with multiple kohlrabi (is that the plural?  So confusing.).

While strange looking, sorta like a hot air balloon while it grows, kohlrabi possesses many attributes worth notice:

  • Low in calories, only 19 for a half cup raw, sliced
  • High in dietary fiber, 2.5 grams for one-half cup
  • Potassium content peaks at 245 grams for one-half cup
  • Vitamin content for that same one-half cup includes 25 I.U. vitamin A, 43.4 mg. vitamin C, 11.3 mcg folic acid, and 16.8 mg. calcium.

Turns out, this little guy is also known as a German Turnip and is the bee’s knees in Kashmir where it is the most consumed vegetable (food must really suck in Kashmir).  Everywhere I searched, the claim is that kohlrabi is delish both raw and cooked. Well, I’m here to tell you people, while there are several varieties of this alien veggie, I apparently got the two that suck raw.  Both white and purple variety of kohlrabi, are dare I say it, horrible raw…so off to the interwebs I went in search of a way to browbeat this veg into submission.  I found the perfect solution:  empanadas!  Pie crust can make ANYTHING taste better.  I present to you:  Kohlrabi and Sweet Potato Empanadas.

  • 3 cloves of garlic, finely minced
  • 1 inch of ginger, peeled and grated
  • 2 tsp coriander, ground
  • 2-3 medium kohlrabi, peeled and cut into small cubes
  • 1 large sweet potato, cooked and smashed
  • 2 large scallions, both white and green parts, finely cut
  • 1 radish, minced (optional)
  • 1 T extra virgin olive oil
  • 1 T butter
  • salt and pepper to taste
  • dash of freshly grated nutmeg
  • 1 box of pre-made pie crust or one batch homemade*
  • 1 egg

This slideshow requires JavaScript.


In a medium skillet, heat oil and butter over medium heat.  Add garlic and ginger to brown.  Add kohlrabi cubes, a pinch of salt and some pepper. Toss well and cook 3 or 4 minutes until kohlrabi are softening a bit.  Add potato mash and continue to cook for 4 more minutes.  Add scallions, radish, nutmeg, coriander and another pinch of salt and pepper.  Mix well and cook for one minute before removing from heat.  Set mixture to this side to cool.  It should be a very, very dry, looking mixture.  Moisture equals disaster for empanadas.

Roll out dough to be a little thinner than pie crust typically is.  If you are using pre-made crust from the store, run your rolling pin over it once or twice.   Using a cereal bowl or large circular cookie cutter, cut out 6 inch-ish circles from the dough.  It should yield about 15, give or take depending on your cutter and dough thickness.

Pre-heat oven to 425F and line a cookie sheet with parchment paper.   Prepare egg wash by beating egg with a teaspoon of water and set to the side along with a small bowl of water.

To make the empanadas, spoon one teaspoon of kohlrabi  mixture into the center of a circle of dough (it’s better to have less filling than too much or the empanadas won’t hold together. Feel out the right ratio that allows you to close off the dough without any filling popping out.).   Dip your finger in the bowl of water and run it around the outside edge of the dough.  Fold dough over the filling to create a half circle.  Press down edges.  Carefully pick up the dough pocket and pinch edges or use a fork, then place on a baking sheet lined with parchment paper and brush with the egg wash.  The video below shows how to appropriately fill and thus seal an empanada.  Caution:  it only LOOKS easy.  By the time you have made all of your precious empanadas your last one will look like this person’s first one; it is however, well worth the effort.

After you assemble the dough pockets, pop them into the preheated oven, cooking for 8 minutes on the first side, then flip and cook for 5 more minutes.  Remove from oven and allow to cool slightly on a rack so they don’t get soggy.  I served mine warm with what else, Frank’s Red Hot.

**My next kohlrabi experiment is going to be this:  Kohlrabi Curry.

Just Because I Didn’t Make It From Scratch, Doesn’t Mean I Couldn’t, It Just Means I Didn’t [want to]

There are certain things I don’t make from scratch because frankly, the effort is not worth the reward:  ice cream, mayo, cheese, tofu, and I NEVER, ever, make my own veg burgers [sidebar: my friend Jon Dunn says to never attempt to make your own vegan tamales, from scratch, and if he makes a statement like that, I absolutely believe him-no tamales will grace my kitchen].  I make everything else from scratch.  I make SALAD DRESSING [granted it’s usually just 2-3 ingredients] for the love of God, from scratch!  The veg burgers in the grocer’s freezer are pretty much delightful so why tamper with perfection?  I’ll tell you why, I ran across these slider buns at Meijer on a recent shopping trip [damn you marketing marvels] and today I find myself making Heidi’s Ultimate Veggie Burgers to take to a holiday party, certainly from scratch…in fact, I just made my own bread crumbs as Meijer in all its greatness, doesn’t sell WHOLE WHEAT breadcrumbs, which I personally think is some kind of hate crime.  I digress, and give you, The Ultimate Veggie Burger recipe:

This slideshow requires JavaScript.

  • 2 1/2 cups canned garbanzos, drained and rinsed
  • 4 large eggs
  • 1/2 teaspoon fine-grain sea salt
  • 1/3 cup chopped fresh cilantro
  • 1 onion, chopped
  • Grated zest of one large lemon
  • 1 cup micro sprouts, chopped (try brocolli, onion, or alfalfa sprouts – optional)
  • 1 cup toasted (whole-grain) bread crumbs
  • 1 tablespoon extra-virgin olive oil (or clarified butter)

Combine the garbanzos, eggs, and salt in a food processor. Puree until the mixture is the consistency of a very thick, slightly chunky hummus. Pour into a mixing bowl and stir in the cilantro, onion, zest, and sprouts. Add the breadcrumbs, stir, and let sit for a couple of minutes so the crumbs can absorb some of the moisture. At this point, you should have a moist mixture that you can easily form into twelve 1 1/2-inch-thick patties. I err on the moist side here, because it makes for a nicely textured burger. You can always add more bread crumbs a bit at a time to firm up the dough if need be. Conversely, a bit of water or more egg can be used to moisten the batter.

Heat the oil in a heavy skillet over medium low, add 4 patties, cover, and cook for 7 to 10 minutes, until the bottoms begin to brown. Turn up the heat if there is no browning after 10 minutes. Flip the patties and cook the second side for 7 minutes, or until golden. Remove from the skillet and cool on a wire rack while you cook the remaining patties.

For the sake of time and volume (I doubled this recipe so needed 24 sliders), I baked them on a rimmed sheet pan (heavily greased) at 400 degrees until they were golden brown but not dry (check them every 5-6 minutes, and flip when one side browns).  I kept these in the fridge until I was ready to serve them in the afternoon, then reheated them briefly on a grill top before serving.

Makes 12 mini burgers.

It Ain’t Easy Being Green, Spring Stir Fry

Sometimes desperation comes in the form of “I don’t want to go to the grocery store or farmer’s market today.”  And so, this modification of a 101cookbooks.com recipe was born…from the stuff I already had in my fridge and herb garden.

This slideshow requires JavaScript.

Green, Spring Stir Fry

  • toasted sesame oil
  • 8 ounces extra-firm tofu, cut into slices thick as a pencil
  • 4 green onions, thinly sliced
  • scant 1 tablespoon freshly grated ginger (peeled)
  • 1/2 teaspoon crushed red pepper flakes
  • 1 # asparagus, trimmed and cut into 1-inch pieces
  • a couple big pinches of fine-grain sea salt
  • 4 cloves garlic, chopped
  • a few handfuls of chopped kale
  • zest and juice of one lemon and one lime
  • 2 tablespoons Hoisin sauce
  • 1 small handful fresh mint, slivered
  • 1 small handful fresh basil, slivered

When you are frying, stir-fry, the biggest advantages you can give yourself to combat ending up with a soggy-fry is to have all your ingredients prepped and within arms reach of the stove AND a smoking hot pan ready to dump them in to…sometimes a non-stick wok is not the best for this…but do the best you can with what you have.

Heat a splash of sesame oil in a large pan, or well-seasoned wok over medium high heat. When it is hot, add the tofu, and cook until golden – a few minutes. Remove the tofu from the pan and set aside.

Add another (generous) splash of oil to the pan and, as soon as it is hot, add the onions, ginger, red pepper flakes, asparagus, and salt. Stir fry for about a minute, then add the garlic, kale and stir-fry for another minute, or until the spinach wilts. Return the tofu to the pan. Stir in the lemon zest and juice and the Hoisin sauce. Cook for another 10-20 seconds, stirring all the while.  Serve immediately.  My favorite way to serve this is over cold Soba noodles.

Faux Chicken BBQ Pizza

I’m not a huge faux meat fan.  I don’t eat meat because, I don’t want to, not because I want to eat something that tastes like it, but isn’t it.  Did that make sense?  At any rate, there are a few things I do miss about being vegetarian:

1.  Bacon

2.  Chicken Hot Wings

3.  Tuna Steak

4.  Barbecued Turkey

I discovered this product at Whole Foods on my last jaunt to Ann Arbor, and thought I’d give it a try.  That trip was about 5 months ago, so it keeps well in the freezer although I think it was sold in the fresh case, by the lunch meat etc.

Mostly, gardein bbq pulled shreds tasted like, well bbq sauce.  The “meat” didn’t have flavor, in fact, after I ate it, THEN I went back to see what it actually was, you know like any responsible consumer-vital wheat gluten, or Seitan in the veg world, which I can make at home.  All-in-all, not an offensive product.  I think it gave Mr. Wonderful his bbq pork/chicken fix for a little while and it was a quick dinner after a long day.  I love this idea of “pulled pork” or whatever and think next time, I will try my own homemade bbq sauce which is much lower in sugar and “pull” my own Seitan.  I’ll let you know how that goes.

Faux Chicken BBQ Pizza

Preheat oven to 400 degrees.

Heat up bbq shreds according to package directions, from frozen it took just 3 minutes on high.

Put naan directly on oven grate for 1-2 minutes until a little crisp.

Add bbq shreds, onion, grated cheese onto the naan then pop back into the oven until cheese is melty and naan is crispy.

Don’t forget your napkin.

This slideshow requires JavaScript.