Category Archives: Leftovers

Yesterday Tacos, Today Taco Soup

Yesterday I made the tacos that I sometimes dream about in the winter, full of summer veggies practically radiating sunshine, tender-crisp, and juicy.  I love tacos, but even I can’t eat them every night for leftovers, so this seemed like the perfect solution: taco soup for the freezer and rest of the week.

Recipe:

Cook all veggies using summer tacos recipe found here spices and all, we will add a little more flavor below due to the dilution from the water. While I was charring all the veggies, I set half of each batch into a soup pot to create taco soup for later in the week.

To that add:

  • 1 tsp epazote
  • 1 tsp oregano
  • 1-2 tsp ground cumin
  • 1 tsp to 1T chipotle en adobo (sauce), depending on your like of heat
  • 2-3 C or 1-2 cans black beans, drained
  • 3 cans diced tomatoes, these can be fire roasted or normal diced tomatoes
  • 2 cubes veggie boullion 
  • 4-6 C of water, depending on your thoughts on consistency of soup

This slideshow requires JavaScript.

Heat all ingredients through give it a taste and adjust the seasonings (salt for sure). Serve warm with a squeeze of lime, vegan sour cream, and tortilla chips or freeze to preserve the summer.

Rustic Vegan Kale Salad – Also, VeganMoFo Intro, Yo.

vegan mo fo banner

I have no idea how I could have let this recipe go unpublished from my blog for this long. I keep a recipe blog for selfish reasons really, it keeps all my lovely meals in one place so I’m not concerned with the bookmarking madness that is my Chrome browser. So when I went searching for ‘kale salad’ in my own blog and found not one result I became really upset…at…myself. Damn it self!

This little number is a weekly dinner and lunch staple, so my apologies for letting this one slip through the cracks. I also managed to forgot it’s Vegan MoFo! The Vegan Month of Food where veg bloggers are to unite and blog DAILY about vegan noms [OMG, that won’t be a reality for me, but I will try a few times a week this month]. I VeganMoFo’d in 2010 and 2011, but must have lost my mind in 2012 where I can find no archived MoFo posts. Boo.

Luckily, my good friends at VeganGR guest blogged for me today, so I am just one day behind the daily blog for Vegan MoFo 2013. This recipe comes from Heidi over at 101 Cookbooks. I’ve taken a few liberties to veganize her dish but have stayed true to the taste. Not ready to go vegan on this…keep the cheese, and for God sake butter the bread to make breadcrumbs if you are not vegan.

  • 1 bunch Tuscan kale [really any kale will work here, if you find it tough, be sure to let the lemon dressing do some work on the kale in a bag or bowl for a few hours to soften the texture – you know, if you are serving the queen or something]
  • 2 thin slices country bread, or two handfuls good, homemade coarse breadcrumbs
  • 2 garlic cloves, mashed and minced
  • 1/4 teaspoon kosher salt, plus a pinch
  • 1/4 cup vegan parm or other salty vegan cheese [Not vegan? Hit it hard with Romano-and thank me later.]
  • 1.5-3 tablespoons extra-virgin olive oil, plus additional for garnish [I go lighter on this one adjusting for the lemon juice I net, I hate an oily dressing, I prefer more juice to oil]
  • Zest of one lemon
  • Freshly squeezed juice of one lemon
  • 1/8 teaspoon red pepper flakes, or a few dashes of your favorite hot sauce
  • Freshly ground black pepper to taste

This slideshow requires JavaScript.

  1. Trim the bottom few inches off the kale stems and discard. Slice the kale into 3/4-inch ribbons. You should have 4 to 5 cups. Place the kale in a large bowl.
  2. If using the bread, toast it until golden brown on both sides and dry throughout. Tear into small pieces and pulse in a food processor until the mixture forms coarse crumbs, or crumbs to your liking.
  3. Pound or mince the garlic and 1/4 teaspoon of salt into a paste. Transfer the garlic to a small bowl. Add 1/4 cup cheese, EVOO, lemon juice, lemon zest, pinch of salt, pepper flakes, and black pepper and whisk to combine. Pour the dressing over the kale and toss very well (the dressing will be thick and need lots of tossing to coat the leaves). Let the salad sit for 5 minutes, then serve topped with the bread crumbs, additional cheese, and a drizzle of oil.
  4. This makes the most excellent lunch for DAYS. Also tastes super yummy with some grilled tofu on the side or mixed in. The tangy dressing will more than make up for the blandness of the tofu so no need to marinate the tofu before hand. Perhaps though add a little extra salt to the tofu steaks when grilling them up to round out the taste.
  5. Find Heidi’s original recipe and more kale noms here: 101 Cookbooks.
  6. Wanna get really crazy? Try this with orange juice and orange zest.

Curried Chard Vegan Frittata

Swiss chard is one of those greens I’m not wild about unless it is IN something else or heavily, heavily seasoned. This recipe is modified from Vegan Brunch in the spirit of curried scramble and can be customized with herbs and seasonings in just about any combination. It keeps well and tastes amazing tossed into a pita with arugula and garlic vegenaise for lunch the next day.

  • 1 tsp olive oil
  • 6 cloves garlic, thinly sliced
  • 1 bunch swiss chard, rough stems removed, chopped well (about 4 cups)
  • 2 tsp dried oregano
  • 1 pound firm or extra firm tofu
  • 1 T tamari or soy sauce (use tamari if gluten free)
  • 1/4 C chives, chopped
  • 1/4 tsp hot curry powder
  • 1/4 tsp sweet curry powder
  • 1/4 tsp granulated garlic
  • 1/4 tsp granulated onion
  • 1/4 tsp white pepper
  • 1/4 teaspoon tumeric
  • several dashes fresh black pepper
  • 1/4 cup nutritional yeast flakes
  • salt to taste

Preheat oven to 400 F.

Preheat a large heavy bottomed pan over low-medium heat. Add the oil and the garlic and cook for about 3 minutes, stirring occasionally. What you’re doing here is “blonding” the garlic, it’s ready when it’s turned a light amber color.

Add the chard, oregano, all spices, chives, and and turn the heat up to medium high. Saute for about 5 minutes, until chard is completely wilted/ Add splashes of water if needed to get the chard to cook down. Turn the heat off.

While the chard is cooking, prepare your frittata base. Give the tofu a squeeze over the sink to remove a little of the water. Use your hands to crumble and squeeze it in a large mixing bowl, until it has the consistency of ricotta cheese (about 3 minutes). Add the remaining ingredients to the tofu and mix well. When your chard is ready, incorporate it into the tofu. Be sure to get all of the garlic, but if there is any moisture in the pan try to avoid adding it to the tofu. Taste for salt.

Lightly grease an 8 inch pie plate and firmly press in your frittata mixture. Bake for 20 minutes, until firm lightly browned on top. Let cool for about 3 minutes, then invert onto a plate and serve.

This slideshow requires JavaScript.

Wheat Berry Spring Salad

A recipe doesn’t have to be very complex. Sometimes I just grab stuff that is either: 1) about to go bad in my fridge, 2) really fresh in my fridge, or 3) stuff that sounds good and hope it all tastes good together. This was #3 for a quick dinner and several more lunches.

Not rocket science, hell sometimes I don’t even measure…

Ingredients:

  • Everything in my fridge cut up (asparagus raw, tomato raw, english cucumber, dried cranberries, red grapes halved, a little romano cheese cut in chunks-0mit for vegans)
  • 2 c cooked wheat berries

Dressing :

  • 1/2 C apricot balsamic vinegar (or any other flavor really)
  • 1/8 C evoo
  • salt and pepper to taste

Tossed the dressing with the wheat berries and severed over microgreens. Tasted amazing the next day in a pita.

Wheatberry Salad

Butternut Black Bean Tacos

I could eat tacos every. single. day. Honestly.

Tacos as we know them in the Wonderful residence, typically are born from whatever is leftover in the fridge, or what can be tossed together before it goes bad in the fridge. I had a few onions that were about to sprout and take over the cupboard, so I used those for the base of these tacos. PS: anything on a tortilla tastes good. Knock yourself out in your own kitchen.

  • 2 C butternut squash mash (pulled from freezer) – okay to use from freezer section at store-cubed is fine too; heck use sweet potatoes if you want
  • 2 C black beans, cooked (pulled from freezer) – okay to use canned
  • 2 large yellow sweet onions
  • 1 tsp olive oil
  • 1 tsp Mexican oregano
  • 1 tsp powdered garlic
  • 1 tsp powdered cumin
  • 1 tsp chili powder
  • corn or flour tortillas, your choice
  • topping [obviously pickled jalapenos, arugula, salsa, and taco sauce]

Saute onions in olive oil until transparent or bronzed. Add smashed or cubed butternut squash and black beans to this mix along with all spices. Warm through. Serve on a tortilla.

Ceci-Roasted Red Pepper Soup

New Year’s Eve is for two things:  1) resolution making and 2) drinking, heavily.  The day after your first thought:  1) resolving to not EVER drink again….like for real this time, ever.  Right?  So for your hangover cure I did a little research and decided that one of my fave soups can be your cure for what you overdo on NYE.

Nutrient-rich foods that are good to eat with a hangover are bananas, red peppers, broccoli, nuts, and oats. A banana smoothie is an excellent choice, as it acts as a natural antacid as well as replenishing vitamins and minerals. To make one, blend together one ripe banana, one a half cups of nondairy milk, and two tablespoons of honey or agave (for those of you that are strict vegan).

This soup is great.  Protein, vitamins, sits on stove all day without getting icky so you can eat when you get that small window of opportunity when you feel “better” than you did when you woke up at Noon.  Tastes excellent with saltines…see, it’s like perfect.  Take care.

  • 2 large red bell peppers
  • 1 medium size onion, chopped
  • 3 cloves garlic, minced
  • 2 tsp. rosemary, dried
  • 1/2 tsp. salt
  • black pepper, to taste
  • 2 c. tomatoes, chopped
  • 1 tsp. ground coriander
  • 3 c. vegetable broth
  • 1 (15oz) can chickpeas, drained and rinsed

DIRECTIONS

  1. Preheat oven to 375 F.
  2. Cut out the stems of the peppers and discard along with the seeds. Stand the peppers in a small baking pan to roast the peppers for 35-50 minutes.
  3. Remove from oven and let cool, additionally, I removed the skin, then cut into bite-sized pieces.
  4. Saute the onion in a large pot in very little oil (or none at all if you like) for 5 minutes until translucent.
  5. Add garlic, rosemary, salt, and black pepper to pot and saute for another minute.
  6. Mix in tomatoes (canned are okay here too, let’s be honest you aren’t going to cut up tomatoes hungover) and stir for another minute.
  7. Add coriander, vegetable broth, and chickpeas and stir.
  8. Bring contents of pot to a low boil and cook covered for 15 minutes or all day…whatever you need/want.
  9. Add the roasted peppers.
  10. Blend half the soup with an immersion blender OR blend about half the soup in a blender, being careful not to let the steam build up in the blender while you are blending, add the blended soup back to the pot.
  11. Let soup sit for a few minutes, taste for salt, and serve.

Adapted from Appetite for Reduction; shown here with bread and goat cheese (omit goat cheese for vegans).

IMG_6222

Maple Mustard Vinaigrette

A Thanksgiving miracle…two blog posts in one week.  I dare you not to put this on everything at your Thanksgiving meal.

Pretty great dressing or dip.  Pretty good FOR you too.

Enjoy.

In a food processor or blender, blend the following until pureed:

  • 2/3 C. maple syrup
  • 1/3 C. apple cider vinegar
  • 2 shallots, chopped
  • 2 cloves garlic, smashed
  • 1 Tbsp. dijon mustard
  • 1 Tbsp. coarse mustard
  • 1/2 Tsp. salt
  • 1 Tsp pepper
  • Slowly add 1 C. extra virgin olive oil.

I served mine over just about everything from quinoa and chickpea bowls, to brussels sprouts to a salad of roasted squash, onions, apples and pears (shown).  Try it out at Thanksgiving dinner.

Courtesy of Jen & Company, a food and fitness blog.

Lentil Sloppy Joes

It’s tailgating season that means…Sloppy Joes.  Last year I posted a recipe using TVP which fooled the meat-eaters for sure, this year I’ll be taking Lentil Sloppy Joes.  Very similar recipe, as I finally got the flavor right, so now, moving on to lentils.  These have a bit of a kick to them, so easy on the chipotle en adobo if you like things a little more mild.  I think dijon, brown, or whole grain mustard would be a great sub for the peppers if you want a kick but no heat.  We shall see how this goes.

Filling:

  • 2 C dried lentils, your choice of lentil
  • 6 C water
  • 3 bay leaves
  • 1 head garlic

So this part cooks itself.  Take your lentils, give them a hearty rinse under cool water until the water runs clear.  Dump them into your slow cooker with the water, bay leaves and head of garlic with top cut off (keep it intact, so you can drag it out later).  Depending on your lentil, your water will absorb completely, or you will have to strain them before combining with other items below.  Either way, you want to cook your lentils until they are al dente (like pasta), not mush.  For me, in a slow cooker cranked up to high, it was just 3 hours.  I cleaned the house while they cooked.  When they are done, drain the excess liquid from the lentils, toss the bay leaves and garlic, then return the lentils to the slow cooker pot, you will finish cooking this dish in the slow cooker after you assemble the items below.   Next…

  • 1 T olive oil
  • 1/2 C coarsely chopped onion
  • 1/2 C coarsely chopped bell pepper (your choice of color)
  • 4 cloves garlic, minced
  • 1 4-oz can tomato sauce
  • 1/4 C water
  • 2 T tomato paste
  • 1 T packed light brown sugar
  • 2 tsp vegan Worcestershire sauce
  • 2 tsp red wine vinegar
  • 1 tsp Sriracha
  • 2 whole chipotle en adobo, chopped finely
  • salt & pepper to taste
  • 4-6 large hamburger buns or rolls or 10-12 slider buns

Heat the oil in a large nonstick skillet (I used a wok) over medium-high heat.  Cook the onion, bell pepper and garlic through until the bell pepper is tender (8-10 minutes).

Stir the remaining sandwich filling ingredients together in a medium bowl.  Add this mix to the cooked and DRAINED lentils in the slow cooker, stir until the mixture is well combined.  Set the slow cooker to high for faster results or low if you have all day and let the mixture thicken.

To serve, spread filling onto a bun and enjoy.

This slideshow requires JavaScript.

Sriracha Tofu

I was thinking of a recipe that might be similar in sushi for spicy tuna and this is pretty close.  One night when we were out at Tokyo Grill, I asked the sushi chef what made up the spicy sauce for the tuna and it’s just Sriracha and mayo mixed together.  I bet the texture could be achieved if you cubed the tofu very, very small.  This can be used for make at home sushi or over rice in a bowl, which is a go-to meal for us during the work week with some steamed or stir fried veggies.  This is spicy.  So if you want to dial it down a notch, half the Sriracha or even quarter it depending on your tolerance.  I like this with avocados and kale over brown rice.  It cools it off a little but still tastes tangy.

  • 1 12-oz. pkg. extra-firm tofu, drained and patted dry, cut into ¼-inch cubes
  • 3 T low-sodium soy sauce
  • 2 T Sriracha
  • 1 T white wine vinegar (or rice wine vinegar)
  • 1 T mirin
  • 1 T maple syrup
  • 2 tsp toasted sesame oil
  • 1 T vegan mayonnaise

1. Heat nonstick skillet over medium-high heat, and add half of tofu cubes. Cook 10 to 12 minutes, or until cubes are golden, stirring occasionally. Transfer tofu to plate, and repeat with remaining tofu.

2. Stir together soy sauce, Sriracha, vinegar, mirin, maple syrup, sesame oil.  Return all tofu to pan, and add soy sauce mixture. Bring to a simmer, and cook 2 to 3 minutes, or until most of liquid is absorbed. Remove from heat, and stir in mayonnaise. Serve warm or chilled.

Adapted from vegetariantimes.com

Fried Rice

I typically make grains on the weekend to avoid the time it takes to prep them during the week.  There is nothing worse than a 30 minute meal, that takes an hour and a half because you need to account for the brown rice to cook.  I have gotten in the habit of planning out a week of meals at a time because as you have probably noticed about me by now, I hate the friggin’ grocery store.  So I shop once a week, get my CSA’s two times a week and that generally allows me to be pretty prepared for all lunches and dinners for the week.
Now sometimes, those made-ahead grains get lost in the back of the fridge.  When that happens there is no better time to use up the rest of your CSA, freezer stuff, and pre-made brown rice, than in fried rice.
Ingredients
  • 3 C cooked brown rice (day old or leftover rice works best!)
  • 3 T sesame oil
  • 1/2 C shelled fresh or frozen peas
  • 1/3 C frozen shelled edemame
  • 1 C shredded carrot
  • 1 small onion, chopped
  • 2 tsp minced garlic
  • 2 eggs, slightly beaten (omit if vegan)
  • 1/4 C Tamari (to keep it gluten free; okay to use soy or Bragg’s Aminos if you are not concerned about gluten)
  • 1 bag Quorn strips (if vegan omit)
  • 1 handful roasted, salted peanuts
On medium high heat, heat the oil in a large skillet or wok.  Add the peas, carrots, edemame, onion, Quorn*, and garlic. Stir fry until tender. Lower the heat to medium low and push the mixture off to one side, then pour your eggs on the other side of skillet and stir fry until scrambled*. Add the rice and soy sauce and blend all together well. Stir fry until thoroughly heated.
*To keep this recipe vegan, omit the egg and the Quorn of course.
Recipe adapted from Life as a Lofthouse

This slideshow requires JavaScript.

Tempeh, Poblano and Portobello Tacos with Honey Cumin Slaw

My third taco recipe of May is a blend of two of my fave recipes: Poblano & Portobello Tacos and TLT Sandwiches.  Sundays are typically a very hectic day at my house cramming all the stuff we should have done on Saturday AND Sunday into just Sunday, so I wanted leftovers for Sunday that I could reheat and not have to spend time on din-din.

Enter, the Tempeh, Poblano & Portobello Taco for dinner guests on Saturday.  Most of this can be done in advance and kept warm in a 200 degree oven until company arrives.  This recipe looks long and drawn out, but it’s mostly done in stages so you don’t even notice it.

Components:

  • 3 packages portobello mushrooms, de-stemmed and sliced then roasted
  • 4 poblano peppers, roasted, skinned and sliced into strips
  • 3 red bell peppers, roasted, skinned and sliced into strips
  • 2 boxes grape tomatoes, roasted
  • dairy or nondairy cheese
  • tortillas of your choice
  • dairy or nondairy sour cream
  • cubed avocado
  • lime wedges
  • store-bought salsa (I used Newman’s black bean and corn)
First things first…the prep for the roasted veggies is not difficult, they pretty much do the work for you…it’s magic, but takes time to get that roasty goodness, so plan accordingly.  Before you dive in, read below to prepare your dressing for the slaw and your marinade for your tempeh, get those two things started and then get your veggies goin’-you will want your tempeh to marinade for about 30 minutes before you bake it off.
Roasted peppers from a jar or the frozen food section are adequate, but who the hell wants to be knows as the adequate taco maker?  Not this chic.  Plan ahead and then deny the time it takes to make these the right way like every other reasonably awesome at home chef.  Easy peasy.  Preheat a grill or your oven to super hot (for the oven we’re talking like 450 and open up the windows just in case).  Preheat your oven to 450 and roast the mushrooms and tomatoes indoor while you soak up some vitamin D outside grilling your peppers.  Since it’s summer, grill them your peppers, then you won’t have to disable your smoke detectors to get the perfect charred pepper.  Take clean, dry peppers and drop them on the grill, wait for smoke and or charring and then turn until every side is burned but yet still moist-ish (yeah, it is a word now).  Transfer these little beauties to a bowl, cover in plastic wrap and then wait until they are cool to remove the charring.  After this is done, you will be left with succulent, sweet and smokey roasted peppers.  Resist eating them all before company arrives.  All that goodness and NO oil needed.
Take your washed and dried tomatoes and chopped mushrooms, place on baking sheets in the oven (use the ones with sides to contain the liquid or you will have a fire, and jerky instead of roasted veggies).  Spray with a little cooking oil, pop in preheated oven and wait.  The tomatoes are done when their skins are bursting.  The mushrooms are done with them are still glistening from moisture, not dry like rawhide.  Watch those, they will burn and then you have mushroom chips.  Gross?  Or maybe a new blog post..hmmm.

Tempeh “Meat”

  • 2 bricks tempeh (any flavor), steamed and sliced into strips

Marinade

  • 6 T extra virgin olive oil
  • 1/2 C tamari or soy sauce
  • 4 T balsamic vinegar
  • 4 T maple syrup or agave
  • 6 T chipotle en adobo
Toss all marinade ingredients into a food processor and whirl away.  Pour over the top of the tempeh strips that you have nestled into a 9×11 baking dish and let sit for 30 minutes or longer.  When your oven roasted veggies are done from above, reduce the oven temp to 350 degrees and slide the tempeh into the oven.  Bake until the marinade has become basically a syrup.  Watch it though, don’t let it burn.  It will look very dark.  Reduce oven even further to 200 degrees leave in tempeh, then toss back in the tomatoes and mushrooms to keep them warm until guests arrive.

Honey Cumin Slaw

  • 1/2 large green cabbage, shredded (could also use a bag of cole slaw mix)
  • 5-8 radishes, grated and patted dry
Combine both items in a large bowl.  Just before service, top with dressing below.  Serve on top of or along side tacos.

Dressing

  • 1/3 C fresh squeezed lime juice
  • 1 T vegetable, grapeseed or extra virgin olive oil
  • 2 T honey or agave
  • 1 tsp cumin

Easiest.  Dressing.  Ever.  Combine items in a Ball jar, give it a good shake and let it sit for 30 minutes before topping slaw above.  Serve immediately.

Finally, assemble tacos with your choice of tortilla (I prefer corn), roasted peppers, mushrooms, tomatoes, tempeh, dairy or nondairy cheese, avocado, dairy or nondairy sour cream, salsa, slaw, squirt of lime and prepare for leftovers.

From this recipe, I was able to get dinner on Saturday night for four, TLT’s from the leftovers with the help of some bread from the freezer toasted for two for Sunday night dinner, two lunches of black bean/mango bowls on Monday, and finally…dinner on Monday night for two, roasted veggie quesadillas.  Not bad for a bunch of simple ingredients, a little prep work, and some help from the freezer.

Pasta with Citrus Sauce

This slideshow requires JavaScript.

This recipe will blow your mind.  If you followed the same path I did and made that quinoa bowl a few days ago, you should still have around a citrus sauce that is begging to be used up.  Your dinner plan will be as follows:

  1. boil water
  2. drop in store-bought tortelinni
  3. heat up store-bought baguette in 350 degree oven
  4. add dressing to cooked and drained tortelinni
  5. plate and eat (serve over a bed of arugula if you are feeling fancy)

No kidding…that’s it.  Dinner is served.

Leftovers Pita with Hummus

This slideshow requires JavaScript.

I’m rather impressed with myself right now.  I made that delicious quinoa bowl  and had lots of leftovers, so I engineered this dinner the very next night, followed by another quick dinner the night after that, stretching the sauces out over three days AND more importantly using them up, instead of wasting them (which in cooking for 2 people I’m prone to do).

This leftovers pita with hummus, takes the Tahini sauce from the quinoa bowl, and whirls it around in a food processor with 1 cup of cooked chickpeas to fatten it up a bit-making hummus.  I added just a pinch of salt and had a spread to use with the leftover bowl materials (kale, red onion, chickpeas) and pan fried some tofu in sesame oil to add a little more substance.  Served it on a whole wheat pita that I just warmed in the oven while I fried up the tofu.

Curry with Cashews

Confession:  I love cooking, but I could LIVE on take out.  In particular thai take out.  My fave place in GR is Angels Thai on Monroe Center.  This is my “go-to” curry recipe adopted from Heidi Swanson’s 101cookbooks.com.  I add some more num num’s and make it for a crowd so that I have leftovers!  Curry lasts surprisingly well in the freezer and makes a great quick meal over rice or quinoa in a hurry.  I picked some hearty veggies and a sturdy bean so they stand up well later going from freezer to table later.  You can add just about anything you want into this dish.  Clean out the fridge if you like.  Just be sure to write it all down if it tastes awesome, or you won’t be able to recreate it later…this happens to me more times than I care to mention.

  • 2 cups lite coconut milk
  • 1 Tbs HOT curry powder (I use Penzeys)
  • 3 Tbs Mild or Sweet curry powder (Penzeys here too)
  • 1/2 – 1 tsp fine grain sea salt (to your taste)
  • 1 large red onion, chopped
  • 3 medium garlic cloves, chopped
  • 2/3 cup water
  • 1 block firm tofu, pressed and cut into small cubes
  • 1 cup green beans, cut into 1-inch segments
  • 2 cups cooked garbanzo beans
  • 1 1/2 cups cauliflower, cut into tiny florets (one large head)
  • 1/3 cup cashews, toasted
  • a handful of cilantro, loosely chopped

Toast the cashews in a wok briefly, until just browned.  Remove the cashews and allow to cool.  Next, toast the curry over LOW.  Do not burn it or your pan will smell and taste like burned curry for all time.  For real.  Add to the toasted curry, half of the coconut milk and bring to a simmer.  Whisk in the rest of the curry powder and salt, working out any clumps. Now stir in the chopped red onion and garlic and cook for a minute. Stir in the remaining coconut milk and the water, and then the tofu. Cook down the liquid for a couple minutes before adding the green beans, garbanzos, and cauliflower. Cover and simmer for just about one minute, maybe two – or just until the cauliflower and beans lose their raw edge and cook through a bit. Remove the pot from heat and stir in the cashews. Taste and adjust the seasoning (salt / curry powder) if needed. Serve with a bit of cilantro topping each bowl over rice or quinoa.

This slideshow requires JavaScript.

PF Chang’s Ain’t Got Nothin’ on Isa

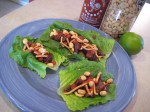
Veg friends rejoice.  This is a meat-eater approved recipe (Christine tell Alex it’s good, like PF Chang’s good).  No one will look at you cross-eyed or make that funny chewing face, like when they hate it but are going to swallow it anyway just to make you feel good.  Take it to a party as an appetizer with some bib lettuce to really impress your friends, then tell them it’s tofu after they inhale it and watch them make another funny face…you know the one of shock when they realize tofu doesn’t suck.

This recipe served three as a main dish with a side of edemame with about 2 wraps to spare just using one block of tofu.

Lettuce Wraps with Hoisin-Mustard Tofu
Adapted from Appetite for Reduction

Tofu

  • 1 block (~14 oz) extra firm tofu, diced in 1/2 inch pieces
  • 2 tsp reduced sodium soy sauce

Sauce

  • 1 tsp sesame oil
  • 1 red bell pepper, seeded and diced small
  • 1 small onion, diced small
  • 3 cloves garlic, minced
  • 1 tbsp minced fresh ginger
  • 1/8 tsp red pepper flakes
  • 3 tbsp seasoned rice vinegar (mirin is recommended but I didn’t have it)
  • 2 tbsp hoisin sauce
  • 1 tsp sriracha or sambal if you prefer
  • 2 tsp prepared yellow mustard

To Serve

  • About 12 romaine (bib or iceburg will work too) lettuce leaves
  • Bean sprouts
  • Dry roasted peanuts or cashews
  • Rice noodles (the crunchy kind)

Prepare the tofu: Preheat a cast-iron or heavy-bottomed nonstick skillet over medium heat. Add the tofu and cook for about 10 minutes, flipping it once in a while, until it is browned on most sides. About midway through, drizzle with the soy sauce and toss to coat.  I had to add a smidge of peanut oil to this recipe when I flipped the tofu as it was sticking a little.  If you have great patience, and wait it out, it shouldn’t stick.  I do not have patience.  I did however have oil.

Preheat a separate large pan over medium heat with the sesame oil. Saute the red pepper, onion, garlic, ginger and red pepper flakes. Cook for about 10 minutes. The veggies should be soft and browned. Add the mirin (or rice wine vinegar would work here too) and let cook for about 3 minutes. Add the hoisin, sriracha, and mustard, and cook for another minute.  Omit sriracha if you don’t like spicy food.  In general avoid sriracha if you don’t like spice.

Add the tofu to the sauce and toss to coat. Serve alongside lettuce leaves, to stuff like tacos.  Top with the sprouts and crunchy bits.  Sidenote:  this is a great stir fry and would stand on its own over some brown rice or noodles.

Chickpeas, please.

Ever since I began making chickpeas from a dried state, I have been obsessed with them.  I eat them by the handful like they are popcorn.  They’re delicious, nutty, versatile, freezable, and CHEAP (check them out at a Supermercado near you).

Here’s a super quick, frugal recipe to laugh Asian take-out prices right out the door.  It keeps well in the fridge for about a week and tastes AWESOME inside of a flour tortilla too.

Island Chickpeas

Adapted from Happy Herbivore

  • 4 C chickpeas
  • 1 1/2 C teriyaki sauce, use your fave from a bottle or better yet, make it
  • 2 T Szechuan sauce
  • 4 C cooked brown rice
  • 2 bunches Kale
  • 4 garlic cloves, chopped
  • 2 tsp olive oil
  • lime wedges
  • canned mango salsa
Combine chickpeas, teriyaki sauce, Szechuan sauce in large frying pan or wok.  Allow to marinade for 5 minutes.  Cook over medium heat, stirring regularly, until almost all of the liquid has been absorbed.  Remove from heat.
In  a saute’ pan, heat oil and garlic until sizzling, add the kale.  Saute’ until bright green and just wilted.
To plate, take 1/2 cup of brown rice, top with some kale a scoop of chickpeas and a squeeze of lime.  I also put a dollop of leftover mango salsa on mine.  Delish.
Pictured under the chickpeas is a Boca chicken patty as well.

This slideshow requires JavaScript.

TVP Chili – Say That Three Times Fast

This is the chili I take tailgating.  Carnivores have no idea this doesn’t have meat in it thanks to the chipotle which adds a smokey beefy taste to the dish.  Add a little liquid hickory or hot sauce to increase the meaty factor.  I love this over vegan dogs, it makes me feel just like everyone else, which if you are veg, you know exactly what I’m talking about.

TVP Chili for Meat-Eaters

  • 1/4 C cumin
  • 1/2 C chili powder
  • 2 C cooked chickpeas
  • 2 C cooked great northern beans
  • 2 C cooked cranberry beans
  • 1-46oz bottle V8 Hot & Spicy reduced sodium
  • 1/3 of the V8 bottle, water
  • 2 medium onions, finely chopped
  • 4 T garlic, minced
  • 3 bell peppers (your choice of color), chopped
  • 1 C frozen or fresh corn off the cobb
  • 2 chipotle en adobo, chopped finely
  • 2 C whole crushed tomatoes, with juice
  • 3/4 C hot water
  • 1 C TVP
Rehydrate the TVP in a bowl with the 3/4 C hot water.  Set aside.
Saute onion, garlic, bell peppers, cumin and chili powder over medium heat until onion is soft.
Add V8, water, tomatoes, stir to loosen up the charred bits in the bottom.
Last, add the beans, corn, and TVP then stir to combine.
Let simmer for flavors to develop for 20 to 30 minutes.

This slideshow requires JavaScript.

Simple Solution – Veg Broth

It has been a busy few weeks at the nonprofit I work for, so mostly dinner has been take out or warming up stuff out of the freezer, and plenty of veggie burgers (on buns, on tortillas, on naan), not a ton of creativity going on in the kitchen.  With that in mind, my CSA share and Doorganics delivery look limp and sad, but not rotting in my fridge, I decided to get ahead of the game and make veg broth to store in my freezer for the upcoming soup season.  Making your own veg broth is cheap, and a good way to use up items that are unsavory for cooking at face value but are still wonderful for a broth base.  During the summer, I keep a freezer bag full of items that would make good broth like the stems of mushrooms, the tops of radishes, celery greens, washed carrot peels, the ends of onions, parsley and the like then when I get a few extra seconds, I dump it in a soup pot cover it with water, add whatever fresh herbs I have in the fridge if any, and let it boil away.  I store it in 2-cup measures in freezer bags marked with the date and freeze flat, that way whenever I need a quick base for soup, I have a lightly flavored, sodium free, cheap alternative to store-bought broth.   Since the consistency of the veggies doesn’t make a difference in the taste of the broth, the freezer step doesn’t hurt, I promise.

My current batch of broth has in it:

  • celery greens
  • celery
  • portobella mushroom stems (trimmed and washed)
  • red bell pepper (seeds and all)
  • carrot shavings (cleaned)
  • turnips, quartered
  • onion ends & parts
  • garlic cloves
  • peppercorns
  • rosemary
  • thyme

Put all the items into a soup pot, cover with water and let it simmer away for an hour or so.  Remove from heat, let cool for hours and hours, then pour into labeled freezer bags (label them before you pour into them) and freeze flat. Remember this will not have salt added as is, so when you add to soups be sure to season well.

This slideshow requires JavaScript.


Cheater’s Buffalo Chicken Salad

Sometimes I just don’t have time for extensive dinner prep and if I make one more decision in a day my head will explode; enter, Cheater Buffalo Chicken Salad.

This slideshow requires JavaScript.

  • 2 Boca Spicy Chicken Patties
  • 1/2 pound mixed greens
  • 1 red bell pepper, diced
  • 5 green onions, greens only diced
  • 1 medium cucumber, seeds removed, peeled and diced
  • 1/4 C ranch or green goddess dressing, diluted with 3 T cold water or milk
  • 3 T Frank’s Red Hot sauce
  • 2 T shredded cheese
Super simple plan:  bake chicken patties according to package instructions, cut into bite-sized pieces.  Assemble veggies into 2 medium bowls, top with baked chicken pieces, top with dressing made from ranch, water and Frank’s Red Hot; plus shredded cheese.
The beauty of this salad as you can use whatever you have on hand in the fridge.  Heck you can even mix up the chicken patty for a black bean burger or any other faux veg protein for that matter.

Radish Sammich

My previous post discussed the ever important Village of Manchester Chicken Broil in all of its glory.  Something I remember more than the chicken dinner, were the leftovers from the dinners and what my Grandma Helen used to make from them (we always ate Chicken Broil at Grandma’s house).  In case you neglected to read the links provided in that post, let me briefly recap:  the dinner is comprised of a half chicken, roll with butter, fresh made cole slaw with secret local recipe, radishes, chips and beverage.  What was always leftover besides chicken (which was made into chicken salad)?  Rolls and radishes.  No one EVER ate the radishes until my Grandma made them into ‘sammiches’ with the neglected butter pat.

So just what in the hell am I getting at here, talking about chicken for the last 2 posts?  Well my point is….in my CSA  share bag for the last few weeks, I’ve had radish overload, so I grabbed some slider buns and made a delish lunch of radish sammich and Parmesan cheese, pictured below.  Don’t knock it ’till you’ve tried it.  Besides, what the heck else are you going to do with those radishes?  You can thank me later.

This slideshow requires JavaScript.

Rummaged Flatbread

Some nights I just don’t feel like cooking.  Really.  Yes, even me.  Which is why I’m thankful that I am competitive enough to make a game out of what I can scavenge from the fridge to pull dinner off.  Mr. Wonderful loves anything in the family of pizza.  So naan is a great quick pizza crust and Costco has the best deal on naan in the free world.  Enter naan from freezer and let the creative juices flow.  The most difficult part about this recipe is the patience it takes to caramelize the onions…chop them up and toss into a fry pan over very, very low, for a very long time.  You can vacuum, do dishes, watch some YouTube videos in the mean time.  Hell, get crazy and read a real book.

Here’s a quick flatbread recipe as rummaged from the fridge/freezer/pantry:

Grilled Asparagus, White Bean and Caramelized Onion Flatbread

  • 1 very large onion, any type, chopped finely into half circles (approx 2 C raw)
  • 1 bunch asparagus trimmed and washed
  • 1 C Provolone cheese, grated (goat or gorgonzola cheese would be better here, but none in the fridge, alas)
  • 4 C white beans, cooked or 2 cans, drained-reserve this liquid in case your hummus is too thick and you can drizzle some in (I pulled these from my freezer-reserve 3/4 C to sprinkle on TOP of flatbread, the rest will be used for “hummus” for the sauce on the flatbread)
  • 3 cloves garlic, peeled
  • 2-3 T Tahini (or just use a little of the juice from the beans if you don’t have this in your cupboard)
  • 1/2 tsp dried oregano or a handful fresh
  • 1/2 tsp dried cumin
  • 1/2 tsp dried chipotle or red pepper flakes, omit if you are not pro-heat
  • 2 T lemon juice, fresh squeezed preferred, but that little plastic lemon kind won’t kill you here
  • salt to taste, this will take more than you think…white beans have little flavor
  • EVOO
  • 2 pieces commercial naan bread

This slideshow requires JavaScript.


Cut up onion, toss in hot frying pan with a swig of EVOO, then turn way, way down to low.  Here is where the patience comes in…now, wait.  Stirring every 15 minutes or so.  Caramelized onions take TIME.  Like, an hour or so.  Good news, you don’t have to do anything to them except poke around at them every quarter hour….seriously quit your complaining.
Take the following ingredients and zap them in the food processor until smooth:
tahini
white beans (minus 3/4 C for topping of flatbread)
lemon juice
garlic cloves
spices
pinch of salt
You just made white bean hummus which is the “sauce” for the flatbread.
Asparagus should be washed, trimmed and tossed with a splash of EVOO, then turned out onto a hot grill, or in a grill pan until just warm, they should be crispy, semi-raw still, they will be cooked again in a hot second.
Fire the naan for a few minutes in a 400 degree oven to crisp it up just a little.
Now assemble:
Apply “sauce” to naan bread, then onions, reserved white beans, asparagus and top with provolone cheese.  Toss back into hot oven until cheese melts.   Season with a bit of black pepper.
Devour.

Sweet Potato Crisp

I think marshmallows are so gross, I don’t even want to tell you what gelatin is made from which is what holds those little guys together.  So I took a topping that I love, from fruit crisp, and then modified it slightly for this dish.  You could easily add 1/3 C oats to the topping and call this “health food”; however I didn’t do that.

Sweet Potato Crisp

Casserole:

  • 3 C sweet potatoes, baked and mashed (approx. 4 large potatoes)
  • ½ C sugar or Splenda
  • ½ C margarine or butter, melted
  • 2 beaten eggs
  • 1 tsp vanilla
  • 1/3 C skim milk

Topping:

  • 1/3 C melted margarine or butter
  • 1 C light brown sugar or brown sugar Splenda
  • ½ C flour
  • 1 C chopped pecans
  • ½ C – 1C sweetened shredded coconut

Mix together all of the casserole ingredients, place into a 9×13 greased pan.

Combine the topping ingredients in a small bowl and sprinkle over the top of the casserole dish.

Bake at 350 degrees COVERED for 25 minutes, then uncover and bake an additional 3-5 minutes or until just brown.

CAUTION: the sweetened coconut burns QUICKLY so in the last 3-5 minutes you are really watching for the coconut to brown and then remove promptly.

This slideshow requires JavaScript.

Clean Out the Fridge Sweet Potato Hash

I consider it a personal challenge when I have a few stray veggies in the fridge and a container of eggs.  It’s not really a food emergency or worth going to the store unless I am out of half and half for the coffee.  With the eggs, I could make an omelet (how predictable), or I could bust out some spices and a piece of stale naan bread from the freezer and make the following:

Curried Sweet Potato Hash with Egg Over Easy and Grilled Naan

This is a toss it all together recipe, so I didn’t measure.  Do the best you can with what you have on hand.  In these photos:

  • 1 small onion diced
  • 1 jalapeno pepper diced
  • ½ green pepper diced
  • 1 handful edemame from the freezer
  • 1 medium sweet potato diced
  • 1 egg, over easy
  • 1 piece of Naan bread, grilled
  • 1 tsp hot curry powder
  • 1 tsp salt
  • 1 tsp black pepper

Dice up the veggies, approximately the same size.  In a sauté pan or whatever is clean frankly, spray a little oil and add the sweet potato dice first, it will take a little longer to cook, when that becomes a bit soft, add all the rest of the veggies.  Cook until just tender.  Sprinkle mixture with curry, pinch of salt and pinch of pepper.  While the hash is cooking, push to once side of the pan and fry the egg over easy.  Over an open flame or in the oven warm up the naan bread.  To assemble.  Naan on the bottom, hash, fried egg.

Feelin’ really crazy?  Butter your naan bread with peanut butter and slice up a banana on top of it before adding the hash and egg…this is called a Tickle.

For lunch this same day, I took the leftover hash, put it in a sauce pan, with a can of coconut milk, a can of water and some additional curry powder.  Soup.  🙂

Crazy for Cumin?  Try this one from Pinch my Salt, one of my fave food blogs.

This slideshow requires JavaScript.

Lentil. Loaf. Love.

I have pounds upon pounds of lentils lining the shelves of my kitchen.  No time like the present to cook up a lovely lentil loaf.  I searched high and low for a loaf that didn’t look like meat so much as it did a healthier version, grainy and textured.  Finally, after much loaf searching, I stumbled upon the blog:  eat me, delicious which really is clever and has a ton of really great recipes.  This week I will be cooking from that blog beginning with this loaf.

Lovely Lentil Loaf
Makes 4-6 servings

  • 3/4 cup dry red split lentils rinsed well (until no longer cloudy), cooked in 1 3/4 cups of veggie broth or water until just tender, not mushy
  • 1 cup oats-not quick cooking (or leftover rice, millet or bulgur) I went for Bob’s Red Mill brand, it was on sale at Meijer tonight.
  • 1 cup grated sharp white cheddar cheese
  • 1/2 cup barbecue sauce (tomato sauce or salsa-I used Tastefully Simple’s Bayou Bourbon Sauce)
  • 2 eggs, lightly beaten
  • 1/2 cup chopped fresh cilantro
  • 1/3 cup chopped scallions
  • 1/4 cup chopped fresh parsley
  • 2 teaspoons soy sauce or Tamari
  • 3 garlic cloves, minced
  • 1 teaspoon dried oregano

Mix all ingredients together in a large bowl. Pour mixture into a loaf pan or casserole dish, lined with foil and lightly oiled.
Bake at 375 degrees for 45 minutes. Let cool for 5 minutes before cutting and serving.

As you can see with this formula the possibilities of add ins, etc are basically endless.

Your final product will be a firm, yet not heavy loaf that tastes delicious over smashed sweet potatoes…just sayin’.

Now get out there and love on some lentils!  This is Walter The Wonderdog approved.

This slideshow requires JavaScript.

Yahtzee! Red Pepper SALE=Spicy Red Pepper Soup

Some like it HOT.  I for one, basically drink Frank’s Red Hot. It has some kind of hold on me.  A sale on red peppers is like hitting 3 or 4 numbers in the lotto, not the full monty, but you still get an excellent monetary reward…especially at D & W.  So when I saw red bell peppers, 10 for $10 dollars and sprinted to the produce shelf, leaving poor Mr. Wonderful in the dust returning with 20 red bell peppers, he had no idea what had just happened.  Since he knows better than to actually ask about such things, he agreed to just wait for the finished product which we lapped up 2 days in a row and several lunch servings later.

This recipe was adapted from the klutzychef at her blog; check her out she is cute and honest…and talks about burning Rice Krispie treats, my kind of gal.

Roasted Red Pepper Soup

serves 4 people as a main meal

Ingredients

  • 8 red bell peppers, roasted (no, it does NOT taste the same if you use canned-just roast them in your oven..super easy)
  • 1 baked medium russet potato, smashed
  • 2 medium carrots, peeled and chopped
  • 1 tablespoon of vegetable oil
  • 1/4 cup half and half
  • 2 medium chopped onions
  • 6 garlic cloves peeled and left whole
  • 2 tsp roasted red pepper flakes (half of this for a milder soup)
  • 1 tsp chipotle powder (omit for mild soup, I like to hurt myself eating soup like this…)
  • 1 tsp sea salt
  • 2 cups crushed tomatoes (16 oz)
  • 1 3/4 cups reduced-fat coconut milk (or whole fat, whatever)
  • 2 cups veggie broth or water

Directions

  1. Bake your potato, set aside to cool.  Roast your peppers, whole, washed and then coated lightly with EVOO or canola oil on a foil-lined (you will thank me later for this step) jelly roll pan at 400 or so until they are black, yes, black.  Set them aside in a tightly covered bowl to cool and then stem, seed, and peel them.  This is not hard, suck it up and do it.  Seriously, the taste is worth it.
  2. In a covered non-reactive pot, heat oil in a dutch oven on medium-high heat.
  3. Add onions, carrots, salt, pepper flakes, chipotle powder, and garlic.  Sauté on medium heat for 15 minutes or until onions are soft and translucent.  DO NOT INHALE DEEPLY when you put the flakes and powder to the oil.  You might want to turn on the fan for a few minutes or suffer for about an hour.
  4. Remove the pot from heat and add canned tomatoes, red peppers, coconut milk, smashed potato guts, half/half and broth/water.
  5. Mix together so ingredients are fully integrated.
  6. Now, in batches, add the soup to a blender or food processor to mix all together.  An immersion blender works beautifully here as well since you can just throw it right into the pot.  If you have a dish towel to spare and are using a standing blender, you may want to put the towel under the cover to prevent hot soup from spilling out the top.
  7. Keep warm until ready to serve on stove over low.
  8. Top with Frank’s Red Hot (I know it’s too much, but it’s soooooo good).