Category Archives: Baking

Tomatoes & Tarts

My friend Lesley and her family bought a farmhouse, so after one too many glasses of wine we decided to plant an epic vegetable garden – it was my responsibility to order the seeds and raise them to transplant size. About three hours and $300.00 later I had bought nearly everything resembling a tomato on the Baker Seed website. Now, we are swimming in tomatoes and zucchini of every heirloom variety under the sun.

Since the first full harvest of tomatoes netted over 20 pounds total and I didn’t really have enough to can but still too many to eat, I went in search of brunch recipes (to eat immediately) and preservation recipes (to eat later). I turned up many a tart and an old favorite recipe for what in my home we affectionately refer to as “crack tomatoes” which are perfect for winter TLT sandwiches when you’re say mid-February and there is no sign of spring in sight.

Crack Tomatoes

  • 2-4 C cherry, grape, pear or other smallish tomato, cut in halves (any tomato will work here really)
  • 1/4 cup extra-virgin olive oil
  • 1 tablespoon brown sugar (or maple syrup)
  • scant 1/2 teaspoon of salt

On jelly roll pan lined with foil or parchment (or glass dish – you will want to be sure you have sides) place tomato halves in a single layer, drizzle with EVOO, brown sugar (or maple syrup) and sea salt, let bake in a 400 degree oven until they have just begun to brown (you don’t want them crispy). Remove from oven, let cool and spoon into pint containers or freezer bags and freeze. If you put these in glass canning jars, you can easily remove the lid and rim and pop into the micro when you are ready to serve. The oil from the pan keeps them luxurious all winter in the deep freeze.

Tomato Tart

  • 1 recipe from scratch, or 1 refrigerated, or 1 frozen pie crust
  • 3 large heirloom tomatoes
  • 3 extra-large eggs
  • 1 – 4oz log goat cheese
  • salt & pepper to taste
  • fresh basil, torn into bits or ribbons

Pre-bake pie crust x 5-7 minutes until the space where the filling will end up is firm, almost has a crust formed (this will keep it from getting smushy). While crust is baking slice tomatoes about 1/4 inch wide, lay on paper town and blot with paper towel until most of the immediate moisture has been mopped up. Lightly beat eggs with salt and pepper (okay to use egg whites only here too), set aside. When pie crust is 1/2 done, pull from oven and pour eggs into crust, take goat cheese and drop by small chunks onto eggs, layer with overlapping tomato slices – place back into oven and cook at 400 until eggs are set (between 15-30 minutes). Let cool to room temperature and serve sprinkled with fresh basil.

This slideshow requires JavaScript.

Vegan Raspberry “Buttermilk” Cake

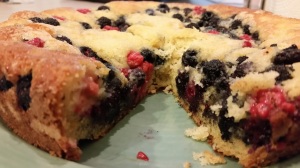
It’s mildly embarrassing to me that the raspberry bush that the “birds planted” in my yard does better than the one that I water and actually care for regularly. No matter, the birds dropped it in the perfect spot, my old garden box, so I get to benefit from their ingenuity I suppose in some form. The raspberries that humans planted were sparse, but large, red and delicious while the raspberries that the birds left us are small, black and a little more tart so I looked for a recipe where I could combine them to get the best of both worlds and I found it, in a cake on one of my fave websites The Smitten Kitchen. I veganized it and was good to go with what is now one of my favorite recipes for any berry. This recipe makes one thin 9-inch cake.

macro shot of raspberry cake from side angle

1 cup (130 grams) all-purpose flour
1/2 teaspoon (2 grams) baking powder
1/2 teaspoon (2 grams) baking soda
1/4 teaspoon salt
1/2 stick (56 grams) unsalted butter substitute, softened ( I used Earth Balance )
2/3 cup (146 grams) plus 1 1/2 tablespoons (22 grams) sugar, divided ( make sure it’s a vegan brand )
1/2 teaspoon pure vanilla extract
1/2 teaspoon finely grated lemon zest ( it’s optional but man does it take this to a new level of yum )
1 large (57 grams) vegan egg of choice, I used a flax egg
1/2 cup (118 ml) well-shaken buttermilk ( to make vegan buttermilk, I took 1T of white vinegar – you could also use lemon juice for this – and added it to 1/2C unsweetened Califia almond milk, let it set for a few minutes and then beat the crap out of it with a whisk – very technical, I know)
1 cup (5 ounces or 140 grams) fresh raspberries, I used a mix of red and black

Preheat oven to 400°F with rack in middle. “Butter” and flour a 9-inch round cake pan.

Whisk together flour, baking powder, baking soda, and salt and set aside. In a larger bowl, beat vegan butter and 2/3 cup (146 grams) sugar with an electric mixer at medium-high speed until pale and fluffy, then beat in vanilla and zest, if using. Add egg and beat well.

At low speed, mix in flour mixture in three batches, alternating with vegan buttermilk, beginning and ending with flour, and mixing until just combined. Spoon batter into cake pan, smoothing top. Be careful, make sure the middle is not more dense than the sides here or you will have a dry outside and too moist of a middle. Scatter raspberries evenly over top and sprinkle with remaining 1 1/2 tablespoons (22 grams) sugar.

Bake until cake is golden and a wooden pick inserted into center comes out clean, 20 to 25 minutes. Cool in pan 10 minutes, then turn out onto a rack and cool to warm, 10 to 15 minutes more. Invert onto a plate.

Raspberry Cake 2

Adapted from Gourmet, June 2009 and veganized from Smitten Kitchen


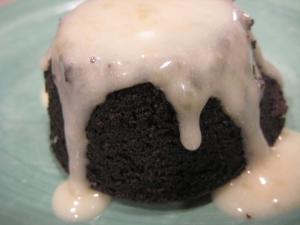
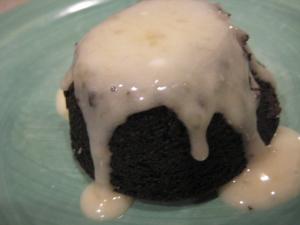
Vegan, Gluten-Free Gooey Pumpkin Spice Latte Chocolate Pudding Cake [say that three times fast]

I haven’t posted in a while and for that I’m sorry. Posts likely won’t pick up until the first part of January as I finish up my PhD coursework and become the coveted “ABD” (all but dissertation) in the next hurdle for terminal degree conclusion.

I know I talk about my amazing Pinterest experiences [and my not so amazing ones too] and my pinning addiction too much as it is, but think of all of the amazing content it creates in life! It’s become a break, a relaxation technique right before bedtime, I pin all sorts of fabu stuff that I may or may not ever act on; however, this recipe from Angela Liddon, I made within 24 hours of pinning and I am NOT sorry. In fact, I have plans to make it for just about every potluck I will be attending in the next 4 weeks or so; my apologies [sorry, not sorry] if I will see you multiples times in the next month – I don’t think you will mind much as this dish is certainly worth grabbing seconds of – for sure.

I’ll STFU now and give you some food porn and a recipe. If you aren’t paying attention to Oh She Glows, you are missing out on some seriously tasty vegan eats. Cheers!

Ingredients:

  • 1.5 cups rolled oats, ground into a flour (use certified gluten-free oats, if necessary)
  • 1 flax egg: (1 tablespoon ground flax mixed with 3 tablespoons water)
  • 3/4 cup coconut sugar – I used cane sugar with fine results
  • 1/3 cup unsweetened cocoa powder – don’t skimp on quality here – I used very dark and it was rich and gooey
  • 1 teaspoon cinnamon
  • 1/2 teaspoon ground ginger
  • 1/8 teaspoon fresh ground nutmeg
  • 1/3 cup finely chopped non-dairy dark chocolate
  • 1/2-3/4 teaspoon fine grain sea salt, to taste
  • 1/2 tablespoon baking powder
  • 1/2 cup + 2 tablespoons almond milk
  • 1/2 cup + 2 tablespoons unsweetened pumpkin puree
  • 1/2 tablespoon pure vanilla extract
  • 1 tablespoon cocoa powder
  • 1/4 cup coconut sugar
  • 1 + 1/4 cup hot coffee – I used Biggby Cinnamon Toffee seasonal flavor and I was not sorry
  • For serving: vegan vanilla ice cream and toasted chopped pecans


This slideshow requires JavaScript.

Directions:

  1. Preheat oven to 375⁰F and lightly grease an 8-inch square glass baking dish with oil.
  2. Whisk flax and water together in a small bowl and set aside for 5 minutes to gel up.
  3. In a large bowl, stir together the oat flour, 3/4 cup sugar, 1/3 cup cocoa powder, cinnamon, ginger, nutmeg, chocolate, salt, and baking powder.
  4. In a small bowl, whisk together the flax mixture, milk, pumpkin, and vanilla.
  5. Pour wet mixture onto dry ingredients and stir until thoroughly combined.
  6. Scoop the batter into the prepared glass dish and smooth out evenly with a spoon.
  7. In a small bowl or mug, combine the remaining tablespoon of cocoa powder and 1/4 cup sugar. Sprinkle all of it evenly over the cake batter.
  8. Slowly pour the hot coffee over the cocoa powder and sugar mixture ensuring that the coffee completely covers the powder and sugar. The cake will now look like a complete disaster, but this is normal. Promise! It’s true. It’s not pretty.
  9. Very carefully place the dish into the oven, uncovered. Bake at 375⁰F for 24-30 minutes (I baked for 24 mins., but your oven might need more or less – see her post for the visual step by step pictures) until the cake is semi-firm on the top, but bubbly and gooey around the edges. It will look under-baked, but this is normal. If for whatever reason your cake is still watery after 30 minutes in the oven, keep baking it until the rapture. I’m just kidding. You will want to pull it out before it burns for sure.
  10. Let the cake cool for 10 minutes and then serve immediately with vegan vanilla ice cream and toasted pecans. This cake is best served warm straight out of the oven. Eat this….all of this immediately. Chef Mike topped ours with fresh whipped cream. It made me very happy.

Notes from Angela: 1) You can probably swap the coconut sugar for natural cane sugar. The bake time may vary slightly since coconut sugar tends to be more dry. 2) If you aren’t a coffee fan, feel free to swap it with boiling water. 3) To make this nut-free, swap the almond milk for coconut milk (or non-dairy milk of your choice) and leave out the pecan garnish. 4) To make the oat flour, add the rolled oats into a high speed blender and blend on high until a fine flour forms. You can also use 1 1/2 cups + 2 tablespoons store-bought oat flour instead.


How Pinteresting…Vegan Flourless Chocolate Muffins

Pinterest claimed another one of my hunger pangs and forced me to make these vegan flourless chocolate muffins last weekend. I’m a little on the fence about them. While they were shared over 7K times online and pinned and repinned who knows how many more, I’m not totally convinced these muffins, while healthier than most, are worth the cals they pack (315 per muffin – omg). The texture is unique, more dense than breadlike (obviously, no flour) they do have a gooey brownie-like quality that makes them have a velvety mouth feel.

I do think these would be a great food to have pre-workout or on a marathon route somewhere in the middle to end as they contain many lovely natural sugars for energy, potassium from the bananas for your tired muscles,  and probably some health benefit from the cocoa (maybe caffeine or additional stimulant). They are dense, filling, and easy on the stomach. This is a pretty low-investment experiment. I had all of these items lying around my house, so give them a try for yourself. They take a matter of a few minutes to whip up in your food processor and just a few minutes in the oven. I added a generous pinch of salt after I tasted the batter as the recipe was a little bland as written. Report back what you think, I’d be curious to know.

Ingredient

  • 1 cup creamy peanut butter (or nut butter of choice)
  • 2 very ripe bananas
  • 1/4 cup maple syrup
  • 1/3 cup cocoa powder
  • Generous pinch of sea salt

This slideshow requires JavaScript.

Pre-heat oven to 350.
In a food processor combine all ingredients. You may have to stop and scrape down the sides a few times.
Once everything is mixed well, spoon batter into lined muffin cups. If using papers you might want to lightly spray the bottoms to avoid sticking. The batter will be VERY sticky. I found wetting a spoon kept it from sticking.
I topped a few of mine with a pinch of sea salt.
Place muffin pan in the oven and bake for about 15 minutes.
Wait until these are completely cooled before removing from the pan. When the timer goes off they will not look cooked, trust the recipe and pull them so you don’t try them out.  My recipe made 8.


Sometimes you just need chocolate cupcakes…like at 11pm for example

The title is true. Sometimes you just need chocolate cupcakes….like at 11pm for example. I posted this delish cake recipe some time ago and then a few nights ago when a chocolate cupcake craving hit…well, I made cupcakes at 11pm.

The cupcake recipe can be found here: Vegan Chocolate Cupcakes [this late night craving wanted coffee/chocolate so I added 1 T espresso powder to the chocolate batter for an espresso chocolate cupcake]

For the “frosting”:

  • 1 ripe banana
  • 1-2 C powdered sugar
  • 1 tsp vanilla

Smash the ripe banana in a large bowl with vanilla. Gently whisk in powdered sugar until you reach your desired frosting consistency. Pop in the fridge. Will keep for up to one week. Bonus, tastes really good on toast.

IMG_7321 IMG_7319 IMG_7320 IMG_7317 IMG_7318 IMG_7315 IMG_7316

Mint Chocolate No Bake Cookie Bites

I do a lot of reading. For school, for work, for fun, I’ve always liked reading. Sometimes I read a recipe and it bypasses the bookmark function and gets me straight away into the kitchen, particularly when I have all the ingredients on hand and want to eat cookies. I mean really, when I want to eat cookies. I’m a big fan of no bake items particularly those that don’t require chemistry to work and you can kind of “eye-ball” the measurements. When these didn’t come together just as planned with the original recipe I improvised a little with the natural sweetness of maple syrup and a few extra dates. I dare you to eat just one.

  • 1 cup rolled oats
  • 1 cup raw cashews
  • 12-16 medjool pitted dates
  • 3 T dark cocoa powder
  • 2-4 T nondairy milk
  • 1/4-1/2 tsp peppermint extract 
  • 1 tsp maple syrup
Dough should just stick together out of the food processor

Dough should just stick together out of the food processor

IMG_7490

A perfect scoop

A perfect scoop

Use a scoop to portion out the dough

Use a scoop to portion out the dough

Roll into balls after you measure out the dough

Roll into balls after you measure out the dough

Nondairy milk, dates and cocoa powder

Nondairy milk, dates and cocoa powder

In a food processor mix the cashews and oats until they are a powdery consistency. Then add the dates, cocoa powder, 2 T milk and peppermint extract and mix until a dough starts to form. If the dough looks dry, add a bit more milk. Roll into balls and place on a parchment lined baking sheet. Set in the fridge to firm up. I got 25 bites out of my batch using a small pampered chef scoop to form the cookie bites.

Adapted from My Whole Food Life

Vegan Chocolate Chip Cookies

My friends Jon and Kolene over at VeganGR are always making vegan chocolate chip cookies and slipping them into non-vegan events with great results. By great, I mean no one can detect the damn difference between the vegan chocolate chip cookies and “normal” chocolate chip cookies.

I’m not wild about any butter/margarine substitute, so I took a crack at an Earth Balance free recipe posted on the Post Punk Kitchen instead. I was not disappointed. The texture was a little crazy, but not in a bad way. The tops of these guys were like crackly almost, flaky certainly, but honestly, a great way to satisfy your sweet tooth in a cruelty free way.

A little bonus: in using canola or veg oil, you don’t have to fight that battle of getting the butter/margarine “room temperature” which ultimately ends up in me making margarine soup in the microwave because I don’t have the patience to zap it slowly and/or I didn’t plan to make cookies at 9am that morning and now it’s officially an emergency at 10pm to get a cookie crammed into my pie hole before I hit the hay. Don’t pretend you have not experienced this same emergency before. It’s a real problem.

Makes two dozen two inch cookies or about 16 three inch cookies

  • 1/2 brown sugar
  • 1/4 white sugar
  • 2/3 cup canola oil (it’s a lot, I know…but no other oil is used)
  • 1/4 cup unsweetened almond milk (or your favorite non-dairy milk)
  • 1 tablespoon tapioca flour (I used Arrowroot and still had sound results)
  • 2 teaspoons pure vanilla extract
  • 1 1/2 cups all purpose flour
  • 1/2 teaspoon baking soda
  • 1/2 teaspoon salt
  • 3/4 cups chocolate chips (vegan)

Preheat oven to 350 F. Lightly grease two large light metal baking sheets.

Mix together sugars, oil, milk and tapioca flour in a mixing bowl. Use a strong fork and mix really well, for about 2 minutes, until it resembles smooth caramel. There is a chemical reaction when sugar and oil collide, so it’s important that you don’t get lazy about that step. Mix in the vanilla.

Add 1 cup of the flour, the baking soda and salt. Mix until well incorporated. Mix in the rest of the flour. Fold in the chocolate chips. The dough will be a little stuff so use your hands to really work them in.

PPK directions: For 3 inch cookies, roll the dough into about ping pong ball size balls. Flatten them out in your hands to about 2 1/2 inches. They will spread just a bit. Place on a baking sheet and bake for about 8 minutes – no more than 9 – until they are just a little browned around the edges. I usually get 16 out of these so I do two rounds of eight cookies. Let cool on the baking sheet for about 5 minutes then transfer to a cooling rack.

For 2 dozen two inch cookies roll dough into walnut sized balls and flatten to about 1 1/2 inches and bake for only six minutes.

I found however, it took a little longer to produce a cookie that was cooked through. Check on them every minute or so to insure you don’t burn ’em until they are to your liking.

Single-serving desserts are better than single-serving friends

Sorry about the premature post last week-I of course, scheduled this post to be published on January 7, 2012 so it hit a little early.  Here it is for real this time:

I’ve been very interested in the blog of Katie, or “Chocolate Covered Katie” which sounds a little bit more pornographic than it probably should.  Anyway, she is well, sweet…of course she is, and her recipes are pretty unique in that they are basically good for you.  Yeah, I know…dessert that is good for you.  Bonus:  she has done the math for us, so they are in single or double servings for those of us that cannot be trusted to eat an actual serving, you know like one brownie (who in the hell eats one brownie?).

  • 1 tablespoon plus 2 tsp cocoa powder
  • 3 tablespoons spelt flour (or white, or even peanut flour)
  • 1/2 tsp instant coffee granules
  • 1/8 tsp salt
  • 2 tsp evaporated cane juice (or sugar)
  • 1/4 tsp baking powder
  • 1 stevia packet (or 1 more tablespoon sugar)
  • 1 tablespoon coconut or veg oil
  • 3 tablespoons milk of choice (I used almond milk)
  • 1/4 tsp pure vanilla extract

Combine dry ingredients and mix very, very well. Add liquid, stir, then transfer to a little dish, ramekin, or even a coffee mug. Microwave 45-50 seconds (or more, depending on how powerful your microwave is). If you don’t want to eat it straight out of the dish, be sure to spray your dish first (and then wait for the cake to cool before trying to remove it).

I couldn’t stop there, I had to try most all of them, and I will say this about these little baby desserts…Mr. Wonderful and I ate them all before they were photographed.  All. Of. Them.  So you don’t actually need a visual…just know they lasted about 60 seconds each…also the amount of time it takes to microwave them.  Keep your New Year’s resolution to eat more sensibly or at least, less of the bad stuff with these single-serving desserts.

Cut and pasted from Chocolate Covered Katie’s site

Reeses Pieces Frosting

(Yields almost 1/2 cup)

  • 1/4 cup peanut butter (or other nut butter)
  • 4-8 tsp pure maple syrup (click for a sugar-free alternative)
  • 2 tbsp cocoa powder
  • 4 tsp milk of choice (or more for thinner frosting)
  • 3/4 tsp pure vanilla extract
  • optional: handful of chocolate chips (the “pieces”)

Chocolate Peanut Butter Mug Cake [Our fave of the quick cakes]

Adapted from this recipe.

  • 1 tablespoon plus 2 tsp cocoa powder (8g)
  • 3 tablespoons powdered peanut butter (PB2 or Betty Lou’s) (For substitutions, see “nutrition facts” link below) (18g)
  • scant 1/16 tsp salt
  • 1 tsp xylitol or sugar (omit if you like bitter chocolate cake) (4g)
  • 1/4 tsp baking powder
  • 1 stevia packet or 1 more tablespoon sugar
  • 2 tsp coconut or veg oil, or mashed banana or applesauce (I personally don’t like the fat-free option and recommend the oil, but I’m adding the option because I know many of you don’t mind the taste/texture of the lower-fat version.) (8g)
  • 3 tablespoons milk of choice (45g)
  • 1/4 tsp pure vanilla extract

Combine dry ingredients and mix very, very well. Add liquid, stir, then transfer to a little dish, 1-cup ramekin, or even a coffee mug. If using the microwave: cook 1 minute 25 seconds (time may vary, depending on your microwave’s wattage). If you don’t want to eat it straight out of the dish, be sure to spray your dish first (and then wait for the cake to cool before trying to remove it).

One-Minute Mocha Cake

(can be gluten-free!)

Topped with Katie’s favorite Four-Ingredient Ice Cream.

  • 1 tablespoon plus 2 tsp cocoa powder
  • 3 tablespoons spelt flour (or white, or gluten free mix)
  • 1/2 tsp instant coffee granules
  • 1/8 tsp salt
  • 2 tsp evaporated cane juice, or sugar
  • 1/4 tsp baking powder
  • 1 stevia packet (or 1 more tablespoon sugar)
  • 1 tablespoon coconut or veg oil (Edit: many commenters have said it still tastes good if you sub applesauce or mashed banana. But I can’t personally vouch for the results if you make that substitution.)
  • 3 tablespoons milk of choice (I used almond milk)
  • 1/4 tsp pure vanilla extract

Combine dry ingredients and mix very, very well. Add liquid, stir, then transfer to a little dish, ramekin, or even a coffee mug. Microwave 45-50 seconds (or more, depending on how powerful your microwave is). If you don’t want to eat it straight out of the dish, be sure to spray your dish first (and then wait for the cake to cool before trying to remove it).

Ceci-Roasted Red Pepper Soup

New Year’s Eve is for two things:  1) resolution making and 2) drinking, heavily.  The day after your first thought:  1) resolving to not EVER drink again….like for real this time, ever.  Right?  So for your hangover cure I did a little research and decided that one of my fave soups can be your cure for what you overdo on NYE.

Nutrient-rich foods that are good to eat with a hangover are bananas, red peppers, broccoli, nuts, and oats. A banana smoothie is an excellent choice, as it acts as a natural antacid as well as replenishing vitamins and minerals. To make one, blend together one ripe banana, one a half cups of nondairy milk, and two tablespoons of honey or agave (for those of you that are strict vegan).

This soup is great.  Protein, vitamins, sits on stove all day without getting icky so you can eat when you get that small window of opportunity when you feel “better” than you did when you woke up at Noon.  Tastes excellent with saltines…see, it’s like perfect.  Take care.

  • 2 large red bell peppers
  • 1 medium size onion, chopped
  • 3 cloves garlic, minced
  • 2 tsp. rosemary, dried
  • 1/2 tsp. salt
  • black pepper, to taste
  • 2 c. tomatoes, chopped
  • 1 tsp. ground coriander
  • 3 c. vegetable broth
  • 1 (15oz) can chickpeas, drained and rinsed

DIRECTIONS

  1. Preheat oven to 375 F.
  2. Cut out the stems of the peppers and discard along with the seeds. Stand the peppers in a small baking pan to roast the peppers for 35-50 minutes.
  3. Remove from oven and let cool, additionally, I removed the skin, then cut into bite-sized pieces.
  4. Saute the onion in a large pot in very little oil (or none at all if you like) for 5 minutes until translucent.
  5. Add garlic, rosemary, salt, and black pepper to pot and saute for another minute.
  6. Mix in tomatoes (canned are okay here too, let’s be honest you aren’t going to cut up tomatoes hungover) and stir for another minute.
  7. Add coriander, vegetable broth, and chickpeas and stir.
  8. Bring contents of pot to a low boil and cook covered for 15 minutes or all day…whatever you need/want.
  9. Add the roasted peppers.
  10. Blend half the soup with an immersion blender OR blend about half the soup in a blender, being careful not to let the steam build up in the blender while you are blending, add the blended soup back to the pot.
  11. Let soup sit for a few minutes, taste for salt, and serve.

Adapted from Appetite for Reduction; shown here with bread and goat cheese (omit goat cheese for vegans).

IMG_6222

Vegan Baked Oatmeal

I’m on a little oatmeal kick recently…well, at Costco I bought about a zillion RAW oatmeal packets that come together in a jiffy and have quinoa, chia, flax, oats and great taste without all the sugar that Quaker has.  I came across this idea from a friend’s Facebook page today while procrastinating.  I made it and LOVE it.  If you are a non-oats person because of the texture of hot or cold oatmeal, this will cure you of your oat-phobia (yes, of course that is a technical term).  A quick, warm breakfast on a cold day is possible.  Try it for Christmas morning so you can dedicate time to your gifts and not the prep of your breakfast.  With this in your belly in the AM, it’s basically permission to eat cookies for the other two meals of the day.  Cheers!

Baked Oatmeal

  • 2 cups old fashioned oats
  • 2 cups unsweetened vanilla almond or coconut milk (any nondairy milk should work here, I used unsweetened nonflavored almond)
  • 1/2 tsp vanilla
  • 1/2 cup slivered almonds (any nut will work)
  • 1/2 cup dried Michigan cherries (or other dried fruit of your choice)
  • 1 large un-peeled Honey Crisp apple, grated (apple should be firm)
  • 2 TBSP pure maple syrup (you choose, but use natural, not a syrup made with artificial sweeteners-Agave is a good sub here)
  • Cooking Spray

Directions:
1. Preheat oven to 400
2. Coat a 3 quart (large) casserole dish or baking pan with cooking spray
3. Combine all ingredients in a large bowl
4. Place mixture in the casserole dish
5. Bake uncovered for 45 minutes

Feel free to toss Chia or Flax in there too…a little sprinkle won’t hurt.

*Makes 6 1-cup servings (divide other servings into small containers for a quick grab-n-go breakfast next week for work!!!)

A healthy vegan cookie…well, kinda-a healthier vegan cookie certainly

So you overdid it at Thanksgiving…you and every other American.  Get back to where you belong with a healthier vegan cookie.  These tasty little morsels will melt in your mouth and are a great way to use up very ripe bananas.  Perfect for  a rainy fall day.  They could also be gluten free, just ensure you use gluten-free oats.  These cookies freeze well, so you might consider doubling the batch and freezing some for when you are too lazy to bake but need a sweet fix.

  • 3 large, very ripe bananas
  • 1/2 C peanut butter, preferably all-natural (just peanuts), or almond butter
  • 1/4 C extra virgin coconut oil, canola or olive oil
  • 1 tsp vanilla extract
  • 2 C old-fashioned oats
  • 1/3 C shredded coconut (optional)
  • 1 tsp baking powder
  • 1/4 tsp cinnamon
  • 1/4 tsp salt
  • 1/2 – 1 C chopped dark chocolate chopped, or chips

This slideshow requires JavaScript.

Preheat oven to 350˚F.

In a large bowl mash the bananas with the peanut butter, oil and vanilla. In another bowl stir together the oats, coconut, baking powder, cinnamon and salt. Add the dry ingredients to the wet ingredients along with the chocolate and stir until combined.

Drop spoonfuls of dough onto a parchment or Silpat lined baking sheet, or one that is sprayed with nonstick spray, and bake for 12-14 minutes, until just set. Makes about 2 1/2 dozen cookies.

Adapted from 101cookbooks.com

Bears, [Vegan] Beet Cupcakes, Battlestar Galactica

Vegan.  Low-fat.  Cupcake.  I know.  It’s like a dream.  This variation of the classic Southern recipe gets its beautiful color from beets rather than red food coloring-though they are mostly purple, not really red, and would make a stunning hair color…which has me thinking of a new shade.  Anyway, you are here for cupcakes…

For the beets.  I roast a ton of veggies on Sundays for the week so these were leftover and had to be used from that roasting process.  I roasted them at 400 in tin foil balls for about 45-60 minutes, let cool a little de-skinned, left in a baggie in the fridge for a few days, then for this recipe I pureed them in my food processor and it was just over the two cups needed for this recipe.  The original author of one of the recipes I picked over to make this one boiled then grated, then processed in a blender.  To each her own.

FOR THE CAKE:

  • 2 C unsweetened almond or soy milk
  • 2 tsp apple cider vinegar
  • 2½ C all-purpose flour
  • 1 1/2 C sugar
  • ¼ C natural cocoa powder
  • 1 tsp baking powder
  • 1 tsp baking soda
  • 1 tsp salt
  • ½ C vegetable oil
  • 2 T pure vanilla extract
  • 2 T unsweetened applesauce
  • 2 large red beets, about 12 ounces, pureed (you should have about 2 cups of beet puree)

FOR THE ICING:

  • 1 C vegan margarine (a nonhydrogenated brand is best), at room temperature
  • 1 C vegan cream cheese, at room temperature
  • 2 T pure vanilla extract
  • 8 C powdered sugar

OR

This chocolate ganache – which is what I used instead

Preheat the oven to 350°F. Line two 12-cup muffin tins with paper cupcake liners.  Mine made exactly 2 and a half dozen.

MIX THE BATTER

Combine the milk and the vinegar in a large mixing bowl, and set aside to curdle. In a separate bowl, sift the flour, sugar, cocoa powder, baking powder, baking soda, and salt. After the milk mixture has curdled, add the vegetable oil, vanilla, and applesauce to it, and stir. Pour the wet ingredients into the dry ingredients, and mix with a hand mixer until no lumps remain. Fold the pureed beets into the batter by hand with a rub­ber spatula until just combined.

BAKE THE CUPCAKES

Fill the lined muffin pans until each cup is three-fourths full of batter. This recipe should make 2 to 2½ dozen cupcakes. Bake cupcakes for 25 minutes, or until a toothpick inserted in the center of a cupcake comes out clean. Set aside to cool. Once cool enough to handle, transfer the cupcakes to a rack, line six compartments of one of the pans with paper liners, fill, and bake the remaining batter.

MAKE THE ICING

Combine the vegan margarine and vegan cream cheese and beat until thoroughly mixed and creamy. Add vanilla and beat until combined. Add the powdered sugar, 2 cups at a time, and incorporate into the creamed mixture. Once all the sugar has been added, scrape down the bowl and beat for 2 minutes at medium speed.

ICE THE CUPCAKES

Place the cooled cupcakes on a serving tray.

METHOD I:

Using a spatula or a butter knife, spread 2 rounded tablespoons of icing onto the top of each cooled cupcake, swirling to cover the surface of the cupcake.

METHOD II:

Place an icing tip inside a pastry bag. Fill the pastry bag half full of icing. Squeez­ing from the top of the bag, force the icing through the tip onto the top of the cupcakes, swirling the icing around the top of each cupcake.

Serve at room temperature, and refrigerate any leftovers. Will keep for up to four days, refrigerated.

Thanks to many beet cupcake recipe makers before me…I was able to make a great recipe from many other great recipes.

This slideshow requires JavaScript.

Lentil Sloppy Joes

It’s tailgating season that means…Sloppy Joes.  Last year I posted a recipe using TVP which fooled the meat-eaters for sure, this year I’ll be taking Lentil Sloppy Joes.  Very similar recipe, as I finally got the flavor right, so now, moving on to lentils.  These have a bit of a kick to them, so easy on the chipotle en adobo if you like things a little more mild.  I think dijon, brown, or whole grain mustard would be a great sub for the peppers if you want a kick but no heat.  We shall see how this goes.

Filling:

  • 2 C dried lentils, your choice of lentil
  • 6 C water
  • 3 bay leaves
  • 1 head garlic

So this part cooks itself.  Take your lentils, give them a hearty rinse under cool water until the water runs clear.  Dump them into your slow cooker with the water, bay leaves and head of garlic with top cut off (keep it intact, so you can drag it out later).  Depending on your lentil, your water will absorb completely, or you will have to strain them before combining with other items below.  Either way, you want to cook your lentils until they are al dente (like pasta), not mush.  For me, in a slow cooker cranked up to high, it was just 3 hours.  I cleaned the house while they cooked.  When they are done, drain the excess liquid from the lentils, toss the bay leaves and garlic, then return the lentils to the slow cooker pot, you will finish cooking this dish in the slow cooker after you assemble the items below.   Next…

  • 1 T olive oil
  • 1/2 C coarsely chopped onion
  • 1/2 C coarsely chopped bell pepper (your choice of color)
  • 4 cloves garlic, minced
  • 1 4-oz can tomato sauce
  • 1/4 C water
  • 2 T tomato paste
  • 1 T packed light brown sugar
  • 2 tsp vegan Worcestershire sauce
  • 2 tsp red wine vinegar
  • 1 tsp Sriracha
  • 2 whole chipotle en adobo, chopped finely
  • salt & pepper to taste
  • 4-6 large hamburger buns or rolls or 10-12 slider buns

Heat the oil in a large nonstick skillet (I used a wok) over medium-high heat.  Cook the onion, bell pepper and garlic through until the bell pepper is tender (8-10 minutes).

Stir the remaining sandwich filling ingredients together in a medium bowl.  Add this mix to the cooked and DRAINED lentils in the slow cooker, stir until the mixture is well combined.  Set the slow cooker to high for faster results or low if you have all day and let the mixture thicken.

To serve, spread filling onto a bun and enjoy.

This slideshow requires JavaScript.

Vegan Pear Ginger Muffins

Sometimes what I make is determined by what is available in my kitchen at the moment (then I don’t have to go to the grocery store).  So many pears lately hanging around, hence, vegan pear ginger muffins found their way into the oven.  I was delighted at how little sugar went into these and how they still managed to be slightly sweet, not over- or underwhelming.  The pear makes a for a great break from squash and pumpkin during the fall months.

(make 18 muffins, or 12 muffins and 1 small loaf of bread)

  • 3 C whole grain flour
  • 1/2 – 3/4 C brown sugar, packed
  • 4 tsp baking powder
  • 1 tsp cinnamon
  • 1 ½ C unsweetened almond or soy milk
  • ½ C canola oil
  • 2 tsp vanilla
  • 2 pears, peeled and diced
  • 1/2 – 3/4 C crystallized dried ginger chopped fine

1. Preheat oven to 400° and line a muffin tin with paper cups.

2. Mix all the dry ingredients together, then add the wet. Stir until just combined.

3. Fold in the chopped pear and pour batter into prepared pan or cupcake wrappers.  Bake for about 20 minutes, check to see if they are done with a toothpick, you don’t want to overbake else they become dry.

These freeze brilliantly.  I don’t know if I’d let them go longer than about a month, but they will get you through a few weeks of breakfasts nonetheless.

This slideshow requires JavaScript.

Many thanks to Gosh, that’s so vegan for the inspiration on the muffins.  I was all pumpkin’d out and pears hit the spot.

Wahoo! Ride ’em Cowboy Cookies [Vegan]

Today is Saturday and that means football!  These are a tailgating favorite.  You could dump just about anything you wanted into these in terms of chip, or chip-like substance.  Sub different flavored chocolate chips, use toffee chips, peanut butter chips if you like (the later will flip your cookies from vegan to vegetarian).  I like these because they come together in a flash and the only person that I’ve found that doesn’t like ’em is my friend Andrea and that is because she is allergic to coconut (which is a horrible thing to be allergic to).  I scooped a few out before the coconut so she wouldn’t miss out 😉Image

photo:  Hell Yeah It’s Vegan

Ingredients
  • 2 c unsweetened shredded coconut
  • 1½ c vegan butter
  • 1½ c granulated sugar
  • 1½ c light brown sugar
  • 1/2 c applesauce (this subs for your egg and oil)
  • 1 Tbsp vanilla
  • 3 c flour
  • 1 Tbsp baking powder
  • 1 Tbsp baking soda
  • 1 Tbsp ground cinnamon
  • 1 tsp salt
  • 3 c vegan chocolate chips, Ghiradelli brand is accidentally vegan
  • 3 c rolled oats
  • 2 c chopped pecans, toasted
Instructions
  1. Preheat oven to 350°.
  2. Measure coconut into a small bowl and stir in 1 tbsp warm water and 2 tbsp sugar; set aside.
  3. In a large bowl, whip the butter until fluffy, add sugars and cream together until smooth.
  4. Add applesauce and vanilla and beat.
  5. In a medium bowl, sift together the flour, powder, soda, and spices.
  6. Add to wet ingredients and beat until well mixed.
  7. Fold in the coconut, nuts, oats and chocolate chips until evenly distributed.
  8. Use an scoop to form balls of dough for jumbo cookies, and flatten slightly.
  9. Bake on greased sheets for 10-12 minutes, or until golden.

Adapted from Hell Yeah It’s Vegan and Vegan Cookies Invade the Cookie Jar by Isa

Vegan Lemon Blueberry Yogurt Bread

I’m a Pinner.  I love Pinterest for recipes among many other random things.
Not only do veg/vegan recipe creators have a wicked presence on Pinterest, all of the nonveg/nonvegan recipes just beg to be converted, so I take that as a personal challenge.  This recipe for example was vegetarian, contained hen’s eggs and moo-cow whole milk yogurt.  I just subbed the regular vegan swaps and it came out delish.  So much so I took it to my family reunion where every one thinks I sustain life being vegan-ish on grass and dirt.  Not so family, not so.  Show everyone how normal we are by serving this at your next gathering.
For the Loaf:
  • 1 1/2 C + 1 T all-purpose flour, divided
  • 2 tsp baking powder
  • 1/2 tsp kosher salt
  • 1 C soy yogurt (I used passionfruit flavor)
  • 1/2 C sugar (increase to 1 C if you are using nonflavored yogurt)
  • 3 flax eggs (1 T ground flax seed, 3 T water)
  • 3 tsp grated lemon zest (approximately 2 lemons)
  • 1/2 tsp pure vanilla extract
  • 1/2 C vegetable oil
  • 1 1/2-2 C fresh blueberries, picked through for stems
 
For the Lemon Syrup:
  • 1/3 C freshly squeezed lemon juice
  • 1/3 C sugar
For the Lemon Glaze:
  • 1 C confectioners’ sugar, sifted
  • 2 to 3 T fresh lemon juice
 
Directions:
1.       Preheat the oven to 350 degrees F. Grease bottom and sides of one 9 x 5-inch loaf pans; dust with flour, tapping out excess.
2.      In a medium bowl, sift together flour, baking powder and salt; set aside.
3.      In a large bowl, whisk together the soy yogurt, sugar, flax eggs, lemon zest, vanilla and oil. Slowly whisk the dry ingredients into the wet ingredients. In a separate bowl, mix the blueberries with the remaining tablespoon of flour, and fold them very gently into the batter.
4.      Pour the batter into the prepared pan and bake 50 to 55 minutes, or until a toothpick inserted in the center of the loaf comes out clean. Let cool in the pans for 10 minutes before removing loaf to a wire rack on top of a baking sheet.
5.      While the loaf is cooling, make the lemon syrup in a small saucepan over medium heat. Stir together the lemon juice and sugar until the sugar is completely dissolved. Once dissolved, continue to cook for 3 more minutes. Remove from the heat; set aside.
6.      Use a toothpick to poke holes in the tops and sides of the warm loaf. Brush the top and sides of the loaf with the lemon syrup. Let the syrup soak into the cake and brush again. Let the cake cool completely.
7.      To make the lemon glaze, in a small bowl, whisk together the confectioners’ sugar and 2-3 tablespoons of the lemon juice. The mixture should be thick but pourable. Add up to another tablespoon of lemon juice if the mixture is too stiff. Pour the lemon glaze over the top of each loaf and let it drip down the sides. Let the lemon glaze harden, about 15 minutes, before serving.
8.      This made quite a bit of batter.  You might consider dividing it into 2 smaller loafs depending on the size of the blueberries you mixed into your batter to avoid spillover in the oven, which is precisely what happened to my first loaf.
Yields: 1-9×5 loaf; or 2 smaller loaves
Adapted from:  Riches to Rags

Peach Pie

Fruit this summer was super duper expensive in Michigan due to premature 90-degree days in April followed by a super freeze that was experienced which sadly killed most of the premature fruit buds.  Michigan produces 70-75% of US cherries and this year, crop was at a loss of more than 90%.  This of course put a premium on fruit including blueberries, cherries, peaches, nectarines, apricots, apples, well you get the idea, Michigan produces a ton of fruit.

While in Hart for a Girls Get-a-Way, I was lucky enough to grab a bag of Starfire peaches and nectarines which cost me a pretty penny, but the sweet treat was WELL worth the premium.  I crammed most of them in my face over the first two days, then let the last of the fruit ripen over the course of the week.  Today, I made a simple peach pie so no peach was left behind.

  • One nine inch pie crust, Pillsbury (accidentally vegan)
  • 2/3 cup sugar
  • 1/3 cup flour
  • 1/4 teaspoon ground cinnamon
  • 7 cups fresh sliced peaches, 7 or 8 medium peaches
  • 1 teaspoon lemon juice
  1. Preheat oven to 425 degrees.
  2. Put pie crust in nine ince pie plate. Prick crust with a fork to prevent bulles during baking and flute edges.
  3. Mix sugar, flour and cinnamon in large bowl.
  4. Stir in peeled and sliced peaches and lemon juice.
  5. Pour into pie plate. Put foil around edges of pie to prevent burning. Remove the foil during the last 8 minutes of baking.
  6. Bake about 45 minutes or until the filling is bubble and the crust in golden brown.
  7. Let set for 30 minutes before serving.

This slideshow requires JavaScript.

Winning the Zucchini War

The zucchini from two CSA’s and and Doorganics has nearly won.  I struck back today making a double batch of vegan zucchini bread.  Nice try zucchini.

  • 3 Tbs ground flax seed
  • 1/2 C water
  • 1/2 C canola oil
  • 1/2 C unsweetened applesauce
  • 1 Tbs white distilled vinegar
  • 1 1/2 C granulated sugar
  • 2 C grated zucchini (about 1 medium zucchini)
  • 2 tsp vanilla extract
  • 3 C flour
  • 2 tsp cinnamon
  • 1/2 tsp nutmeg
  • 1 tsp baking soda
  • 1/4 tsp baking powder
  • 1 tsp salt
  • 1 C chocolate chips (Ghirardelli’s semi-sweet chips are accidentally vegan)

DIRECTIONS:

Preheat oven to 325. Lightly grease two 8x4x2″ loaf man, 4 mini loaf pans or 2 muffin tins. In a mixer, combine the flax meal and water and blend until thickened.  This is your “egg” portion of most recipes.  Add the oil, vinegar, and sugar, and combine. Stir in the zucchini and vanilla.

In a separate bowl, combine the flour, cinnamon, nutmeg, baking soda, baking powder, and salt. Add chocolate chips. Stir the entire bowl to make sure no dry areas are left.  This is quite a bit of batter.  Divide the batter evenly into the two loaf pans (or pans of choice) and bake for 60-70 minutes. (40-45 mins for mini loaves; 30-35 for muffins).

This slideshow requires JavaScript.

I snuck in a picture of the cutest Bagel in the world, Walter too.  He was sleepy after a vegan treat.

Recipe adapted from Epicurean Vegan

Vegan Black Bean Brownies

These vegan brownies are gluten free, vegan and totally delicious. They taste like any other brownie you may have met, except have a more complex and deep taste associated with the chocolate, almost a savory sweet.  They are also not dry, which is more than I can say for most other brownies I’ve experienced of the non-veg variety.  This is another one of those recipes that you may as well just double and bake off another batch for the masses.  They freeze well and keep in the fridge for a long time so you can enjoy them longer.

Ingredients

  • 1/3 of a 15 oz. can black beans, drained and rinsed (about 1/2 cup)
  • 1 flax egg (1 T flaxseed meal + 2.5 T water)
  • 1 T coconut oil (or other oil)
  • scant 1/4 cup cocoa powder
  • dash salt
  • 1/2 t vanilla
  • 1/4 c granulated sugar
  • 1/2 t baking powder
  • heaping 1/2 t finely ground espresso powder or instant coffee granules
  • 1/4 c semisweet chocolate chips (dairy free for vegan)*

Instructions

  1. Preheat oven to 350 degrees. Lightly grease 6 muffin tins. Prepare flax egg by combining flax and water in small bowl and letting it rest for 3-5 minutes. Combine black beans through instant coffee in a food processor (sift in sugar if clumpy) and puree. Then stir in chocolate chips. Pour batter into muffin tins and smooth the tops with a spoon. Bake for 17 minutes or until tops are dry and starting to pull away from the sides. Let cool for 30 minutes before removing from pan (I baked mine in cupcake papers so I didn’t have to mess with clean up and I baked another batch in mini cupcake tin form).

*PETA happens to have a very good/searchable data base on their website for vegan products to sub for regular products.  I understand they are polarizing but they also have the mad money to make tools that are incredible for people searching for animal safe items.  Despite the fact that they sell half shirts still (thanks Pamela Anderson), I really like the info they have available on their site.  If you just can’t bring yourself to check out the tools, typically you can find Ghiradelli Chips at the grocery store which are accidentally vegan.

Recipe courtesy:  Dana Schultz

Happy Birthday to Me! Vegan Cupcake Recipe for YOU!

In honor of my birthday today (36 is the new 26), a vegan cupcake recipe for your nom nom pleasure.

Vegan Chocolate Cupcakes

  • 3 C all purpose flour
  • 2 C white sugar
  • 6T cocoa powder
  • 2 tsp soda
  • 1 tsp salt
  • 3/4 C vegetable or canola oil
  • 2 T white distilled vinegar
  • 2 tsp vanilla extract
  • 2 C cold water

Preheat oven to 350 degrees (F).

Sift the dry ingredients together into a large mixing bowl.  Gently add the wet ingredients to the dry ingredients until just combined.

Scoop out 1/4 C batter into cupcake wrappers.

Bake 350 x 12-16 minutes depending on your oven.  My batches all averaged about 15 minutes in a conventional gas oven.

Let cool and frost with your fave vegan frosting or Pillsbury chocolate frosting (both dark and milk chocolate varieties are accidentally vegan).

This slideshow requires JavaScript.

Thank you to my friends Jon Dunn and Kolene Allen of VeganGR for sharing this recipe with me.

No Pudge Brownie Knock Off

I get these cravings sometimes that only a fudgie and delicious homemade brownie cure.  Mr. Wonderful and I are trying to be more calorie consciensous so, here is a knock off of a low fat, lower sugar brownie that still tastes like heaven and a lot like the No Pudge name brand brownie but without all the weird ingredients you can’t pronounce.  After a tour of the Interwebs, I created this from the collaboration of many other recipes.  Thank you to everyone that came before me, needing a fudge fix.
No Pudge Brownies
  • 3/4 – 1 cup sugar (don’t use a substitute here, you will regret it-they fall flat)
  • 1/4 cup brown sugar packed
  • 3/4 cup flour
  • 1/2 cup cocoa
  • 2 teaspoons cornstarch
  • 1/4 teaspoon baking soda
  • 1/4 teaspoon salt
  • 2/3 cup non-fat greek yogurt (a 6 oz. container, I used Chobani Pomegranate)
  • nonstick cooking spray
  1. Preheat oven to 350°F.
  2. Mix all dry ingredients.
  3. Add yogurt and mix well.
  4. Batter will be very thick.
  5. Spray an 8×8 pan with nonstick cooking spray.
  6. Spread batter evenly.
  7. Bake for 20-25 minutes.  Or until a toothpick comes out clean.  DO NOT OVERBAKE.
  8. Remove and cool.
  9. Dip a knife in warm water and cut into 16 squares.
This batter is SUPER thick.  I had to spread mine into the pan with greased hands.   The results though, are amazing!  Trust me!

This slideshow requires JavaScript.

Shhhh, it’s a Peanut Butter Secret

So I’m calorie counting.  And frankly, it’s horrifying.

Not what I’m eating now so much as how much I was probably eating when I wasn’t keeping track of things so well.  I mean it’s pretty easy for me to put away a bottle of wine without even flinching, you know while I’m inhaling an entire cheese plate at Greenwell during happy hour BEFORE I even order dinner, which I would likely eat in its entirety.   This behavior, plus LOVE, security and stability, has caused me to gain 35 pounds in about a year.  For those of you keeping track is like 2-3 chicky jean sizes, officially outing me from the bikini category which I was barely one cheek in to begin with.

No wonder America is fat.  Food in America is DELICIOUS!  Food in America is LARGE.  I’ve read all the books, done all the research, but all that I will leave for another blog post.  My point is this….if you are a chronic dieter (i.e. probably if you are female and breathing), you are probably trying to figure out how to get your sweet fix without breaking the calorie bank.  To you I say, let me introduce you to my friend Katie.  As in “Chocolate-Covered Katie“.  I know, I know….you just looked at the first page of her blog, from the link and you hate her already.  I don’t blame you.  She is, in fact, so effing sweet and cherub-like that she didn’t even realize that basically she has given herself a stripper name for a “brand.”  To add to the hatred, she has also, managed to create treats that don’t taste like shit even though they are sometimes made from things like dates which youare all now Googling, because they are so healthy you have never eaten one…and lastly, she’s thin.  BITCH!

For a long time I too hated Katie, in fact avoided her cutesy stories, so-so food photography, her sinfully dreamy recipes, and general cheerleader rah-rah…that is until I ate her Peanut Butter Secrets.  The rest is history.  Go ahead, eat a handful of these and bookmark her website.  Do it.  You must like her.  You really have no choice now.

  • 1/2 cup peanut butter
  • 3/4 tsp baking soda
  • 3 T whole-wheat pastry flour (or white or a gf mix)
  • 1/4 cup sugar (for sugar-free cookies, see below link)
  • 2 T brown sugar
  • 2 T applesauce
  • 1/2 tsp pure vanilla extract

Mix dry ingredients very well. Then add wet stuff and form cookie balls. If you want soft cookies, refridge the dough for at least an hour. Then bake in a preheated oven (350F) for 7-8 minutes. They’ll look underdone when you take them out, but that’s ok. Let cool for at least 5 minutes before removing from tray.  If you don’t refridge the dough, check the cookies in 5 minutes and probably take them out at about 6 minutes.

If you are keeping track…rolling out 22 cookies hits you at 50 calories a piece (according to Katie).  I rolled out 44 little cuties and baked them for 5 minutes each.  Perfect.  Vegan.  YUM!

This slideshow requires JavaScript.

Lovingly adapted from Chocolate-Covered Katie.

Vegan SIN-amon Rolls

This slideshow requires JavaScript.

I wasn’t sure if I should share this recipe or just keep it to myself so I alone look amazing when I waltz into a potluck brunch with these babies in tow.  Alas, I want to eat them more often, so I thought if I can get this out there to my vegan friends, they also would develop a mild addiction and want to make them frequently as well thereby getting them into my face more often.

I’ve had this cookbook Vegan Brunch on my bookshelf FOREVER, and never even cracked the binding.  Honestly, when is the last time you attended a brunch?  Yeah, me either.  A few months ago however, my friends Kolene and Jon hosted, you guessed it, a VEGAN BRUNCH!  I made curried tofu scramble, but Jon….he made these rolls and probably other delicious things-but THESE I was frankly obsessed with and had to get more of.  When I asked for the recipe he directed me to Vegan Brunch, you know the book collecting dust on my shelf.  I went home and made them that night, pigged out on them at midnight with Mr. Wonderful, then brought a batch to work the next day (the recipe made a TON of rolls) to test on my coworkers.  In case you were wondering how to score serious favors at work for a while, bake cinnamon rolls in your office kitchen, then serve them to your friends.  They become even more helpful in their sugary comas.

Caution, these take a while to make.  You are MAKING cinnamon rolls-like “from scratch”, not just baking them off from the frozen food section at Meijer, so there are steps involved.  Do not skip them, do not rush them.  And by all means….MEASURE, this is baking, you know…like chemistry and crap, so you need to be precise.  If you haven’t worked with yeast before, check out this link to keep you from throwing in the towel prematurely.

Dough

  • 2-1/4 tsp active dry yeast
  • 1/3 c sugar + 1 tsp sugar
  • 1/2 c lukewarm water
  • 3/4 c non-dairy milk, room temperature (I used coconut milk)
  • 1/3 c canola oil
  • 3/4 tsp salt
  • 1 tsp ground cinnamon
  • 1 tsp ground nutmeg
  • 3 1/4 – 4 c flour

Filling

  • 1/4 c brown sugar
  • 1/4 c white sugar
  • 1 T ground cinnamon
  • 2 T flour

To roll

  • 1/4 c Earth Balance (soy margarine, non-hydrogenated)
  • also, a great deal of patience and an uncluttered work space

Icing

  • 1 C powdered sugar (10x)
  • 1-1/2 – 2 T non-dairy milk (I used coconut milk here too)
  • 1 tsp vanilla extract

Proof yeast by putting yeast into half the lukewarm water with the 1 tsp of sugar. Let sit, make sure it bubbles so you know your little organisms are hungry, alive and well.  Mix the rest of the dough ingredients together, add proofed yeast mix. Knead for 5 minutes. Place in an oiled bowl and let rise 1 hour. Punch the dough down and let rest 10 more minutes.

Make the filling (mix together ingredients above for filling).

Roll out dough to 12″ x18″ (or whatever you get frankly-mine was a little larger) on a floured clean, flat surface. Sprinkle filling over the dough evenly, dot with small chunks of the Earth Balance.

Roll from the long side. Go slowly and get it as tight as possible.  This for me is the most difficult part. I can’t even roll up my yoga mat without having it all cock-eyed, so this dough rolling part is torture for me.  Do the best you can.  When they bake, no one will know you had edges that were not perfect as they will be too busy cramming the final product into their pie-holes.

Oil or spray any kind of pan you like really. I used two pie plates so I could bake one now, and take one to work in an unbaked state later. Cut the roll into half to one inch pieces pieces and place close together in the prepared pan. I used dental floss to cut through the dough so that I didn’t smash the dough.

Cover with towel, let rise for 30-45 minutes in a warm location. I usually put it on the stove, above the pilot lights.  These can also be stored in the fridge overnight without losing any of the yumminess to be baked off the next morning, just cover in plastic wrap. The next morning when you are preheating the oven (below) leave on the counter until they hit just about room temp.

Preheat oven to 375 degrees. Bake 18-2o minutes-the smaller your rolls when they go in, the less time you need, check them regularly to make sure they aren’t burning, they should be lightly browned. Make icing while it bakes.

Drizzle with the icing as soon as you remove from the oven.

Adapted from Vegan Brunch by Isa Chandra Moskowitz.

Featured on The Mode Life.

Bonus Find: One Minute Chocolate Cake

image

I’m not going to talk…just gonna give this to you.  Make it.  You’re welcome.

Via Chocolate Covered Katie

  • 1 tablespoon plus 2 tsp cocoa powder
  • 3 tablespoons spelt flour (or white, or even coconut or peanut flour)
  • 1/8 tsp salt
  • 2 tsp sugar
  • 1/4 tsp baking powder
  • 1 stevia packet (or 1 more tablespoon sugar)
  • 1 tablespoon mashed banana or applesauce
  • 3 tablespoons almond milk
  • 1/4 tsp pure vanilla extract

Combine dry ingredients and mix very, very well. Add liquid, stir, then transfer to a little dish, ramekin, or even a coffee mug. Microwave 30-40 seconds. If you don’t want to eat it straight out of the dish, be sure to spray your dish first (and then wait for it to cool before trying to remove it).

Gluten Free Vegan Banana Oat Cake

I work in a diet-diverse office, mostly omnivores; however, I have one gluten free coworker, a dairy free coworker, a vegan coworker and me, a vegetarian dabbling in the world of veganism.  Every now and again, I find a recipe on  a blog or try to veganize something and can usually hit on most of the dietary restrictions, but this cake hits on ALL!  Even the lady that hates peanut butter, liked this cake, just omitted the “frosting”.  This recipe credit belongs to Oh, She Glows.  Visit her blog for a smattering of vegetarian and vegan deliciousness.

Cake:

  • 2 cups Bob’s Red Mill Gluten Free regular oats, processed into a flour (locally these are available at Harvest Health & Horrocks perhaps even Meijer)
  • 1/2 cup Bob’s Red Mill Gluten Free regular oats (not processed)
  • 1/2 cup brown sugar, packed firmly
  • 1/2 tsp ground cinnamon
  • 1/8th tsp ground nutmeg
  • 1/16th tsp ground cloves (optional)
  • 1/16th tsp ground ginger (optional)
  • 2 tbsp cane sugar (or regular white)
  • 1 tsp baking powder
  • 1/2 tsp kosher salt
  • 2 tbsp coconut oil, melted (or other light tasting oil)
  • 2 medium very ripe bananas, peeled
  • 1/3 cup applesauce (I used sweetened and backed down the white sugar above)
  • 1/4 cup almond milk
  • 1 tsp pure vanilla extract
  • Fold in: 1/2 cup dark chocolate chips; 1/4 cup walnuts (optional), chopped; 1 ripe banana, cut into chunk

Preheat oven to 350F and lightly grease a 8 inch (4 cup) casserole dish or 8” cake pan. Take 2 cups of regular oats and process them in a food processor until flour like in consistency.

In a large bowl, whisk together the dry ingredients (processed oats, regular oats, sugars, spices, baking powder, and salt).

In another bowl, mix together the oil, applesauce, almond milk, and vanilla. Add in the two peeled bananas and smash into the wet ingredients until smooth.

Add the wet mixture to the dry and stir until just combined. Now fold in the chips, optional walnuts, and the chopped banana.

Spread into prepared pan and bake for 36 minutes at 350F or until a toothpick comes out clean. The cake must be cooled for at least 15-20 minutes before attempting to remove.

Once fully cooled, slice and top with PB Banana Glaze. Store in the fridge for up to 3 days.  I found that this also freezes beautifully.

Frosting:

  • 1 ripe banana (but not too ripe, you still want it solid!)
  • 2 tbsp peanut butter (I used Koeze’s crunchy)
  • 1/2 cup icing sugar, sifted
  • Pinch of kosher salt, to taste

Mash banana in a bowl until smooth. Add in peanut butter and mash until combined. Sift in the salt and icing sugar and stir until fully combined. Makes about 2/3 cup glaze. Store in fridge in a sealed contained for 1-2 days.

This slideshow requires JavaScript.