Category Archives: Quick Cooking

Summer Salad – Roasted Corn & Blueberry

Summer is here! Shut up and eat your fruit and veggies! That is all.

20160723_174312

Salad ingredients:

  • 1 C blueberries, rinsed
  • 6-8 ears corn, roasted and cut off cob (or cut off cob and roasted)
  • 1/3 C red onion, diced finely
  • 1 English cucumber, peeled and quartered
  • 1 can chickpeas, rinsed and drained

Dressing ingredients:

  • 2 T EVOO
  • 2 T honey or agave
  • 1 tsp cumin
  • 1 tsp smoked paprika
  • juice of 6 small limes
  • 1/2 tsp red pepper flakes

Toss ingredients with dressing. Chill. Serve!

Amazing additions to this would be: jalapeno, cilantro, feta, goat cheese, cherry tomatoes! YUM.

Raw, Vegan Peanut Butter Cookies with Sea Salt

You know by now my love affair with Pinterest. This recipe has been pinned for a bit on my Eat board and was long past time to try it. I dare say, you should go check out A House in The Hills blog where this post originated, blogger Sarah has lots of interesting things going on over there.

We have a bit of a peanut butter problem in our home, this hits the spot and is fairly healthy. Also, it doesn’t require you to turn on the oven and in the summer that’s critical in our home. Get your peanut butter cookie fix here:

  • 1 cup of raw almonds – I had 3/4 cup raw almonds in the pantry and supplemented them with 1/4 raw cashews
  • 1/2 cup of peanut butter – I used unsalted, chunky here
  • 1 cup pitted Medjool dates
  • 1 1/4 teaspoons of vanilla extract
  • sea salt to garnish

This slideshow requires JavaScript.

Combine raw nuts, peanut butter, dates and vanilla in your food processor or high power blender until a doughy texture comes together. Sarah recommend that you add more peanut butter if the dough is not sticking together properly. Remember you aren’t baking these babies, so it’s super important that they stick together! After you get the consistency you are striving for form into small balls and use a fork to create the traditional criss-cross mark on top of a baked cookie. Sprinkle with sea salt if you like. Although, I can see where a few chocolate chips might not be such a bad idea here either!

Store these in your fridge or freezer well packaged. Sarah from A House in the Hills says they are better the next day, but I am not sure mine have a shelf life of “the next day.”

Marinated Asian Tofu

I have a pantry full of delish Asian ingredients which I use to make varied marinades, dressings, etc. You would be shocked how great chickpea miso, oil, vinegar and some Sriracha sauce are as a salad dressing in a pinch. The ingredients are flexible, tasty and many of them vegan. This weekend we got together with Chef Dewicki and Andrea which means amazing food shall be had and this time was no exception. I opted to use all ingredients from my house, meaning no trips to the grocery store which challenges me in a very, very good way. Taking a cue from a recipe I’ve been eyeballing over on Pinterest, here is a marinated tofu recipe that I dropped atop peanut noodles and then added grilled veggies and roasted Urban Mushroom CSA goodies from their last delivery for a quick pasta salad.

This slideshow requires JavaScript.

Marinade:

  • 1 tsp Ume plum vinegar
  • 3-4 T low sodium soy sauce
  • 1 tsp rice wine
  • 1 glug maple syrup, use agave or other favored sweetener here if you want
  • 1 T nonflavored oil, I used canola
  • 1 T chopped garlic
  • 1/2 tsp powdered ginger
  • 1 tsp roasted sesame oil
  • 1 1/2 tsp Sriracha
  • 1 tsp water

Whisk all ingredients together in a medium bowl. Drop in your pieces of tofu or tempeh, let soak for about 20 minutes, turning once at 10 minutes to cover all pieces. As I was roasting mushrooms anyway, I put the tofu pieces on a foil-covered roasting pan in the oven with the excess sauce at 375 for about 40 minutes. You want it firm and cooked, all marinade soaked up, but not dry. So keep an eye on it. I cut up my barely pressed tofu into matchsticks so they roasted pretty quickly. This method yields pretty concentrated flavor in the tofu, so go easy on the seasonings of the salad, wrap, pita or pasta you drop it on as you don’t want to make a salty mistake.

**Roasted mushroom images here to make you a little jealous. Although they would taste super yummy in the marinade too.

Damn You Pinterest

Dear Pinterest,

You are an amazing resource for Vegan/Vegetarian inspiration; however, you are also a time suck. I login to your beautiful user interface bright with photos, inspiration, and photogenic love for a quick recipe and then I emerge 2-4 hours later in a fever wondering what in the hell happened to the last few hours of life.

I do use your helpful advice on how to remove blackheads naturally, and how to hack a mason jar into a dozen beautiful [and helpful] household uses. I absolutely appreciate you showing me stuff to make in my “spare time” whenever I manage to get some of that, giving me ridiculously easy fitness moves I could pull off at home [because you know summer beach bodies are built in the winter], in providing me with “fun and simple” easy-to-sew patterns of clothes I will never be able to make but desperately want to in order to appear “free and breezy” like that romantic tulle skirt you keep teasing me with in my feed, and lastly, the recipes...oh, the recipes. Your communities of recipes suck me in every single time.

This weekend I had something to show for it however, Vegan ‘Caramel’ Truffles [sadly sometimes I do not]. Thank you for loving photos of great vegan eats as much as I do, but damn you for making it so pretty and so helpful to a curious person like myself that I find it difficult to leave. You do relax my mind and that is worth at least $105.00 per hour according to my therapist bill.

Fondly,

Adrienne

This slideshow requires JavaScript.

Simple Chocolate Vegan Ganache

Don’t let your cupcakes go naked, or worse…be slathered in store bought frosting. Use your microwave to whip up a simple tasty vegan ganache. Paired with the best vegan chocolate cupcakes or drizzled you will ever eat or maybe even on PANCAKES, you will wonder why you ever shopped for frosting in the grocery store.

  • 1/2 C vegan semi-sweet chocolate chips
  • 1/2 C nondairy milk of choice (I used almond milk)
  • 2 T sweetener of choice (I used maple syrup)
  • Add-in’s: 1 T cinnamon and/or 1 T espresso powder

Directions: In a microwave safe measuring cup, combine all ingredients except add-in’s. Microwave in increments of 20-30 seconds, until chocolate chips melt. Whisk chocolate chip mixture together until smooth and velvety, then whisk in your desired add-in’s. Refrigerate to set up. When thickened drizzle over cake of choice. I love this recipe best: Vegan Chocolate Cake.

This slideshow requires JavaScript.

Crock Pot Vegan: Sweet Potato, Kale, and Chickpea Soup

And….we’re back! After a few weeks off for bad behavior and a new ACL, I’m glad to be back. I’ve had my eye on this recipe for a few weeks now. It is sweet, savory, smooth and lumpy (in the best chickpea way). It’s sure to keep you full and warm when battling the winter chills. The original recipe calls for farro from Cookie + Kate but since I didn’t have any handy, I grabbed some wheat berries instead which I cooked first on the stove and added toward the end. 


Ingredients
  • 1 large yellow onion, chopped
  • 2 small to medium sweet potatoes, peeled and diced (or butternut squash)-I used a mix of both as I had some cubes frozen from fall.
  • Salt, to taste
  • 2-3 T red Thai curry paste (available in the Asian section at most grocery stores-check to be sure no anchovies or shrimp were sacrificed for your paste)
  • 1 C uncooked farro, rinsed (or 2 C cooked whole grains, like wheat berries, spelt berries or kamut)
  • 6 C vegetable broth (or water flavored with vegetarian bouillon cubes)
  • 1 C coconut milk (from a can-okay to use light)
  • 2 C cooked chickpeas (or one can of cooked chickpeas, rinsed and drained)
  • 1/2 red pepper, finely chopped
  • 1 small bunch of crinkly purple kale or green kale, finely chopped
  • Sriracha to taste, I dropped in 1T
Instructions for crock pot:
Chop and dump. Simple as that. Omit the cooked wheat berries and chickpeas until about an hour before you are going to serve then pop them in the cooker to warm up with the rest of the items. My soup took 6.5 hours in a large crock pot. I used the last hour to add the wheatberries and chickpeas.
Instructions for stove top from Cookie + Kate:
  1. In a large soup pot, heat the oil over medium-high heat.
  2. Stir in the onions, raw sweet red pepper, and sweet potato and a big pinch of salt. Sauté for five minutes, stirring occasionally, until the onions start to soften.
  3. Add the curry paste and stir until the onions and sweet potatoes are coated and the curry is fragrant (about a minute).
  4. Add the farro, if that’s your grain of choice, and six cups of veggie broth or water and bouillon cubes and the coconut milk.
  5. Bring to a boil, then set the timer for thirty minutes, cover the pot and reduce the heat to a simmer.
  6. After thirty minutes, uncover the pot and add the chickpeas. Taste and season with more salt as needed (if it tastes flat, add more). If you chose to use cooked whole grains, add them now. Cover and simmer for another twenty minutes.
  7. Uncover, stir in the kale, add cayenne pepper if desired, and serve.
Notes

Overnight Oats: Date & PB2 Edition

I have a love affair with overnight oats now; however, the first time I tried them I gagged and swore them off for good. That is until I discovered I didn’t care for the soaked chia texture present in so many of the overnight oat recipes, it was NOT the actual oats that I found offensive-just the cha, cha, cha chia. I researched a bunch of recipes and discovered that not all oats are created equal and that I could have oats sans chia without any fretting. From then on, I’ve had auto ship attached to my Amazon.com order for Bob’s Red Mill Oats every 30 days (I prefer the extra thick kind) and a full stomach well past the noon hour if I eat them for breakfast. And really, isn’t that every working girl’s dream? To NOT be STARVING at lunchtime? I think so. There is nothing worse than ravenous pre-noon snacking, binge drinking coffee to fill up your belling and/or a casual noon time stuffing that will put a pooch in your pencil skirt and a frown on your face for the rest of the day. Enough about my body image issues…you are here for the food.

jar of overnight oats with banana

Overnight oats:

  • 4 dates, pitted and sliced
  • 1/3 C whole oats
  • 2/3 C nondairy milk, I prefer almond milk (unsweetened)
  • 1 tsp maple syrup
  • 1 heaping T of PB2
  • 1/8 tsp cinnamon
  • 1 banana, sliced just before you drop it into the oats the next day

The night before, add all ingredients but banana into a jar and place in fridge overnight. Next day, drop in sliced banana, stir and enjoy.

The sandwich so fresh & juicy you eat it over the kitchen sink

Growing up my family didn’t do a tremendous amount of gardening unless it was in the form of flowers, which my mother has always been extremely fond of. The landscaping of our home was meticulous. My grandma however, had a pretty good size garden which was kinda like a neighborhood garden before community gardens were all the rage. She and her neighbors would plant their favorite veggies between the sticky cherry tree and big tire swing, in front of the pine layer separating her home from the IGA, and just beyond the sandbox so that none of us would “go messin’ with it.” The garden made for two things: 1) the most amazing go-cart racing track was formed from its perimeter, and 2) the amount of tomatoes that came from it in August/September was something of the stuff legends are made.

IMG_7875

This is the “grown up” vegan version of the tomato sandwich that we would eat nearly every day in the summer at the peak of tomato season which was comprised of gooey Wonder Bread, Miracle Whip, heavy with salt, and layered with iceberg lettuce and fresh, juicy tomatoes. So messy and heavy that you would have to eat the sandwich over the sink or end up changing your shirt after lunch.

Tomato Sandwich

  • 2 pieces soft vegan bread, toasted lightly
  • 1 medium sized ripe tomato of your choice
  • 2 big knifefuls of Vegenaise, use BBQ flavor if you want it to really make it sing
  • 1 handful, fresh picked greens of your choice, pictured here, arugula

IMG_7874

To assemble: spread Vegenaise on bread, layer tomato slices with arugula, smash and enjoy over the kitchen sink.

Rustic Vegan Kale Salad – Also, VeganMoFo Intro, Yo.

vegan mo fo banner

I have no idea how I could have let this recipe go unpublished from my blog for this long. I keep a recipe blog for selfish reasons really, it keeps all my lovely meals in one place so I’m not concerned with the bookmarking madness that is my Chrome browser. So when I went searching for ‘kale salad’ in my own blog and found not one result I became really upset…at…myself. Damn it self!

This little number is a weekly dinner and lunch staple, so my apologies for letting this one slip through the cracks. I also managed to forgot it’s Vegan MoFo! The Vegan Month of Food where veg bloggers are to unite and blog DAILY about vegan noms [OMG, that won’t be a reality for me, but I will try a few times a week this month]. I VeganMoFo’d in 2010 and 2011, but must have lost my mind in 2012 where I can find no archived MoFo posts. Boo.

Luckily, my good friends at VeganGR guest blogged for me today, so I am just one day behind the daily blog for Vegan MoFo 2013. This recipe comes from Heidi over at 101 Cookbooks. I’ve taken a few liberties to veganize her dish but have stayed true to the taste. Not ready to go vegan on this…keep the cheese, and for God sake butter the bread to make breadcrumbs if you are not vegan.

  • 1 bunch Tuscan kale [really any kale will work here, if you find it tough, be sure to let the lemon dressing do some work on the kale in a bag or bowl for a few hours to soften the texture – you know, if you are serving the queen or something]
  • 2 thin slices country bread, or two handfuls good, homemade coarse breadcrumbs
  • 2 garlic cloves, mashed and minced
  • 1/4 teaspoon kosher salt, plus a pinch
  • 1/4 cup vegan parm or other salty vegan cheese [Not vegan? Hit it hard with Romano-and thank me later.]
  • 1.5-3 tablespoons extra-virgin olive oil, plus additional for garnish [I go lighter on this one adjusting for the lemon juice I net, I hate an oily dressing, I prefer more juice to oil]
  • Zest of one lemon
  • Freshly squeezed juice of one lemon
  • 1/8 teaspoon red pepper flakes, or a few dashes of your favorite hot sauce
  • Freshly ground black pepper to taste

This slideshow requires JavaScript.

  1. Trim the bottom few inches off the kale stems and discard. Slice the kale into 3/4-inch ribbons. You should have 4 to 5 cups. Place the kale in a large bowl.
  2. If using the bread, toast it until golden brown on both sides and dry throughout. Tear into small pieces and pulse in a food processor until the mixture forms coarse crumbs, or crumbs to your liking.
  3. Pound or mince the garlic and 1/4 teaspoon of salt into a paste. Transfer the garlic to a small bowl. Add 1/4 cup cheese, EVOO, lemon juice, lemon zest, pinch of salt, pepper flakes, and black pepper and whisk to combine. Pour the dressing over the kale and toss very well (the dressing will be thick and need lots of tossing to coat the leaves). Let the salad sit for 5 minutes, then serve topped with the bread crumbs, additional cheese, and a drizzle of oil.
  4. This makes the most excellent lunch for DAYS. Also tastes super yummy with some grilled tofu on the side or mixed in. The tangy dressing will more than make up for the blandness of the tofu so no need to marinate the tofu before hand. Perhaps though add a little extra salt to the tofu steaks when grilling them up to round out the taste.
  5. Find Heidi’s original recipe and more kale noms here: 101 Cookbooks.
  6. Wanna get really crazy? Try this with orange juice and orange zest.

VeganGR Blog Take Over Part 2: Quick Sauerkraut

You know you have good friends when they take a veggie gift and your smartass comment about blogging for you and actually do it. So Jon and Kolene over at VeganGR have been the recipient of some ridiculous veggies from my summer surplus…Jon, the resident chef, and Kolene, the photographer came up with Sauerkraut when faced with a do or die cabbage situation a few weeks ago. Here’s what happened, according to Jon:

Faced with an exorbitant amount of cabbage (I mean, A TON of cabbage. See previous post about Adrienne’s gift of 40lbs of veggies), there was only one choice.

Sauerkraut.

Now, let’s be clear about this. I am lazy, and I hate waiting. I also have a mild fear of home fermentation.  Recent attempts at rejuvelac based cheese turned into a science experiment into mold than a delicious vegan chèvre. I am determined to plod on, but until I become the king of producing lactic acid, I needed another solution.

A Google search for “quick sauerkraut” turned up far fewer hits than you’d think. This recipe looked promising, so I went with that.

I didn’t have apple cider on hand, ‘cause like, who does? So I doubled the water. To balance and bring in the sugar I think the cider was intended to, I added a little sweetness. The result was really nice, and the hit of a recent summer barbecue!

Ingredients:

  • 1 T olive oil
  • 1 onion, sliced very thin
  • 1 medium green cabbage, sliced thin
  • 1 ¼ C apple cider vinegar
  • 1 C water
  • 1 T salt
  • 1 tsp caraway seed
  • 2 T sugar

Directions:

  1. Heat oil in pan, and add onion. Cook over medium heat until onion turns translucent.
  2. Add rest of ingredients and bring to a boil. Cook covered over low heat for 30-45 minutes. You want the cabbage nice and tender. Keep an eye on it, you may need to add a little more water.

This slideshow requires JavaScript.

Tempeh, Lettuce, Tomato Sandwiches (TLT)

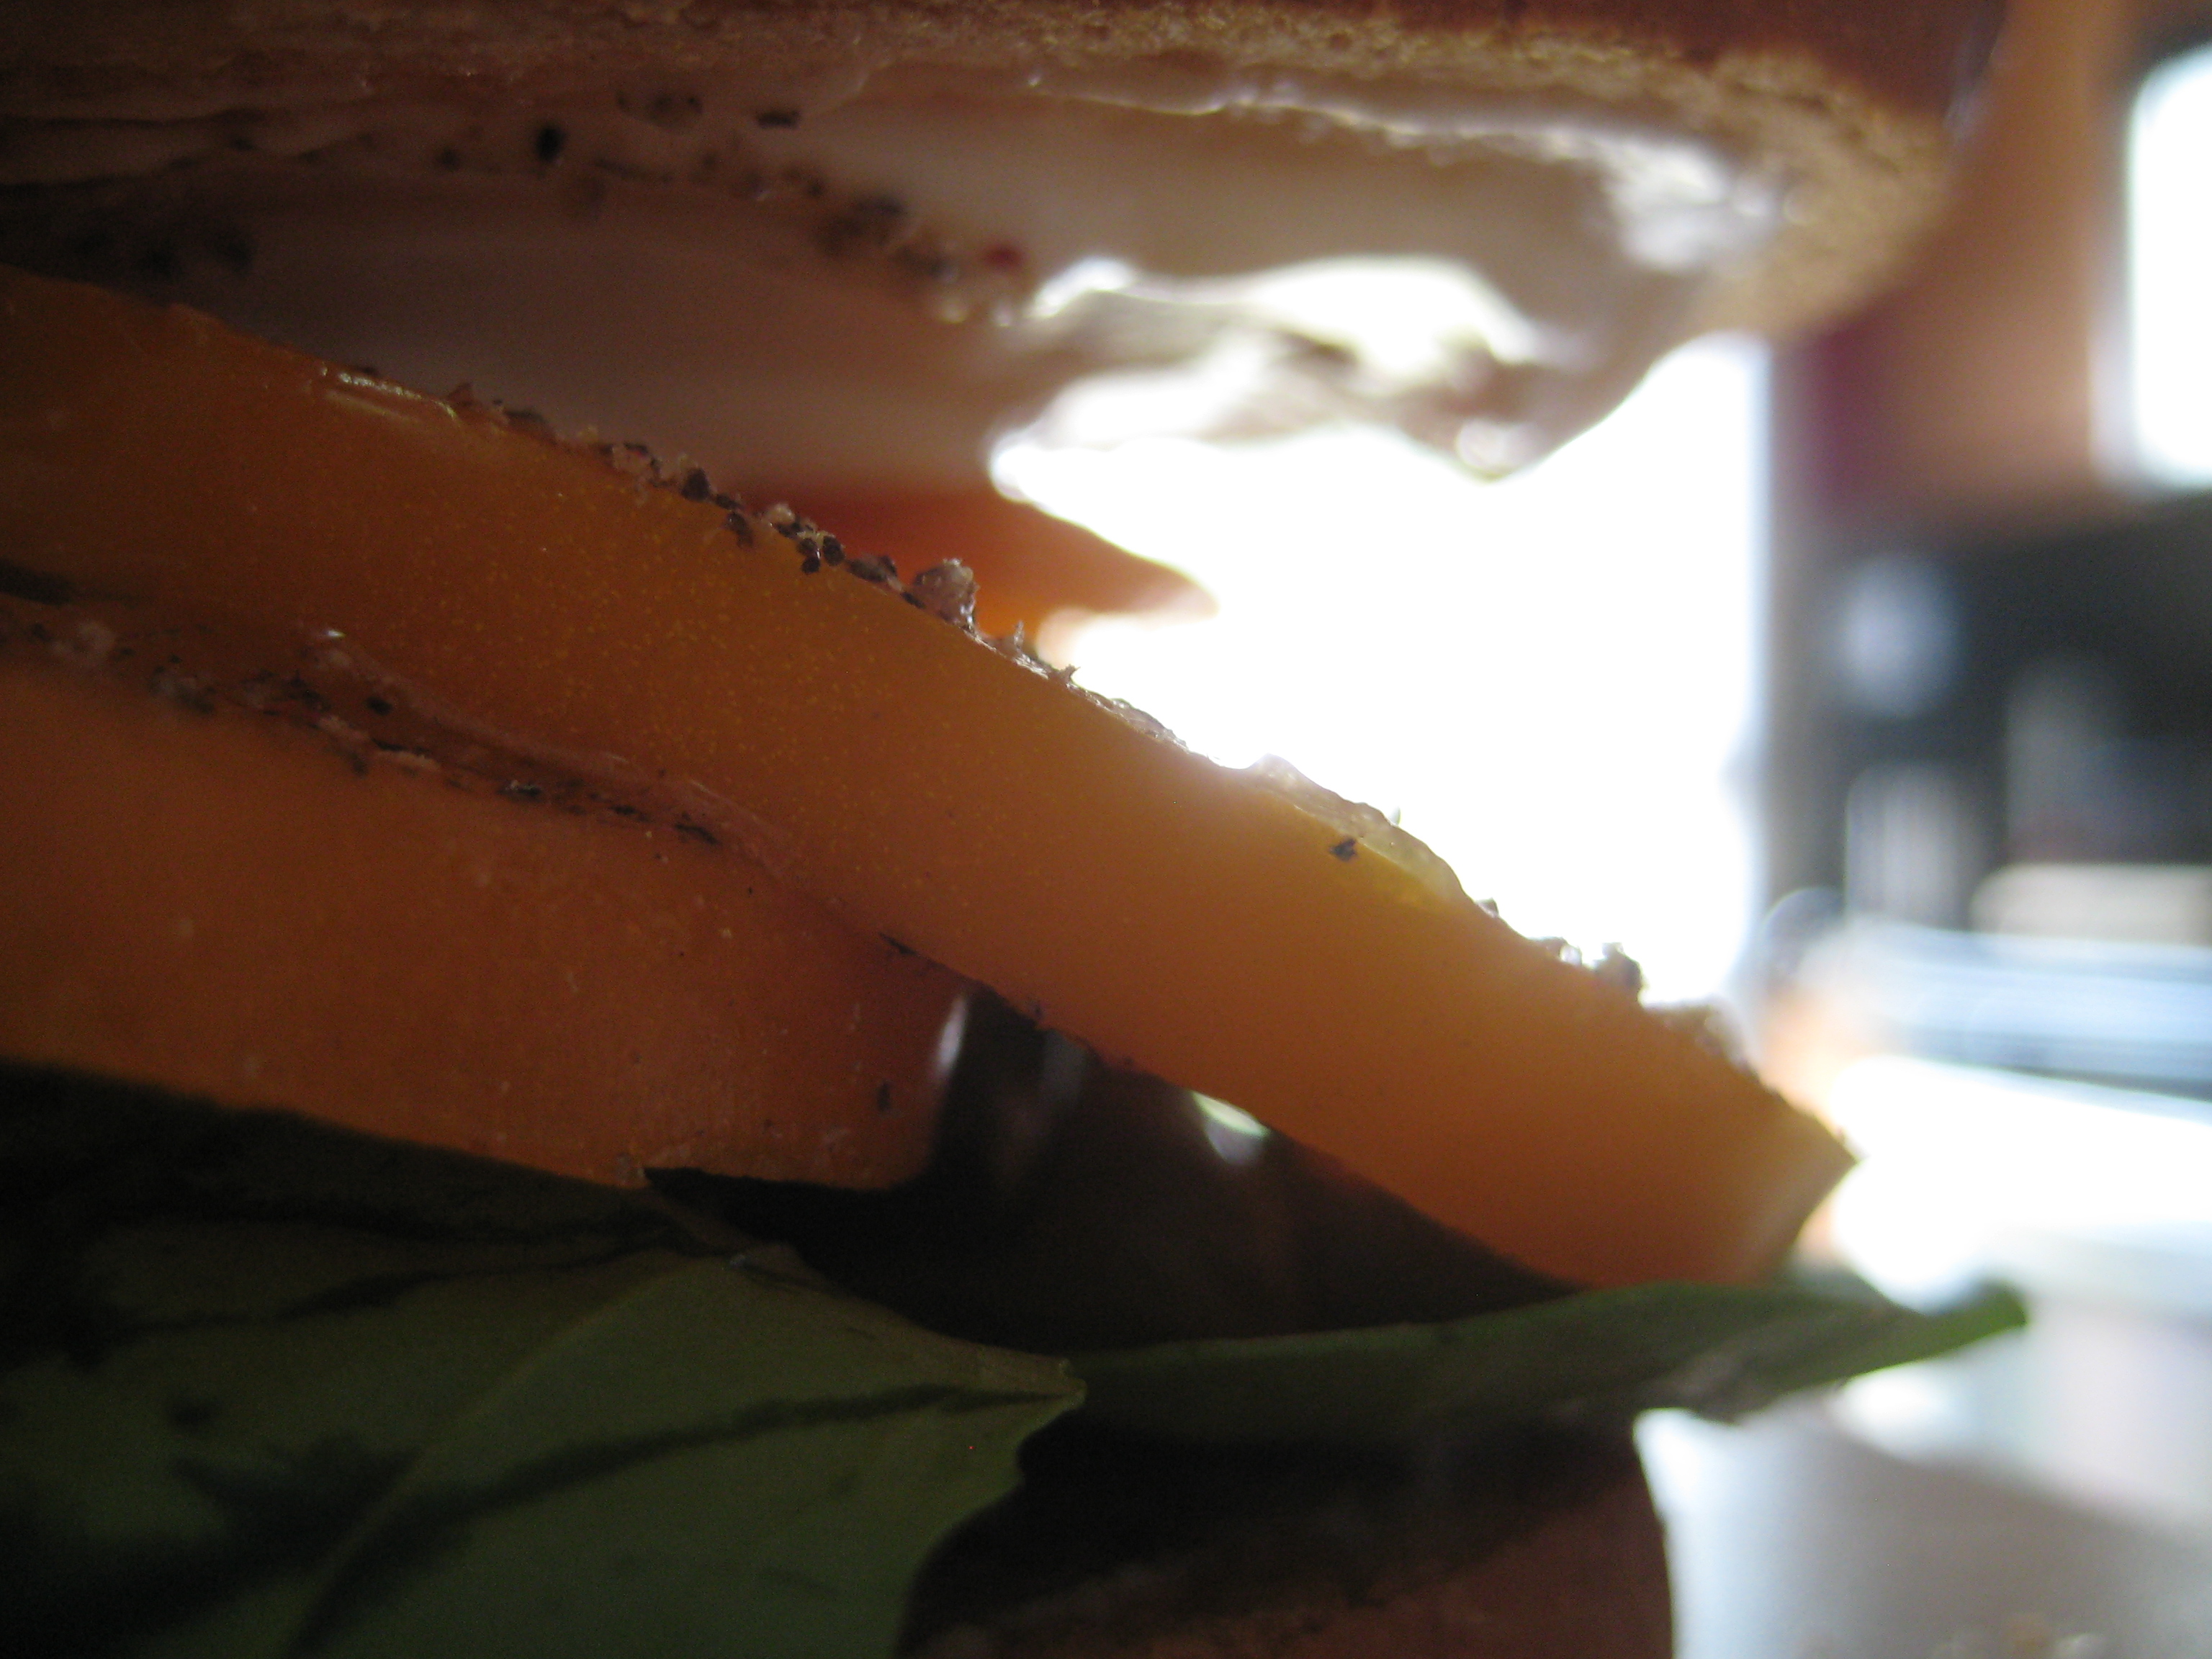
THE sandwich we eat just about once a week in the summer…sometimes more frequently 🙂 I’ll let the recipe do the talkin’ this time.

Thanks to 101 Cookbooks for the base recipe.

1/4 C soy sauce
2 T balsamic vinegar, I use Tangerine flavored
2 T pure maple syrup
3 T adobo sauce from a can of chipotle peppers

8 ounces of tempeh, cut into 1/3-inch thick strips

1 small basket of cherry tomatoes (2 cups)
1/4 C extra-virgin olive oil olive oil
1 T pure maple syrup
scant 1/2 teaspoon of salt

1 small head of romaine lettuce, cored, then cut into 1/4-inch ribbons
1-2 large avocados, mashed with a pinch of salt just before assembling
4 or 8 extra-thin slices of hearty whole grain bread, well toasted

Preheat oven to 350F degrees.

Whisk together the soy sauce, balsamic vinegar, maple and adobo sauce. Pour 1/3 of the tempeh marinade into an 8×8 baking dish (or something comparable) – you want a dish that is just big enough to hold the tempeh in a single layer – this way it will be fully enveloped by the marinade. Pour the remaining marinade over the top of the tempeh, cover and keep in the refrigerator for a couple hours, overnight or until ready to use.

While the tempeh is marinating, go ahead and roast the tomatoes. Cut each tomato in half and arrange them in a large oven-proof baking dish. Mix together the olive oil, sugar, and salt and pour this over the tomatoes. Gently toss them a bit, making sure they all get coated, finishing with each tomato facing cut-side up. Place in the oven and bake for 45 minutes or so, until the tomatoes are shrunken and sweet [I have also left them whole with no consequence].

When the tempeh is done marinating heat a large pan over medium-high heat and cook the tempeh slices for a few minutes on each side. You may need to do this in batches if you don’t have a big enough pan. Set the tempeh slices aside until you are ready to assemble the sandwiches.

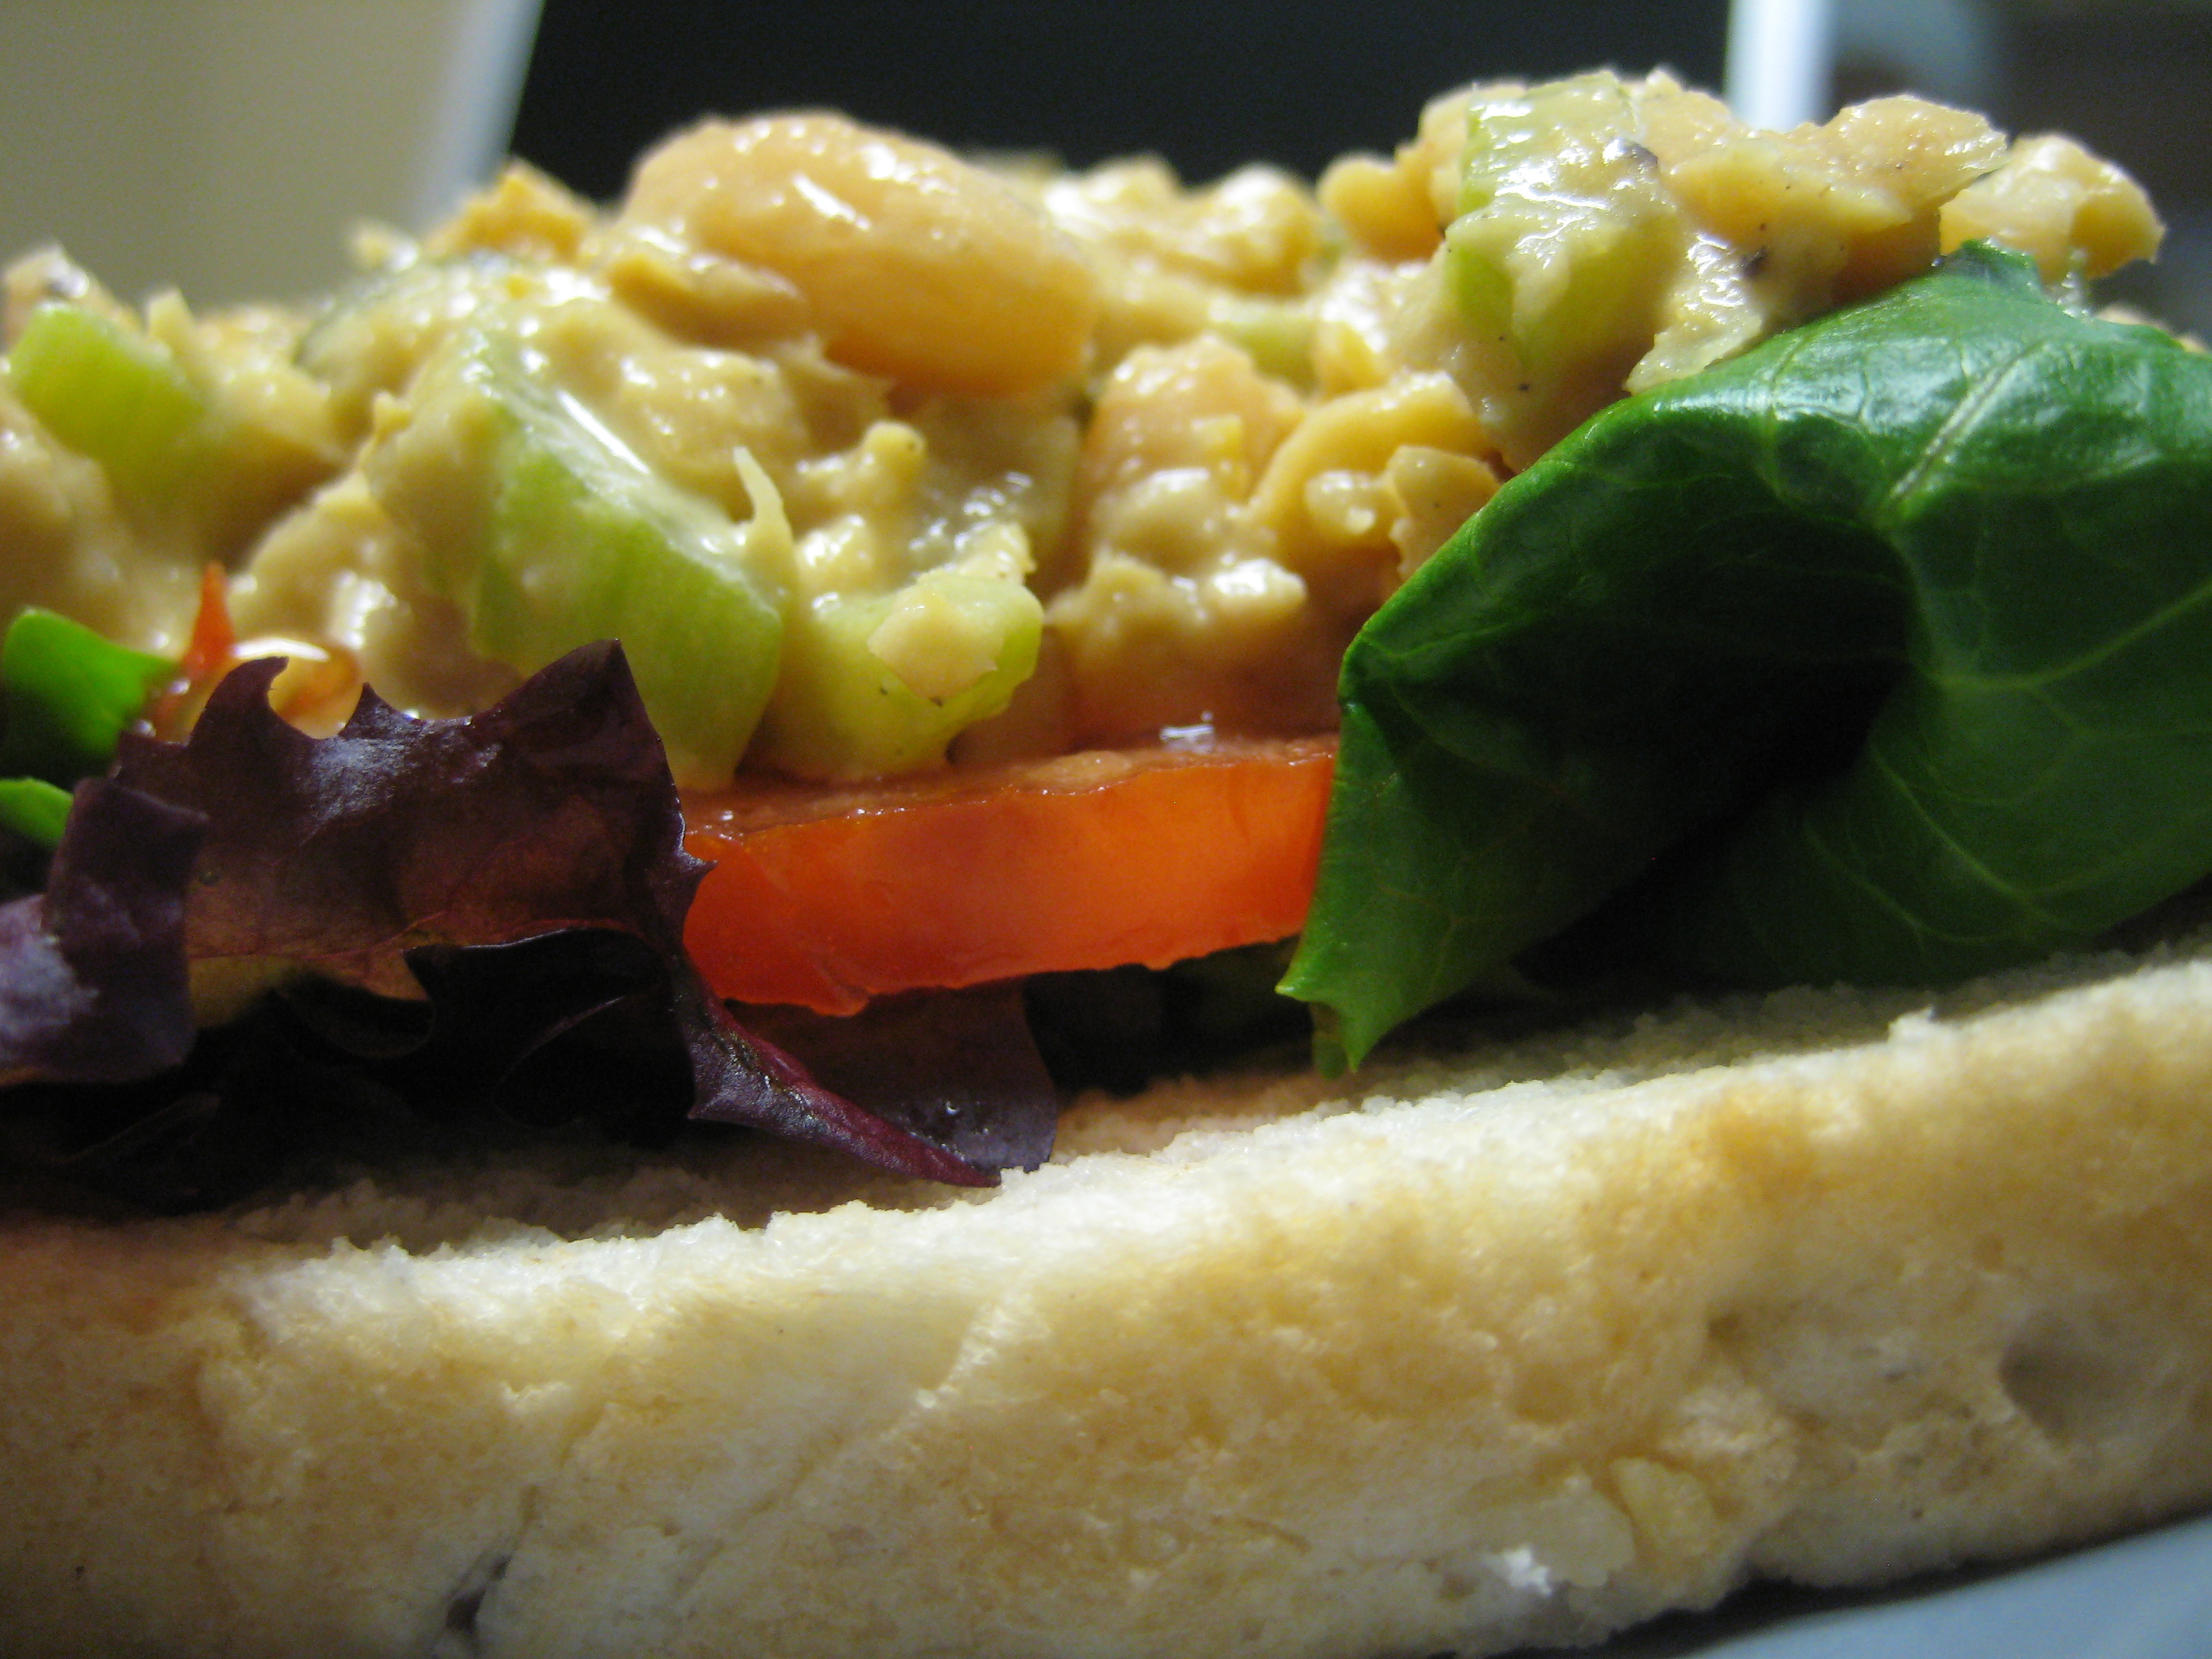
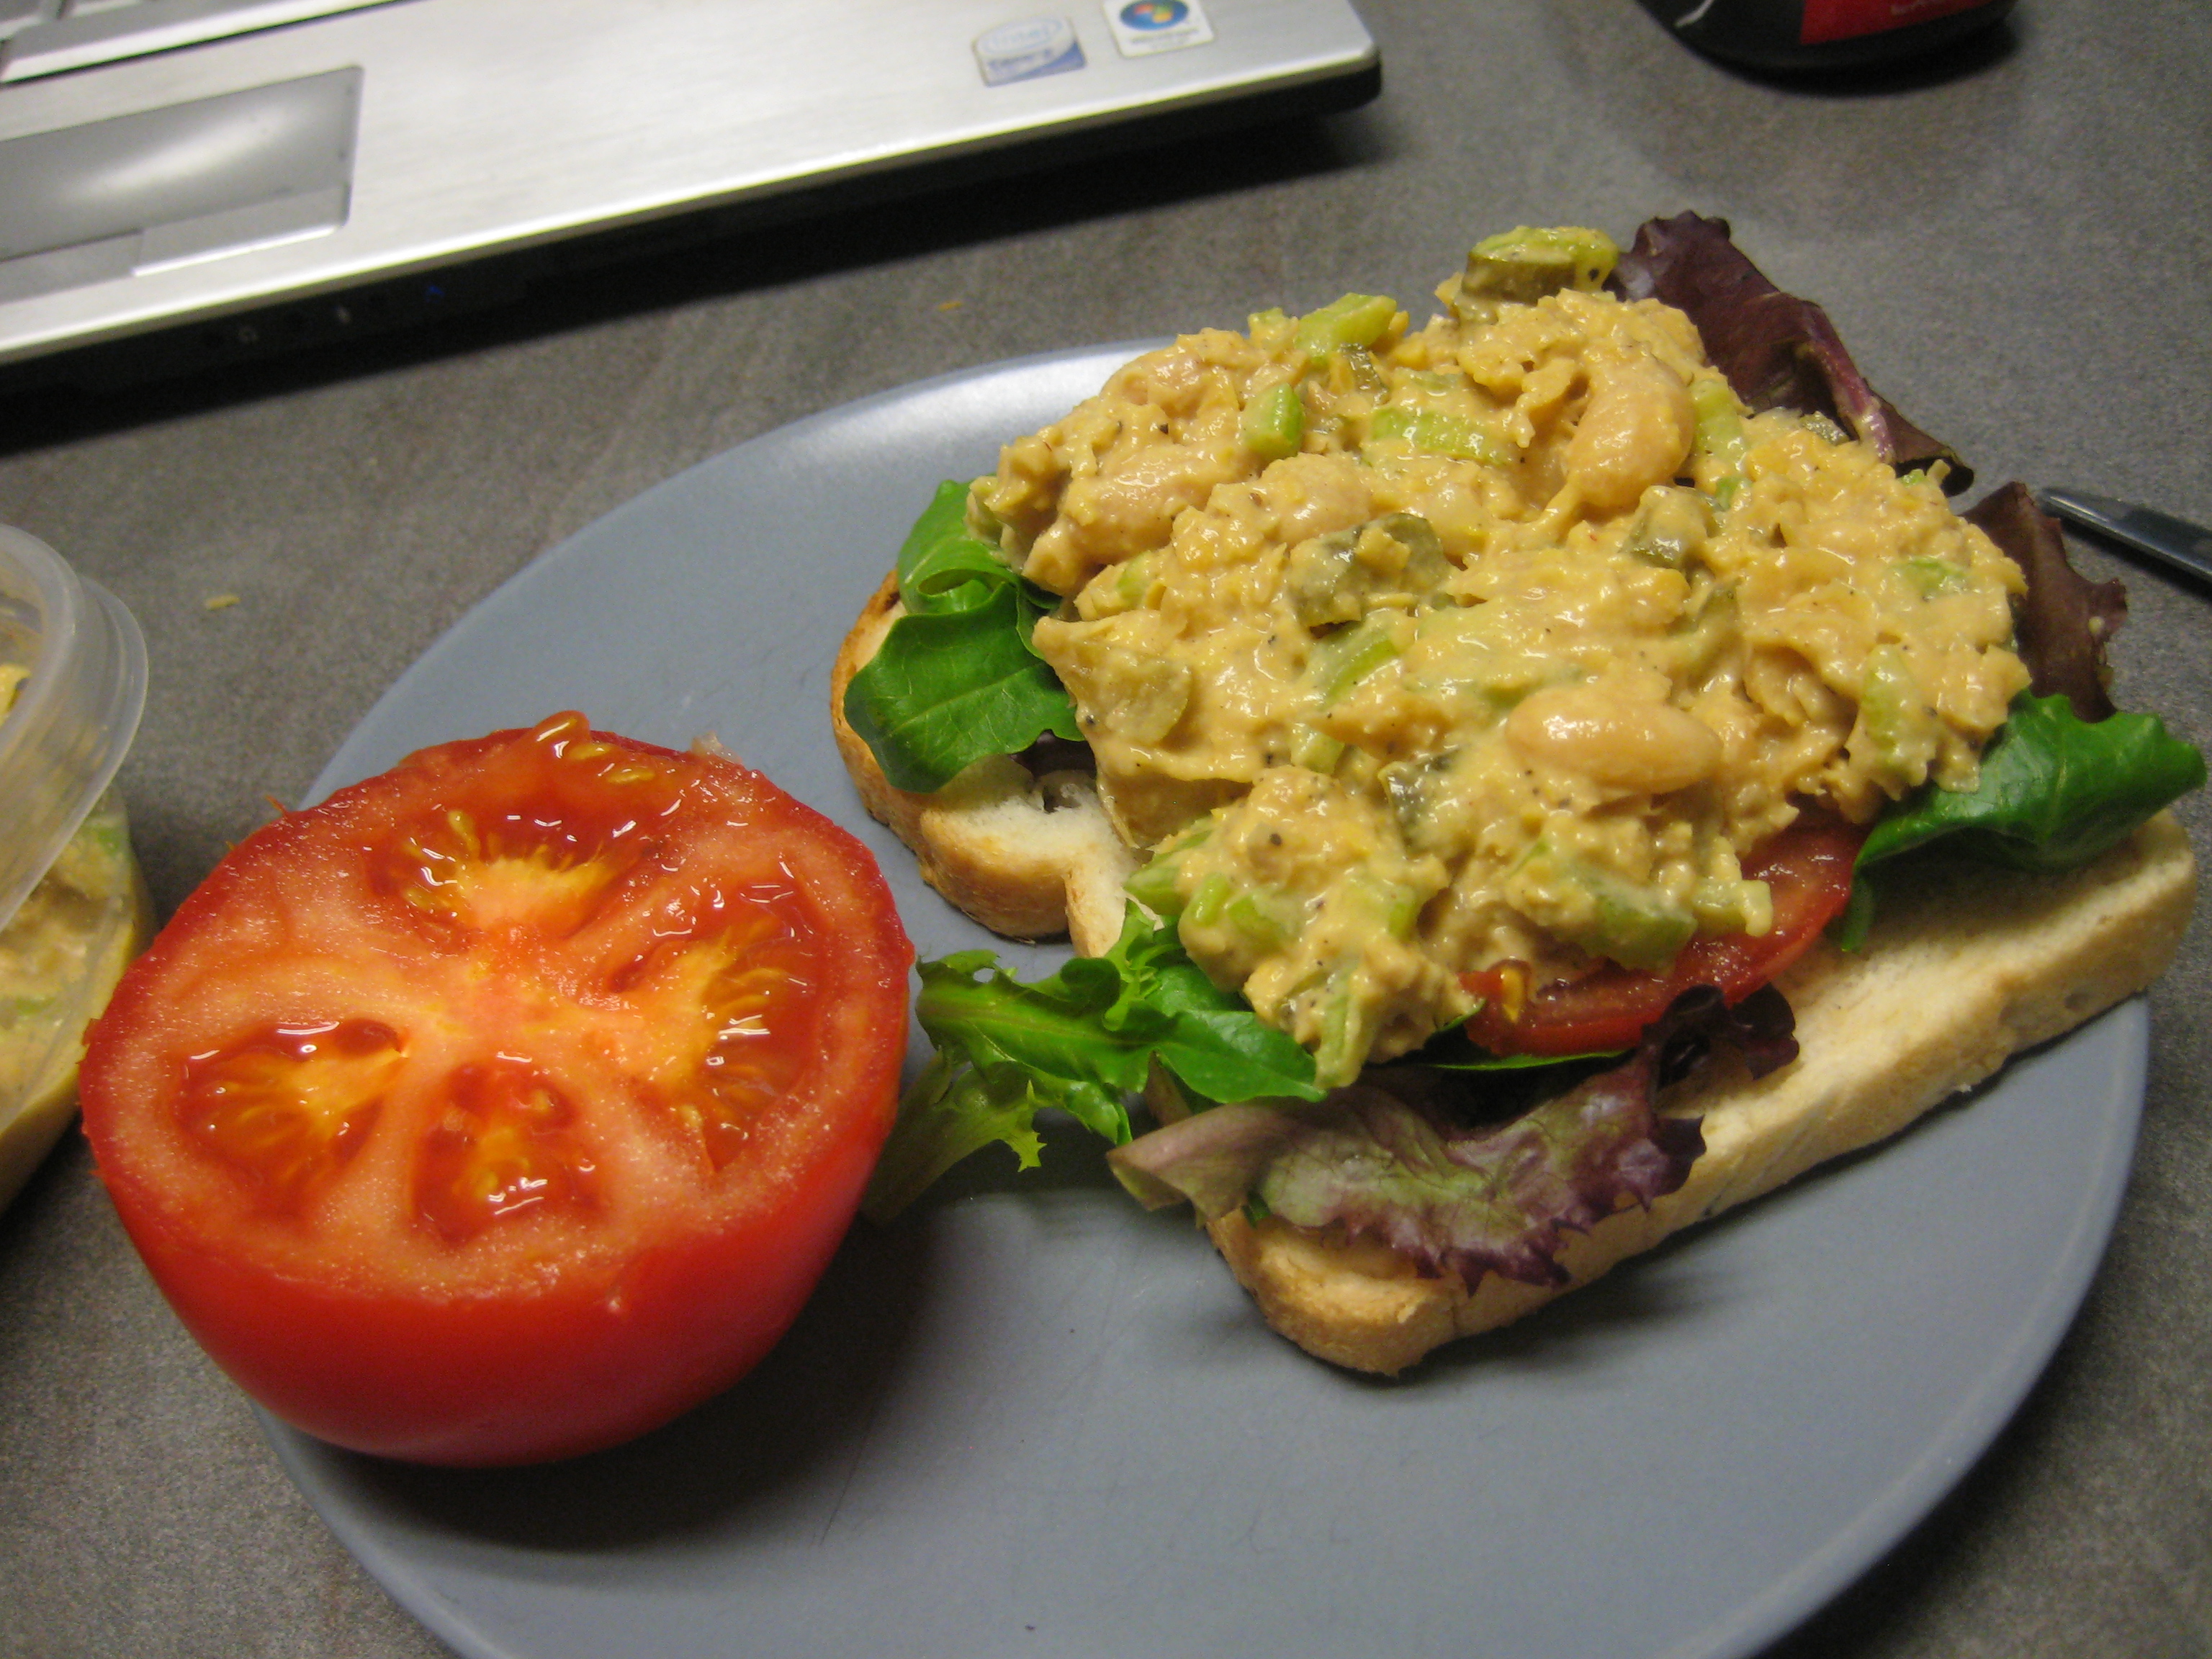
To assemble each sandwich take one slice of bread and slather a generous layer of mashed avocado or vegenaise. Place a small helping of the shredded lettuce on top of the avocado, a few tomatoes, then a few slices of the tempeh, and more tomatoes. Enjoy either open faced or topped with another avocado-slathered bread slice.

Note: we call these tomatoes “crack tomatoes” in our house…they freeze amazingly, so go ahead and make a triple batch. They taste great on tacos, in chili, tortilla soup, etc.

And some nights you eat tomatoes for dinner…

Who can really argue with the taste of a Michigan tomato in July? I can’t. So in taking all the mystery out of this post…some nights you simply eat tomatoes for dinner. Shown below are heirloom varieties Green Zebra and Beefsteak from Good News Farm.

This slideshow requires JavaScript.

Ingredients:

  • Tomatoes
  • Salt
  • Pepper

Slice, cube or dice. Salt and pepper to taste. Noms.

Peanut Kohlrabi Slaw Wrap

Kohlrabi has been gathering in my crisper for weeks. It was beginning to outnumber the greens, which if you are a CSA member of any kind you know that greens are prolific this time of year while we wait for all of the other delish stuff to grow-so this was becoming an emergency situation. Mr. Wonderful and I wanted a quick dinner and this fit the bill. The recipe below is for peanut kohlrabi slaw, we served this slaw over Gardein Seven Grain strips on a reduced fat flour tortilla, it was like a salad in a tortilla. Super simple, fast, and made from the stuff I found in the fridge.

Need a few more recipes for the space-aged looking veg? Check out the kohlrabi archives…yep, they exist.

  • 1/2 head green or Asian cabbage (finely shredded about 1 lb)
  • 2 T peanut butter (smooth)
  • 1 T peanut oil
  • 2 T rice wine vinegar
  • 1 T soy sauce
  • 1/2 tsp brown sugar
  • 3 cloves clove garlic (minced)
  • 1 tsp powdered ginger
  • 1/4 tsp cayenne pepper (taste)
  • 2 kohlrabi (bulbs peeled and grated or Julienne 1 1/2 to 2 cups)
  • 3-4 large radishes, grated or minced
  • 1/4 C dry roasted peanuts (garnish)
  • 1/4 C dried currants
  • salt
  • pepper
  • sesame seeds (roasted, garnish)

Directions:

Make the dressing in a mason jar. Put all items but sesame seeds, peanuts, radishes, currants, kohlrabi, and cabbage into a jar, shake vigorously. Taste a few times and readjust seasoning as you wish.  Toss together with all other ingredients.

Good additions would be: grated carrot, green onion, water chestnuts, crispy rice noodles, and fresh grated ginger. Adapted from Food.com.

This slideshow requires JavaScript.

Shit! I don’t have any taco seasoning.

This is my second Shit! I don’t have any…. recipe blog post. My first had to do with chili powder. My anger level seems to have risen as this title involves an actual explicative and before I was just using a mild substitute; or maybe I just REALLY wanted to make tacos tonight…I digress and give you taco seasoning for when you realize you have none. This recipe shakes out to be WAY less sodium than the packaged brands, so do yourself a favor and just make it yourself before you have a taco seasoning emergency. It takes all of about 3 minutes. I made 5x the amount (some math involved, hooray) and store it in a mason jar to keep any new emergencies at bay.

  • 1 Tbsp chili powder
  • 1/4 tsp garlic powder
  • 1/4 tsp onion powder
  • 1/4 ancho chili powder (this is an add in for more flavor, not necessary for “normal” flavor)
  • 1/4 tsp crushed red pepper flakes
  • 1/4 tsp dried oregano
  • 1/2 tsp paprika
  • 1.5 tsp ground cumin
  • 1/2 to 1 tsp sea salt (more or less to taste)
  • 1 tsp black pepper

1. In mason jar, measure out all items listed above and give it a little shake until well mixed. If you like it spicy, add more red pepper flakes or mess around a little and try some dried chipotle pepper, etc. This is totally customizable. Adapted from allrecipes.com and many other bloggers before me.

This slideshow requires JavaScript.

Strawberry Chia Freezer Jam

My friend Jen had to sell me on this idea big time as every other time I have had or used chia seeds except in a granola bar, I have come away feeling icky with bloating, and all those black seeds sticking in my teeth, gelling and [in my imagination] growing [cha, cha, cha chia]. This however, seems like an appropriate place for chia seeds-in freezer jam.

This recipe was adapted from Oh She Glows  and came together in a blender, in a blink. Since this is freezer jam, pop it into a freezer safe container AFTER you let it sit for a few hours and be sure to leave plenty of headspace for the chia to work it’s magic.

Ingredients

  • 6 C blended strawberries [AFTER blending you want 6 C which is about 12 C of whole berries]
  • 3 T maple syrup (or other sweetener of your choice)
  • 6-12 T water
  • 3 T chia seeds
  • 2-3 T lemon juice
  • zest from 2 lemons

Wash, hull, blend strawberries together, stir in syrup, chia, zest, juice and 6 of the T of water. Depending on the consistency you want from the jam, add up to 6 T more water. We added all 6 as our chia were already thickening past the point we really liked it while it was sitting waiting for us to scoop it into the jars.

Ladle into freezer safe jars, allow to sit 6-8 hours before putting in the freezer to gain perfect chia thickness. Store in freezer up to 6 months. The Mountain Mama Cooks adds vanilla to hers if you would like for a more “cooked” versus raw taste. If you are a purist, Eating Bird Food always has strong chia recipes even for the chia-shy like me.

This recipe tasted like a fresh picked strawberry with a kick. I will need that come winter.

This slideshow requires JavaScript.

Wheat Berry Spring Salad

A recipe doesn’t have to be very complex. Sometimes I just grab stuff that is either: 1) about to go bad in my fridge, 2) really fresh in my fridge, or 3) stuff that sounds good and hope it all tastes good together. This was #3 for a quick dinner and several more lunches.

Not rocket science, hell sometimes I don’t even measure…

Ingredients:

  • Everything in my fridge cut up (asparagus raw, tomato raw, english cucumber, dried cranberries, red grapes halved, a little romano cheese cut in chunks-0mit for vegans)
  • 2 c cooked wheat berries

Dressing :

  • 1/2 C apricot balsamic vinegar (or any other flavor really)
  • 1/8 C evoo
  • salt and pepper to taste

Tossed the dressing with the wheat berries and severed over microgreens. Tasted amazing the next day in a pita.

Wheatberry Salad

“Take me to the beach” Vegan Granola Bars

Memorial Day weekend. First official beach weekend in Michigan which of course requires portable food. Gena Hamshaw of the blog Choosing Raw shares a recipe on HuffPost Taste every other Thursday and this one I have made several times since I discovered it. Perfect portable beach food.

The best part about this is recipe is that you can sub out just about anything you have in your kitchen for the dry components so long as you keep the wet component ratio (nut butter and agave or brown rice syrup) intact. The recipe doubles and triples well to boot.

Original Recipe:

  • 2 1/2 C rolled or quick oats
  • 1 C raw pumpkin seeds
  • 1/2 C raisins
  • 2/3 C nut butter
  • 1/2 to 2/3 C agave nectar or brown rice syrup (adjust based on how well things stick together)
  • 1/8 tsp sea salt (optional)
  1. Mix together oats, pumpkin seeds, and raisins in a large bowl.
  2. Whisk together nut butter, sweetener, and sea salt. Pour onto oat mix and mix well. If it is too dry add some more sweetner.
  3. Press mixture into a shallow baking dish lined with parchment to form one large bar. Cut into shapes after 4 hours and wrap up for individual serving. They last 2 weeks, covered in the fridge.

Recipe for Bars Pictured:

  • 2 1/2 C rolled oats
  • 1/2 C dried cranberries
  • 1/2 C mini carob chips
  • 1/3 C dried coconut
  • 1/3 C chia seeds
  • 1/3 C sunflower seeds
  • 2/3 C natural, crunchy peanut butter
  • 2/3 C brown rice syrup
  1. Mix together dried ingredients in a large bowl.
  2. Whisk together nut butter and sweetener (I didn’t need salt due to sunflower seeds and peanut butter). Pour onto oat mix and mix well-dig your hands into it if you must! If it is too dry to stick together properly add some more sweetener.
  3. Press mixture into a shallow baking dish lined with parchment to form one large bar. Cut into shapes after 4 hours and wrap up for individual serving. I can see this working out well as rolled spheres too. They have a great texture. Bars or balls will last 2 weeks, covered in the fridge.

This slideshow requires JavaScript.

How do I overnight oats? Let me count the ways….

My first encounter with overnight oats contained chia seeds which I love in smoothies, but loathe in anything that is required to set and then eat or drink. the consistency is well, cha, cha, cha, chia…and if you are a child of the 80’s then you will know exactly what this means – gel-like, icky, sticky and gross.

This recipe and countless variations becomes breakfast at least 4 days a week. With an unlimited amount of creations you can concoct with this base, it is sure to become a morning staple in your home too. I put these oats together at night before bed, pop in the fridge, then grab while I’m running out of the house like my hair is on fire in the AM. I eat them at the office while I’m checking email and making coffee.

Overnight Oat Base:

  • 1/3-1/2 C rolled oats ( I use Bob’s Red Mill, thick cut ) – not instant here – if you like it a little runny opt for less oats
  • 2/3 C any non dairy milk ( my go to is unsweetened almond milk )

Typically I add:

  • 2 T PB2
  • 1 sliced banana ( just before I eat the oats )

My next fave is:

  • 2 tsp maple syrup
  • 1 T reduced fat coconut
  • 1 C sliced strawberries (just before I eat the oats)

I also really love:

  • 2 tsp maple syrup
  • 1/2 C blueberries (just before I eat the oats)

Sometimes I even get really crazy and add:

  • 2/3 C unsweetened chocolate almond milk ( instead of the unsweetened plain milk in the recipe above )
  • 2 T Chocolate PB2
  • 1 sliced banana

Directions: combine oats and any add in EXCEPT fruit, then pop in the fridge overnight. 6 or so hours they are ready to consume. Add fruit before eating. If you add fruit the night before the water escapes into the oats and make them watery and icky. A very technical term, icky.

Pictured below is the “really crazy” variety minus the banana. My fave jar to use is pictured. Seems to be the perfect size for 1) the spoon and eating and 2) the oats for soaking in the milk.

IMG_7296 IMG_7295 overnight oats in ball jar from side top overnight oats in jar from top overnight oats in ball jar side view overnight oats in ball jar on desk with computer overnight oats in ball jar macro side IMG_7291 overnight oats close up

VOTE! Virtual Vegan Potluck: Peanut Soba Noodle Salad

vvpLOGO

UPDATE: The potluck is over, but the voting for faves just started! Below find my entry in the Virtual Vegan Potluck then click on over to cast your vote for Veg Bon Vivant for salad winner!

++++++++++++++++++++++++++++++++++++++++++++++++

I’m part of a GLOBAL plant-based potluck today. Doesn’t that sound super impressive? Over 170 of my virtual vegan friends have committed to participation in Virtual Vegan Potluck, a twice-a-year, orderly, and yummy way to expose their blog followers to new recipes and new vegan blogs. I am so excited about the blogroll itself I can hardly stand it. New reading! My “dish to pass” is a salad. A tried and true salad that never has leftovers and leaves everyone shocked that they just ate Thai food. Hey, eat more veggies while you are at it.

I relish all of the different flavor combinations that comprise regional foods and on occasion I like to make up my own recipes from the most awesome parts of other recipes.  I love peanut sauce in Thai restaurants; however it is not good for you. At. All. I modified a recipe I found online cutting out the non-veg ingredients, pinched a little of the fat (bye-bye oil) and yet maintained a “dressing” consistency suitable for a salad instead of satay duty. Paired with a few of my fave salad ingredients including the beloved soba noodle, I dropped in a spicy protein too to give you a delightfully filling and portable salad that could hold its own at a REAL potluck. Hello summer!

Peanut Dressing:

  • 3/4 cup creamy peanut butter
  • 1/4 cup (brown) rice vinegar
  • 1 T tamari or soy sauce
  • 1 tsp to 1 T chopped, ground, or pre-chopped ginger (test along the way)
  • 2 cloves garlic, crushed and chopped
  • drizzle of toasted sesame oil (keep it to less than a tsp)
  • big pinch of crushed red pepper flakes or 1 tsp-1T of hot sauce, your choice
  • 1/4-1/2 cup hot water

Salad:

  • 1 package soba noodles prepared according to package instructions
  • 2 carrots, peeled, grated
  • 4 radishes, chopped
  • 1 head napa cabbage, shredded
  • 1/4 C crushed peanuts or cashews, toasted
  • a handful of bean spouts per salad
Mix dressing ingredients together in the food processor, let set 10-20 minutes to develop in flavor intensity, reserve 1/4 C dressing for topping salad.  Shred cabbage, toss with chopped radishes and grated carrot, mound in 3-4 salad bowls.  Toss soba noodles in the peanut sauce until coated nicely, divide and add to cabbage salad, top with 1/4 C reserved dressing and crushed peanuts or cashews and fresh bean spouts.  Serve immediately.

This slideshow requires JavaScript.

Well you know how a potluck works right? So that was JUST my dish to pass, scoot on over to the next blog for another delish salad and start filling up that plate! Just make sure you save room for dessert….I went through the blogroll today and down the line are some vegan desserts you will not want to miss!
Click “go forward” for the next salad from Yum for Tum or depending on how you found this post, you might have missed the one before me at Mojo Central. Happy potluck!
go_forward-300x243go_bck-300x257
Pictured with salad ginger/garlic/soy marinated baked tofu (recipe below):
  • 1 package extra firm tofu, drained, sliced in half (thickness wise) and pressed (after pressing 20-30 minutes, cut into pieces about the size of a pinky finger-sorry, that’s kinda gross!)
  • 3 cloves garlic, minced
  • 1/2 C soy sauce
  • 2 inches ginger, peeled and grated
  • 1 tsp sesame oil
  • 1 pinch red pepper flakes
Marinate tofu in mixture of the ingredients above for 30 minutes to overnight. Bake tofu on a foil lined, lightly greased, rimed baking sheet at 375 or grilled until firm in texture, turning every 5-10 minutes.  Serve with the salad.
thanks2-300x176

Virtual Vegan Potluck: Peanut Soba Noodle Salad

vvpLOGO

I’m part of a GLOBAL plant-based potluck today. Doesn’t that sound super impressive? Over 170 of my virtual vegan friends have committed to participation in Virtual Vegan Potluck, a twice-a-year, orderly, and yummy way to expose their blog followers to new recipes and new vegan blogs. I am so excited about the blogroll itself I can hardly stand it. New reading! My “dish to pass” is a salad. A tried and true salad that never has leftovers and leaves everyone shocked that they just ate Thai food. Hey, eat more veggies while you are at it.

I relish all of the different flavor combinations that comprise regional foods and on occasion I like to make up my own recipes from the most awesome parts of other recipes.  I love peanut sauce in Thai restaurants; however it is not good for you. At. All. I modified a recipe I found online cutting out the non-veg ingredients, pinched a little of the fat (bye-bye oil) and yet maintained a “dressing” consistency suitable for a salad instead of satay duty. Paired with a few of my fave salad ingredients including the beloved soba noodle, I dropped in a spicy protein too to give you a delightfully filling and portable salad that could hold its own at a REAL potluck. Hello summer!

Peanut Dressing:

  • 3/4 cup creamy peanut butter
  • 1/4 cup (brown) rice vinegar
  • 1 T tamari or soy sauce
  • 1 tsp to 1 T chopped, ground, or pre-chopped ginger (test along the way)
  • 2 cloves garlic, crushed and chopped
  • drizzle of toasted sesame oil (keep it to less than a tsp)
  • big pinch of crushed red pepper flakes or 1 tsp-1T of hot sauce, your choice
  • 1/4-1/2 cup hot water

Salad:

  • 1 package soba noodles prepared according to package instructions
  • 2 carrots, peeled, grated
  • 4 radishes, chopped
  • 1 head napa cabbage, shredded
  • 1/4 C crushed peanuts or cashews, toasted
  • a handful of bean spouts per salad
Mix dressing ingredients together in the food processor, let set 10-20 minutes to develop in flavor intensity, reserve 1/4 C dressing for topping salad.  Shred cabbage, toss with chopped radishes and grated carrot, mound in 3-4 salad bowls.  Toss soba noodles in the peanut sauce until coated nicely, divide and add to cabbage salad, top with 1/4 C reserved dressing and crushed peanuts or cashews and fresh bean spouts.  Serve immediately.

This slideshow requires JavaScript.

Well you know how a potluck works right? So that was JUST my dish to pass, scoot on over to the next blog for another delish salad and start filling up that plate! Just make sure you save room for dessert….I went through the blogroll today and down the line are some vegan desserts you will not want to miss!
Click “go forward” for the next salad from Yum for Tum or depending on how you found this post, you might have missed the one before me at Mojo Central. Happy potluck!
go_forward-300x243go_bck-300x257
Pictured with salad ginger/garlic/soy marinated baked tofu (recipe below):
  • 1 package extra firm tofu, drained, sliced in half (thickness wise) and pressed (after pressing 20-30 minutes, cut into pieces about the size of a pinky finger-sorry, that’s kinda gross!)
  • 3 cloves garlic, minced
  • 1/2 C soy sauce
  • 2 inches ginger, peeled and grated
  • 1 tsp sesame oil
  • 1 pinch red pepper flakes
Marinate tofu in mixture of the ingredients above for 30 minutes to overnight. Bake tofu on a foil lined, lightly greased, rimed baking sheet at 375 or grilled until firm in texture, turning every 5-10 minutes.  Serve with the salad.
thanks2-300x176

Mint Chocolate No Bake Cookie Bites

I do a lot of reading. For school, for work, for fun, I’ve always liked reading. Sometimes I read a recipe and it bypasses the bookmark function and gets me straight away into the kitchen, particularly when I have all the ingredients on hand and want to eat cookies. I mean really, when I want to eat cookies. I’m a big fan of no bake items particularly those that don’t require chemistry to work and you can kind of “eye-ball” the measurements. When these didn’t come together just as planned with the original recipe I improvised a little with the natural sweetness of maple syrup and a few extra dates. I dare you to eat just one.

  • 1 cup rolled oats
  • 1 cup raw cashews
  • 12-16 medjool pitted dates
  • 3 T dark cocoa powder
  • 2-4 T nondairy milk
  • 1/4-1/2 tsp peppermint extract 
  • 1 tsp maple syrup
Dough should just stick together out of the food processor

Dough should just stick together out of the food processor

IMG_7490

A perfect scoop

A perfect scoop

Use a scoop to portion out the dough

Use a scoop to portion out the dough

Roll into balls after you measure out the dough

Roll into balls after you measure out the dough

Nondairy milk, dates and cocoa powder

Nondairy milk, dates and cocoa powder

In a food processor mix the cashews and oats until they are a powdery consistency. Then add the dates, cocoa powder, 2 T milk and peppermint extract and mix until a dough starts to form. If the dough looks dry, add a bit more milk. Roll into balls and place on a parchment lined baking sheet. Set in the fridge to firm up. I got 25 bites out of my batch using a small pampered chef scoop to form the cookie bites.

Adapted from My Whole Food Life

Wanted: Vegan Sandwiches

In a recent poll of the Wonderful residence…we miss sandwiches. Two recipes to fix that situation follow for bread spreads. These taste equally as good on crackers or straight from the bowl around midnight. I mean if you say had a hunger pang in the night.

From Happy Herbivore (pictured):

“Tuna Salad”

  • 15 oz chickpeas (canned or from dry) rinsed and drained
  • 2 celery stalks, washed and diced
  • 1 – 2 T pickle relish or sliced pickles
  • 1 tsp onion flakes or powder
  • 2 T nutritional yeast flakes
  • 1 T low sodium soy sauce or Tamari
  • 3 T vegan mayo (I used half and still had great consistency)
  • 1/2 tsp kelp powder (this is the “fishy” salty flavoring)
  • 1/2 tsp lemon juice 
  • pepper and salt to taste

I deviated  a little from the original instructions provided as I like a specific texture of spread. Mash chickpeas in a large mixing bowl OR pulse 3-4 times in a food processor-do not puree, or make hummus instead, you can’t really go wrong here I guess. Dice celery into bite sized pieces. Chop up pickles into small dice too. Add all ingredients to the large bowl, stir, stir, stir. Add more mayo or kelp as needed to taste.

IMG_7306 IMG_7304 IMG_7305 IMG_7302 IMG_7297 IMG_7303 IMG_7300 IMG_7301 IMG_7299 IMG_7298

“Tuna” Salad

Courtesy of Jon Dunn at VeganGR:

  • 1 can chickpeas, drained
  • 2-3 T Vegenaise
  • 1-2 T sweet pickle relish or pickle chopped
  • salt pepper to taste
  • 1/2 t dulse or kelp granules or other “fishy” seasoning (optional)

Send chickpeas through a couple of pulses in food processor (can be done by hand by the less lazy). Mix blended peas with the Vegenaise, sweet pickle and seasonings. EAT ON ANYTHING.

**note – all of the following ingredients are really to personal taste. Some people like green onion, mustard, or all sorts of other stuff in their tuna salad. Basically, you’re following whatever recipe you would with tuna, but using chickpeas instead.

Roasted Veg Mini Pizzas

Shocked that I might be full after just half of this serving size. I continued to eat of course until I was stuffed of this goodness. Another yummy Happy Herbivore meal plan recipe that will now be a weekly staple at the Wonderful residence: Roasted Veg Mini Pizzas (serves 1)

  • 2 whole-wheat Pita Pockets
  • 1/2 C marinara sauce
  • 1 C zucchini
  • 1 tomato, diced
  • 1 onion, sliced
  • 3 1/2 T nutritional yeast or vegan parm
  • sliced black olives (optional)

Spread a thin layer of marinara sauce over the top of each pita. Not too much or you will just have soggy bread, icky. Top with squash, tomato and onion. Bake in 400 degree oven for about 10 minutes (check at 5) until everything is warmed and browning slightly. I placed my pitas directly on the oven rack to get a crispy “crust.” Sprinkle with olives, nutritional yeast, or vegan parm (shown in photos). Don’t forget the Frank’s Red Hot!

IMG_7310 IMG_7311 IMG_7308 IMG_7309 IMG_7307

418 calories for 2 pita pizzas, 4.8g fat, 77g carbs, 24g fiber, 20g sugars, 30g protein.

Chana Palak Masala – Easy for YOU to say!

I talked about the Happy Herbivore meal plans a few weeks ago in a post and I will again sing the praises that just $19.00 a month can bring you a little more peace into a crazed life by just telling you what to do and when to do it. I often like it when there is ONE area of life I don’t have to make yet another decision during they day and Lindsay Nixon is my beacon of hope in that regard.

Sometimes I look at a recipe in the meal plan and think, how in the world will that taste good? Fortunately I’m kinda brave and will mostly eat anything, this recipe surprised me at 1) how few calories it has, 2) how filling it is, 3) it really is delicious and 4) you can eat take-out like food at home in under 30 minutes.

Enough of my blabbering, here’s the recipe (2 servings):

  • 1 small onion, diced
  • 2 cloves garlic, minced
  • 12 oz peeled whole or diced tomatoes (canned)
  • 15 oz chickpeas (canned), drained and rinsed
  • 10 oz frozen baby spinach (fresh okay too)
  • 1 C low sodium veg broth or water
  • 1/2 tsp ground cumin
  • 1/2 tsp coriander
  • 1/2 tsp mild curry powder
  • 1/2 tsp tumeric
  • 1/4 tsp ground ginger (or double it with fresh)
  • dash of red pepper flakes
  • 1 tsp lemon juice (optional, but use it…it makes it better)
  • 1 tsp garam masala

Make magic:

In a large pot, saute’ onions and garlic with a few tablespoons of water, instead of oil. Once the onion is translucent, add spinach, chickpeas, tomatoes with juices and broth. Cover and cook over medium until the spinach cooks down [I used frozen and didn’t drain and it came out fine]. Uncover and break up tomato bits. Add all spices except garam masala, add lemon juice at this point. Cover and cook for 3 minutes. Add 1/2 garam masala and cook for 2 more minutes more. Taste, adding additional garam masala if desired plus salt and pepper if needed. Turn heat off and allow to sit for 5 or so minutes. The dish will thicken as it stands. Start to finish, this took me about 30 minutes. I served about 1/4 of this recipe over brown rice.

Per serving: 283 calories, 58g carbs, 3g fat, 10g fiber, 7g sugar, 12g protein

IMG_7312 IMG_7314 IMG_7313

Lost an hour? Gain a few back.

Forget about Daylight Savings Time. The Happy Herbivore, Lindsay Nixon, fellow chickpea lover, has found a way to give you back a few hours of your week. Previously, I would spend a few hours a week, typically either on a Sunday as a diligent planner, or via freaking out when I get home from work worrying about what will go on the grocery list, or what I will cook for dinner, etc. The Happy Herbivore has eliminated the planning, digging, guessing, grocery list making, contemplating out of my weekly food equation with 7-Day meal Plans.

With this service, which is around $20.00 a month, I get a pdf link weekly with a calendar for meals, all the recipes in one place, a premade grocery list, calorie counts for all food consumed, and suggested snack ideas. Each day falls into the 1,200 calorie range so you can add snacks or decrease snacks as needed and the meals are interchangable with other weeks and other meals. She does a pretty good job of recycling ingredients through the week in different ways so you don’t feel like you are always eating say quinoa in the same way. Today for example, we ate quinoa for breakfast in chocolate *pudding* form with blueberries. Even I was skeptical, and I spend most of my waking life thinking about what I am going to next eat. Turns out, taking the thinking portion out of food is what I need during this part of life. I sometimes don’t want to make another decision that day which typically translates into take-out which is not good for my weight OR my checking account.

The Happy Herbivore has cookbooks too of course, so you could pull out a recipe and swap it for another if you so choose. At any rate. I’d be happy to share a week with you if you are scared of the initial investment-just leave me a comment including your email address below and I’ll send it out to you. Just one per person though, I want this service to continue and for that to happen, Lindsay has to be compensated for her time. I’m sure you will find, it’s worth all $18.88 per month to regain a few extra hours a week and a plan after you try.

Curious what Chocolate Espresso Quinoa Pudding is? Try it.

  • 1/4 C quinoa (rinsed)
  • 3/4 C unsweetened chocolate almond milk
  • 1 1/2 T pure maple syrup
  • 1 T unsweetened cocoa powder (I mixed 1/2 special dark and 1/2 regular)
  • 1/8 tsp espresso powder
  • 1/8 tsp vanilla extract
  • 1/2 C blueberries (fresh or frozen)

In a saucepan, combine quinoa, chocolate milk and espresso. Cover, bring to a boil, reduce to low and simmer until quinoa is cooked and fluffy, about 15-20 minutes. Stir in maple syrup, vanilla, and cocoa [I made a quick paste of this before putting into quinoa], plus another splash of chocolate milk. Taste, add more maple syrup if you need it a little sweeter. Top with fresh fruit. Serve warm.