Category Archives: Dinner

Purple Carrot Files: Italian Cannellini Bean Stew

I’ve been using Purple Carrot vegan meal planning/prep service on and off for about a year. While I like it, I don’t exactly love it. The cons are: tons of trash/recycling, expensive ($69.00 for 3 meals x 2 people OR 2 meals x 4 people), produce can be iffy upon arrival, produce doesn’t last long after delivery, some recipes are missing steps, instructions, ingredients or seasoning, there are lots of Asian & Thai flavors, and some meals seem suuuuuper cheap for what I pay for the box (like this one I’m profiling). The pros are: convenient, pre-measured, tasty and fun recipes I might not have otherwise tried, all the prep is done for you but the chopping (even in most cases the washing), lots of Asian & Thai flavors (yeah I listed that as a con too -but for me, I love these flavors), and finally, great customer support. Every single time I’ve emailed them, ranted on Twitter or tried to get a jab in on Instagram upset about a crappy piece of produce they have refunded me at minimum $20.00 and responded very promptly.

This last part is why I stick around: service. While it is not a perfect produce science. The service is friendly, prompt and honest. I’ve always been a big fan of a sincere apology, so I will take Thanksgiving off – they did a cool box donation to Feeding America, I fell for that noise and donated my meals to a charity this week and I’ll come back after the holiday in the hopes of more delicious Asian & Thai foods to combat my Thanksgiving sides hangover. Speaking of hangovers, food or otherwise, one of the recipes that I made this week struck me as being an excellent hangover cure: Italian Cannellini Bean Stew. 

This slideshow requires JavaScript.

Ingredients:

  • 2 cloves garlic, minced
  • 1 large shallot, minced
  • 6 ounces carrot, diced
  • 3 ounces escarole, deveined & chopped
  • 1 can Cannellini beans, rinsed
  • 1/4 tsp red pepper flakes
  • 3 T veggie broth powder
  • 3/4-1 tsp smoked paprika (I prefer Penzeys – especially because they are social justice badasses)
  • Fresh basil, chiffonade
  • 1/4 – 1/3 C vegan Parmesan
  • Olive oil (EVOO)

Directions:

Mince & dice: rinse & dry produce. Mince the peeled garlic and shallot. Peel and dice the carrots into uniform pieces.

Chop & rinse: rinse the escarole and basil. Separate the leaves from the thick/tough stems and discard the stems to both greens. Separately, stack the leaves of each green up, roll them and roughly chop them into ribbons (chiffonade). Drain and rinse the cannellini beans, set aside.

Start stewing: add 1 T EVOO to a stock pot and heat over medium high heat until hot. Add shallot, carrot, red pepper flakes and a bit of salt. Cook for about a minute stirring – careful not to burn the shallot. Add the garlic and saute until fragrant – 30 seconds to 1 minute – do not burn the garlic. Repeat: do not burn the garlic.

Finish stewing: add 4 C water, the veg powder and paprika to the pot. Scrape the bottom of the pot to dislodge any nummy bits from the bottom then add the beans. Bring the stew (stoup really) to a boil and reduce heat to low, simmer 10 minutes or until the carrots are tender (not mush). Add the escarole leaves to the pot, let wilt x about 2 minutes. Remove the pot from heat.

Garnish: season the stew with salt and pepper. Ladle into shallow bowls. Garnish with basil ribbons and vegan Parm.


Tried & True Thanksgiving Recipes That Will Impress Your Meat-Eating Friends

Thanksgiving is the ultimate potluck. Bring in the fam, everyone brings a dish or ten and you set in for the long haul on the twenty-course meal with more sides than you even knew existed. Being a vegan or vegetarian is feast or famine at a family gathering. You are constantly battling chicken broth in a lovely array of veg dishes. So if you haven’t yet trained your family on the perils of cream of chicken soup in the green bean casserole, head over to VeganGR for the top veganized comfort food recipes you can sneak into an omnivore gathering. Kolene and Jon have tried and tested nearly every recipe you can imagine and have settled down with these versions of comfort food, good even for your dad who thinks steak is a food group: VeganGR Thanksgiving Guide.

This weekend I got a little anxious for potatoes and gravy, so I tossed a Vegan Field Roast “Meat” Loaf slathered in BBQ sauce into the oven and served the Easy Mushroom Gravy over baked potatoes as the side. If you think that gravy needs animal fat to be delicious or that cooking the gravy with the threat of “breaking” of the gravy is part of the “art” of Thanksgiving, get out of town because this is the best gravy, meat-filled or otherwise you will put into your mouth. I dare you to swap it out for the main gravy at your holiday gathering…no one will notice a thing.

What little veg secret will you unleash at your holiday gathering? I’d love to hear about it. Make just 1 swap and tell me all about it.

This slideshow requires JavaScript.

Ingredients:

1 medium sized onion, roughly diced
8 oz cremini (baby bella) mushrooms roughly chopped
4 oz shiitake mushrooms, sliced (pictured is double cremini, no shiitake mushrooms at the grocery store last night)
1 T olive oil
¼ c canola oil
½ c all-purpose flour
2 cups good vegetable broth (I used Rapunzel broth powder)
1 t garlic powder (I subbed a Tablespoon of fresh garlic)
½ t thyme (dried)
½ t sage (I subbed 2 teaspoons of fresh sage for dried)
salt/pepper to taste

Directions:

  • Sauté onion and cremini mushrooms in saucepan along with the canola oil and a pinch of salt. Cook down until onions are translucent and the mushrooms have lost their moisture.
  • Add flour and stir until everything is covered and combined. You want no more white flour to be visible, and all the veggies covered in a thick paste. Let cook for a minute or so.
  • Add vegetable broth and stir. Bring back up to a boil and allow mixture to thicken. Once thickened, turn off heat and allow to cool for a few minutes.
  • While that’s cooling, add olive oil to a small frying pan on medium heat. Sauté shiitakes until they’re lightly browned. Remove from heat.
  • Take thickened sauce to a blender. Add in the thyme and sage, and process on high until smooth. Return to sauce pan, and turn heat back on.
  • Once hot, add shiitakes to gravy.
  • Serve + Revel in your plant-based trickery.

Tomatoes & Tarts

My friend Lesley and her family bought a farmhouse, so after one too many glasses of wine we decided to plant an epic vegetable garden – it was my responsibility to order the seeds and raise them to transplant size. About three hours and $300.00 later I had bought nearly everything resembling a tomato on the Baker Seed website. Now, we are swimming in tomatoes and zucchini of every heirloom variety under the sun.

Since the first full harvest of tomatoes netted over 20 pounds total and I didn’t really have enough to can but still too many to eat, I went in search of brunch recipes (to eat immediately) and preservation recipes (to eat later). I turned up many a tart and an old favorite recipe for what in my home we affectionately refer to as “crack tomatoes” which are perfect for winter TLT sandwiches when you’re say mid-February and there is no sign of spring in sight.

Crack Tomatoes

  • 2-4 C cherry, grape, pear or other smallish tomato, cut in halves (any tomato will work here really)
  • 1/4 cup extra-virgin olive oil
  • 1 tablespoon brown sugar (or maple syrup)
  • scant 1/2 teaspoon of salt

On jelly roll pan lined with foil or parchment (or glass dish – you will want to be sure you have sides) place tomato halves in a single layer, drizzle with EVOO, brown sugar (or maple syrup) and sea salt, let bake in a 400 degree oven until they have just begun to brown (you don’t want them crispy). Remove from oven, let cool and spoon into pint containers or freezer bags and freeze. If you put these in glass canning jars, you can easily remove the lid and rim and pop into the micro when you are ready to serve. The oil from the pan keeps them luxurious all winter in the deep freeze.

Tomato Tart

  • 1 recipe from scratch, or 1 refrigerated, or 1 frozen pie crust
  • 3 large heirloom tomatoes
  • 3 extra-large eggs
  • 1 – 4oz log goat cheese
  • salt & pepper to taste
  • fresh basil, torn into bits or ribbons

Pre-bake pie crust x 5-7 minutes until the space where the filling will end up is firm, almost has a crust formed (this will keep it from getting smushy). While crust is baking slice tomatoes about 1/4 inch wide, lay on paper town and blot with paper towel until most of the immediate moisture has been mopped up. Lightly beat eggs with salt and pepper (okay to use egg whites only here too), set aside. When pie crust is 1/2 done, pull from oven and pour eggs into crust, take goat cheese and drop by small chunks onto eggs, layer with overlapping tomato slices – place back into oven and cook at 400 until eggs are set (between 15-30 minutes). Let cool to room temperature and serve sprinkled with fresh basil.

This slideshow requires JavaScript.

Tomata Sammich

The first tomato of each season I dedicate to Gramma Helen and her love of tomata sammiches. Read more about this sandwich in a previous post.

Raw, Vegan Peanut Butter Cookies with Sea Salt

You know by now my love affair with Pinterest. This recipe has been pinned for a bit on my Eat board and was long past time to try it. I dare say, you should go check out A House in The Hills blog where this post originated, blogger Sarah has lots of interesting things going on over there.

We have a bit of a peanut butter problem in our home, this hits the spot and is fairly healthy. Also, it doesn’t require you to turn on the oven and in the summer that’s critical in our home. Get your peanut butter cookie fix here:

  • 1 cup of raw almonds – I had 3/4 cup raw almonds in the pantry and supplemented them with 1/4 raw cashews
  • 1/2 cup of peanut butter – I used unsalted, chunky here
  • 1 cup pitted Medjool dates
  • 1 1/4 teaspoons of vanilla extract
  • sea salt to garnish

This slideshow requires JavaScript.

Combine raw nuts, peanut butter, dates and vanilla in your food processor or high power blender until a doughy texture comes together. Sarah recommend that you add more peanut butter if the dough is not sticking together properly. Remember you aren’t baking these babies, so it’s super important that they stick together! After you get the consistency you are striving for form into small balls and use a fork to create the traditional criss-cross mark on top of a baked cookie. Sprinkle with sea salt if you like. Although, I can see where a few chocolate chips might not be such a bad idea here either!

Store these in your fridge or freezer well packaged. Sarah from A House in the Hills says they are better the next day, but I am not sure mine have a shelf life of “the next day.”

Vegan Sriracha Maple Glazed Veggies

This slideshow requires JavaScript.

I totally missed the boat on posting Thanksgiving recipes this year-don’t judge me. Luckily this recipe isn’t just a “holiday” recipe so I can share with you now. It will warm you up from the inside out AND it’s a sneaky way to make veggies that sometimes get a bad rap, like brussels sprouts, into the belly of an unsuspecting friend with favorable results. I think this could be slathered on just about anything but for this recipe I chose sweet potatoes, raw cranberries (go with it okay), and brussels sprouts – I think any roasted veggie would do though, so experiment with whatever is in your pantry already.

  • 1/2 C maple syrup
  • 3T EVOO (about 1T per cup of veggies roasting)
  • 3T Sriracha
  • 1 1/2 T Braggs Aminos (or low sodium Tamari/soy sauce)
  • 1T chopped garlic
  • 1T minced fresh ginger
  • juice and zest of 1 lime

Whisk all ingredients in a small bowl and dump over veggies in a roasting pan. Roast at 400, turning every 15 minutes, until veggies are slightly charred and glazed. Serve. Put leftovers over rice or in a tortilla the next day for a quick lunch.

Recipe adapted from Baker by Nature and Pocket Full of Thyme

Crock Pot Vegan: Sweet Potato, Kale, and Chickpea Soup

And….we’re back! After a few weeks off for bad behavior and a new ACL, I’m glad to be back. I’ve had my eye on this recipe for a few weeks now. It is sweet, savory, smooth and lumpy (in the best chickpea way). It’s sure to keep you full and warm when battling the winter chills. The original recipe calls for farro from Cookie + Kate but since I didn’t have any handy, I grabbed some wheat berries instead which I cooked first on the stove and added toward the end. 


Ingredients
  • 1 large yellow onion, chopped
  • 2 small to medium sweet potatoes, peeled and diced (or butternut squash)-I used a mix of both as I had some cubes frozen from fall.
  • Salt, to taste
  • 2-3 T red Thai curry paste (available in the Asian section at most grocery stores-check to be sure no anchovies or shrimp were sacrificed for your paste)
  • 1 C uncooked farro, rinsed (or 2 C cooked whole grains, like wheat berries, spelt berries or kamut)
  • 6 C vegetable broth (or water flavored with vegetarian bouillon cubes)
  • 1 C coconut milk (from a can-okay to use light)
  • 2 C cooked chickpeas (or one can of cooked chickpeas, rinsed and drained)
  • 1/2 red pepper, finely chopped
  • 1 small bunch of crinkly purple kale or green kale, finely chopped
  • Sriracha to taste, I dropped in 1T
Instructions for crock pot:
Chop and dump. Simple as that. Omit the cooked wheat berries and chickpeas until about an hour before you are going to serve then pop them in the cooker to warm up with the rest of the items. My soup took 6.5 hours in a large crock pot. I used the last hour to add the wheatberries and chickpeas.
Instructions for stove top from Cookie + Kate:
  1. In a large soup pot, heat the oil over medium-high heat.
  2. Stir in the onions, raw sweet red pepper, and sweet potato and a big pinch of salt. Sauté for five minutes, stirring occasionally, until the onions start to soften.
  3. Add the curry paste and stir until the onions and sweet potatoes are coated and the curry is fragrant (about a minute).
  4. Add the farro, if that’s your grain of choice, and six cups of veggie broth or water and bouillon cubes and the coconut milk.
  5. Bring to a boil, then set the timer for thirty minutes, cover the pot and reduce the heat to a simmer.
  6. After thirty minutes, uncover the pot and add the chickpeas. Taste and season with more salt as needed (if it tastes flat, add more). If you chose to use cooked whole grains, add them now. Cover and simmer for another twenty minutes.
  7. Uncover, stir in the kale, add cayenne pepper if desired, and serve.
Notes

Virtual Vegan Potluck – Ginger Carrot Soup

I know what you were thinking….when is the next Virtual Vegan Potluck? Well, it is YOUR lucky day. VVP is TODAY! The VVP is an online party that happens twice a year where food bloggers share PLANT-BASED recipes (of course) in any one of eight courses. We’ve been eating an obscene amount of soup in our home lately due to the dreary, drizzly, midwestern weather we are enduring in the mitten state so I didn’t have to go far for this recipe selection.

The coolest thing about the VVP is the linking up of every blog via the “back” (Vegan Runner Eats) and “forward” (Quinoa Kale and Exhale) buttons on the bottom of each blog in the Potluck. You are welcome for providing you with the opportunity for entering this veggie wormhole! Be sure to visit my friends in the other categories of course, but soup…soup is where it’s at. Click the buttons below for delish noms for the fall/winter months. I know you are spending most of you work time browsing the web for Thanksgiving meal ideas anyway, so why not hang out in the potluck for a while?

virtual vegan potluck welcome logo

I make a trek to Whole Foods Ann Arbor every so often and the first thing I usually grab from the produce section is a 5 pound bag of their organic carrots. I do this to 1) remind myself that baby carrots are not really a carrot, 2) that I love the serene process of preparing veggies for consuming (i.e. peeling, chopping, etc), and 3) that carrots have a TASTE. Yes. An. Actual. Taste. You don’t get a whole lotta taste from those Dole carrots at my local supermarket. You just don’t.

While scouring the Interwebs for delish recipes I often find that I like certain elements of multiple recipes, or a regular recipe that could stand to be veganized, and so I collect them, mix them up and then execute delish, satisfying, warm-in-your-belly soup.

  • 2 pounds carrots, peeled and diced small for fast cooking
  • 1 tsp garlic powder or 2 medium cloves garlic, minced
  • 1-2 tsp onion powder or 1 large yellow onion, chopped
  • 2 tsp curry powder (I did 1 tsp hot, 1 tsp sweet)
  • 1 tsp ground cumin
  • 1-2 T fresh chopped ginger or 1 tsp ground ginger (the fresh gives it a certain lively flavor in your mouth and a lot of zip!)
  • 1/2 tsp cinnamon
  • 1/2 tsp garam marsala (optional)
  • 1/4 tsp nutmeg
  • 5-6 C water (you want all of your carrots covered with liquid to start)
  • 2 veg boullion cubes
  • 1 can (14-16 oz) nondairy milk (in keeping with the spice theme above, I chose light coconut milk)
  • fine grain sea salt (as much as you need)

Process your carrots by peeling and chopping into uniform chunks so they cook at the same rate.

If using real garlic, onion, and or ginger heat a stock pot add 1 T of water and drop in raw ingredients. Heat until transluscent over medium heat careful not to burn fresh garlic. After your fresh ingredients are cooked through, or if not using fresh garlic, onion, and/or ginger, next drop carrots into stock pot followed by all other ingredients and bring mix to a gentle boil. Reduce heat to simmer or low and cook the soup until the carrots are tender. Remove from heat and let cool.

If you wish to puree the soup with a hand blender you can probably get away with blending right in the pot off the heat with some care so as not to splash molten carrot on yourself. If using a blender, be careful as you transfer hot liquids and above all consider the pressure factor in putting hot liquids in a covered blender. I will leave a part of the lid open and cover with a towel lightly so as to avoid an explosion. With either method, you control the consistency with additional water, veg broth, or as one blog suggested, orange juice! Taste and season with salt or more curry after your soup is pureed.

Some of the recipes I viewed suggested a squeeze of lemon after puree to bring out a lightness in the soup. Others finish with a drizzle of extra virgin olive oil, lemon oil, nut oils, sesame oil or chili oil. We love our carbs at the Wallace-DeVries home, so instead of oil, we finished this soup with Naan 🙂

This slideshow requires JavaScript.

Ideas for this mashup come from: The Curvy Carrot, Eat Live Run, Whole Foods,  Simply Recipes, Mind Body Green, and May I Have That Recipe.

VVPL go back                                                             VVPL go forward

Yesterday Tacos, Today Taco Soup

Yesterday I made the tacos that I sometimes dream about in the winter, full of summer veggies practically radiating sunshine, tender-crisp, and juicy.  I love tacos, but even I can’t eat them every night for leftovers, so this seemed like the perfect solution: taco soup for the freezer and rest of the week.

Recipe:

Cook all veggies using summer tacos recipe found here spices and all, we will add a little more flavor below due to the dilution from the water. While I was charring all the veggies, I set half of each batch into a soup pot to create taco soup for later in the week.

To that add:

  • 1 tsp epazote
  • 1 tsp oregano
  • 1-2 tsp ground cumin
  • 1 tsp to 1T chipotle en adobo (sauce), depending on your like of heat
  • 2-3 C or 1-2 cans black beans, drained
  • 3 cans diced tomatoes, these can be fire roasted or normal diced tomatoes
  • 2 cubes veggie boullion 
  • 4-6 C of water, depending on your thoughts on consistency of soup

This slideshow requires JavaScript.

Heat all ingredients through give it a taste and adjust the seasonings (salt for sure). Serve warm with a squeeze of lime, vegan sour cream, and tortilla chips or freeze to preserve the summer.

The sandwich so fresh & juicy you eat it over the kitchen sink

Growing up my family didn’t do a tremendous amount of gardening unless it was in the form of flowers, which my mother has always been extremely fond of. The landscaping of our home was meticulous. My grandma however, had a pretty good size garden which was kinda like a neighborhood garden before community gardens were all the rage. She and her neighbors would plant their favorite veggies between the sticky cherry tree and big tire swing, in front of the pine layer separating her home from the IGA, and just beyond the sandbox so that none of us would “go messin’ with it.” The garden made for two things: 1) the most amazing go-cart racing track was formed from its perimeter, and 2) the amount of tomatoes that came from it in August/September was something of the stuff legends are made.

IMG_7875

This is the “grown up” vegan version of the tomato sandwich that we would eat nearly every day in the summer at the peak of tomato season which was comprised of gooey Wonder Bread, Miracle Whip, heavy with salt, and layered with iceberg lettuce and fresh, juicy tomatoes. So messy and heavy that you would have to eat the sandwich over the sink or end up changing your shirt after lunch.

Tomato Sandwich

  • 2 pieces soft vegan bread, toasted lightly
  • 1 medium sized ripe tomato of your choice
  • 2 big knifefuls of Vegenaise, use BBQ flavor if you want it to really make it sing
  • 1 handful, fresh picked greens of your choice, pictured here, arugula

IMG_7874

To assemble: spread Vegenaise on bread, layer tomato slices with arugula, smash and enjoy over the kitchen sink.

Rustic Vegan Kale Salad – Also, VeganMoFo Intro, Yo.

vegan mo fo banner

I have no idea how I could have let this recipe go unpublished from my blog for this long. I keep a recipe blog for selfish reasons really, it keeps all my lovely meals in one place so I’m not concerned with the bookmarking madness that is my Chrome browser. So when I went searching for ‘kale salad’ in my own blog and found not one result I became really upset…at…myself. Damn it self!

This little number is a weekly dinner and lunch staple, so my apologies for letting this one slip through the cracks. I also managed to forgot it’s Vegan MoFo! The Vegan Month of Food where veg bloggers are to unite and blog DAILY about vegan noms [OMG, that won’t be a reality for me, but I will try a few times a week this month]. I VeganMoFo’d in 2010 and 2011, but must have lost my mind in 2012 where I can find no archived MoFo posts. Boo.

Luckily, my good friends at VeganGR guest blogged for me today, so I am just one day behind the daily blog for Vegan MoFo 2013. This recipe comes from Heidi over at 101 Cookbooks. I’ve taken a few liberties to veganize her dish but have stayed true to the taste. Not ready to go vegan on this…keep the cheese, and for God sake butter the bread to make breadcrumbs if you are not vegan.

  • 1 bunch Tuscan kale [really any kale will work here, if you find it tough, be sure to let the lemon dressing do some work on the kale in a bag or bowl for a few hours to soften the texture – you know, if you are serving the queen or something]
  • 2 thin slices country bread, or two handfuls good, homemade coarse breadcrumbs
  • 2 garlic cloves, mashed and minced
  • 1/4 teaspoon kosher salt, plus a pinch
  • 1/4 cup vegan parm or other salty vegan cheese [Not vegan? Hit it hard with Romano-and thank me later.]
  • 1.5-3 tablespoons extra-virgin olive oil, plus additional for garnish [I go lighter on this one adjusting for the lemon juice I net, I hate an oily dressing, I prefer more juice to oil]
  • Zest of one lemon
  • Freshly squeezed juice of one lemon
  • 1/8 teaspoon red pepper flakes, or a few dashes of your favorite hot sauce
  • Freshly ground black pepper to taste

This slideshow requires JavaScript.

  1. Trim the bottom few inches off the kale stems and discard. Slice the kale into 3/4-inch ribbons. You should have 4 to 5 cups. Place the kale in a large bowl.
  2. If using the bread, toast it until golden brown on both sides and dry throughout. Tear into small pieces and pulse in a food processor until the mixture forms coarse crumbs, or crumbs to your liking.
  3. Pound or mince the garlic and 1/4 teaspoon of salt into a paste. Transfer the garlic to a small bowl. Add 1/4 cup cheese, EVOO, lemon juice, lemon zest, pinch of salt, pepper flakes, and black pepper and whisk to combine. Pour the dressing over the kale and toss very well (the dressing will be thick and need lots of tossing to coat the leaves). Let the salad sit for 5 minutes, then serve topped with the bread crumbs, additional cheese, and a drizzle of oil.
  4. This makes the most excellent lunch for DAYS. Also tastes super yummy with some grilled tofu on the side or mixed in. The tangy dressing will more than make up for the blandness of the tofu so no need to marinate the tofu before hand. Perhaps though add a little extra salt to the tofu steaks when grilling them up to round out the taste.
  5. Find Heidi’s original recipe and more kale noms here: 101 Cookbooks.
  6. Wanna get really crazy? Try this with orange juice and orange zest.

VeganGR Blog Take Over Part 2: Quick Sauerkraut

You know you have good friends when they take a veggie gift and your smartass comment about blogging for you and actually do it. So Jon and Kolene over at VeganGR have been the recipient of some ridiculous veggies from my summer surplus…Jon, the resident chef, and Kolene, the photographer came up with Sauerkraut when faced with a do or die cabbage situation a few weeks ago. Here’s what happened, according to Jon:

Faced with an exorbitant amount of cabbage (I mean, A TON of cabbage. See previous post about Adrienne’s gift of 40lbs of veggies), there was only one choice.

Sauerkraut.

Now, let’s be clear about this. I am lazy, and I hate waiting. I also have a mild fear of home fermentation.  Recent attempts at rejuvelac based cheese turned into a science experiment into mold than a delicious vegan chèvre. I am determined to plod on, but until I become the king of producing lactic acid, I needed another solution.

A Google search for “quick sauerkraut” turned up far fewer hits than you’d think. This recipe looked promising, so I went with that.

I didn’t have apple cider on hand, ‘cause like, who does? So I doubled the water. To balance and bring in the sugar I think the cider was intended to, I added a little sweetness. The result was really nice, and the hit of a recent summer barbecue!

Ingredients:

  • 1 T olive oil
  • 1 onion, sliced very thin
  • 1 medium green cabbage, sliced thin
  • 1 ¼ C apple cider vinegar
  • 1 C water
  • 1 T salt
  • 1 tsp caraway seed
  • 2 T sugar

Directions:

  1. Heat oil in pan, and add onion. Cook over medium heat until onion turns translucent.
  2. Add rest of ingredients and bring to a boil. Cook covered over low heat for 30-45 minutes. You want the cabbage nice and tender. Keep an eye on it, you may need to add a little more water.

This slideshow requires JavaScript.

VeganGR Blog Take Over Part 1: Eggplant Gravy

I have a small problem: I bite off more than I can chew. This would explain a few things: 1) my 15 lb weight gain in the last two years, 2) my zest for ordering multiple appetizers and never being able to eat an entree at a restaurant, and 3) subscribing to multiple CSA’s in the summertime and then freaking out when it gets to July/August and I have like, triple of everything.

I hate letting good food go to waste so I act as veggie broker to my friends giving them extras of my goods that Mr. Wonderful and I will just watch shrink and die in the confines of our fridge. In the case of eggplants, luckily I can broker all of them off to friends. It’s the only veggie I do not like, well, at least I thought I didn’t until my friends at VeganGR got a hold of my surplus and made eggplant into gravy!

I told Jon Dunn to write a guest post for me and then I could keep my own mouth shut up there, so here’s what he has to say:

There are lots of advantages to being friends with Adrienne and Derek. But the best is that they give us veggies. LOTS of veggies.

Seriously, Adrienne has admitted she’s been overwhelmed with the summer haul from her three (3!!) CSA shares. So, she’s been kind enough to share the wealth. The only requirement was that we blog about what we did with them.

So today, let’s talk eggplant. Adrienne is not a fan, so it was an easy decision to slough them off on us. It’s a good thing, because I can’t get enough of them! I thought I’d share with you a unique recipe I created one time that was kind of an accident.

I had an eggplant, wasn’t sure what I was making for dinner, but threw it in the oven. Then I started making other foods that were ENTIRELY unrelated to an eggplant. So here I was, with a beautiful roasted eggplant and mashed potatoes. So naturally, I made gravy.

Combined with cashews, garlic, and a bit of herbs, the eggplant comes together in a really silky smooth gravy when you blast it in a high power blender. Make sure you fully roast that nightshade. Hopefully for those of you that hate this wonder-veg, that dread of seeing the eggplant in the CSA box will vanish with this recipe!

Ingredients:

  •  2 medium eggplants
  • ½ C raw cashews (these need to be soaked if you’re not using a high power blender such as a vitamix)
  • 1 C water
  • 2 cloves garlic, peeled
  • 1 tsp salt (more to your taste)
  • ½ tsp thyme
  • pepper to taste
  1.  Cut your eggplants in half lengthwise. Score the skin, and place on a baking sheet lined with parchment paper.
  2. Roast the eggplant in a 400 degree oven for 45 minutes. You’ll know it’s ready when the skin looks all nice and toasty.
  3. Remove eggplant from the oven and remove the skin (let that sucker cool a bit before you go burning yourself!).
  4. Drop all the ingredients into your blender, set it to high and let it go for a couple of minutes. You’ll know when it’s ready when it’s all silky smooth.
  5. Serve over mashed potatoes, baked tempeh, chicken fried tofu, or any other amazing food that begs for a nice home-style gravy.

This slideshow requires JavaScript.

A Tale of Two Vegan Ranch Dressings

We haven’t purchased dressing from a store since my discovery of flavored balsamic dressings years ago, but ranch was always hard to substitute for dips and faux chicken tenders. Ranch dressing to dip well just about any and everything in from french fries to carrot sticks has become an American obsession and being vegan-ish doesn’t make me long any less for a dressing for this same purpose!

For a long while I searched high and low for a store-bought veg ranch dressing that I could embrace and love a la Hidden Valley Ranch. Alas, I’m not willing to put up with high fructose corn syrup OR things with faces in my dressing anymore, so to the Internet I went. I have tried many shorter order ingredient lists to make vegan ranch dressing and they are okay [the second recipe is the best small ingredient list dressing I have found for ranch], but this first recipe, tastes like REAL ranch dressing. Drip some veggies in it or serve over a salad. Keeps for about a week in the fridge.

  • 1 C soy Greek-style yogurt
  • 1 C vegenaise
  • 1 C almond milk, unsweetened [plus 2 tsp white or apple cider vinegar]
  • 1/3 C vegan sour cream
  • 1 tsp garlic powder
  • 1 tsp onion powder
  • 1 heaping T freshly ground black pepper
  • 1 tsp kosher salt
  • 1 T white vinegar [apple cider vingar will work in a pinch too]
  • 1 T lemon juice
  • 3 T fresh parsley, finely chopped

Directions:

  • To make “buttermilk” mix almond milk with 2 tsp of vinegar until frothy, set aside for up to 5 minutes to develop buttermilk consistency.
  • Mix the soy yogurt, vegenaise, almond “buttermilk” and vegan sour cream together in a large bowl.
  • Stir in the garlic and onion powders and pepper, then add the salt, vinegar, lemon juice and parsley and stir until just combined. 
  • Cover and refrigerate until needed, up to a week.
  • Veganized from a Food Republic recipe.

ranchdressing_recipe

In a hurry? Try this recipe instead. Not quite as rich like regular ranch dressing but makes for a good schmear on a burger, sandwich, and dipping sauce.

  • 1 C vegenaise
  • 1/2 tsp garlic powder
  • 1/2 tsp onion powder
  • 1/4 tsp black pepper
  • 2 tsp parsley, chopped fresh or 1 tsp dry
  • 1/2 C unsweetened soymilk or almond milk
  • salt to taste

Directions:

  • Whisk all ingredients together and chill before serving. Add a little more nondairy milk if you need to thin dressing.

Tempeh, Lettuce, Tomato Sandwiches (TLT)

THE sandwich we eat just about once a week in the summer…sometimes more frequently 🙂 I’ll let the recipe do the talkin’ this time.

Thanks to 101 Cookbooks for the base recipe.

1/4 C soy sauce
2 T balsamic vinegar, I use Tangerine flavored
2 T pure maple syrup
3 T adobo sauce from a can of chipotle peppers

8 ounces of tempeh, cut into 1/3-inch thick strips

1 small basket of cherry tomatoes (2 cups)
1/4 C extra-virgin olive oil olive oil
1 T pure maple syrup
scant 1/2 teaspoon of salt

1 small head of romaine lettuce, cored, then cut into 1/4-inch ribbons
1-2 large avocados, mashed with a pinch of salt just before assembling
4 or 8 extra-thin slices of hearty whole grain bread, well toasted

Preheat oven to 350F degrees.

Whisk together the soy sauce, balsamic vinegar, maple and adobo sauce. Pour 1/3 of the tempeh marinade into an 8×8 baking dish (or something comparable) – you want a dish that is just big enough to hold the tempeh in a single layer – this way it will be fully enveloped by the marinade. Pour the remaining marinade over the top of the tempeh, cover and keep in the refrigerator for a couple hours, overnight or until ready to use.

While the tempeh is marinating, go ahead and roast the tomatoes. Cut each tomato in half and arrange them in a large oven-proof baking dish. Mix together the olive oil, sugar, and salt and pour this over the tomatoes. Gently toss them a bit, making sure they all get coated, finishing with each tomato facing cut-side up. Place in the oven and bake for 45 minutes or so, until the tomatoes are shrunken and sweet [I have also left them whole with no consequence].

When the tempeh is done marinating heat a large pan over medium-high heat and cook the tempeh slices for a few minutes on each side. You may need to do this in batches if you don’t have a big enough pan. Set the tempeh slices aside until you are ready to assemble the sandwiches.

To assemble each sandwich take one slice of bread and slather a generous layer of mashed avocado or vegenaise. Place a small helping of the shredded lettuce on top of the avocado, a few tomatoes, then a few slices of the tempeh, and more tomatoes. Enjoy either open faced or topped with another avocado-slathered bread slice.

Note: we call these tomatoes “crack tomatoes” in our house…they freeze amazingly, so go ahead and make a triple batch. They taste great on tacos, in chili, tortilla soup, etc.

And some nights you eat tomatoes for dinner…

Who can really argue with the taste of a Michigan tomato in July? I can’t. So in taking all the mystery out of this post…some nights you simply eat tomatoes for dinner. Shown below are heirloom varieties Green Zebra and Beefsteak from Good News Farm.

This slideshow requires JavaScript.

Ingredients:

  • Tomatoes
  • Salt
  • Pepper

Slice, cube or dice. Salt and pepper to taste. Noms.

Peanut Kohlrabi Slaw Wrap

Kohlrabi has been gathering in my crisper for weeks. It was beginning to outnumber the greens, which if you are a CSA member of any kind you know that greens are prolific this time of year while we wait for all of the other delish stuff to grow-so this was becoming an emergency situation. Mr. Wonderful and I wanted a quick dinner and this fit the bill. The recipe below is for peanut kohlrabi slaw, we served this slaw over Gardein Seven Grain strips on a reduced fat flour tortilla, it was like a salad in a tortilla. Super simple, fast, and made from the stuff I found in the fridge.

Need a few more recipes for the space-aged looking veg? Check out the kohlrabi archives…yep, they exist.

  • 1/2 head green or Asian cabbage (finely shredded about 1 lb)
  • 2 T peanut butter (smooth)
  • 1 T peanut oil
  • 2 T rice wine vinegar
  • 1 T soy sauce
  • 1/2 tsp brown sugar
  • 3 cloves clove garlic (minced)
  • 1 tsp powdered ginger
  • 1/4 tsp cayenne pepper (taste)
  • 2 kohlrabi (bulbs peeled and grated or Julienne 1 1/2 to 2 cups)
  • 3-4 large radishes, grated or minced
  • 1/4 C dry roasted peanuts (garnish)
  • 1/4 C dried currants
  • salt
  • pepper
  • sesame seeds (roasted, garnish)

Directions:

Make the dressing in a mason jar. Put all items but sesame seeds, peanuts, radishes, currants, kohlrabi, and cabbage into a jar, shake vigorously. Taste a few times and readjust seasoning as you wish.  Toss together with all other ingredients.

Good additions would be: grated carrot, green onion, water chestnuts, crispy rice noodles, and fresh grated ginger. Adapted from Food.com.

This slideshow requires JavaScript.

Shit! I don’t have any taco seasoning.

This is my second Shit! I don’t have any…. recipe blog post. My first had to do with chili powder. My anger level seems to have risen as this title involves an actual explicative and before I was just using a mild substitute; or maybe I just REALLY wanted to make tacos tonight…I digress and give you taco seasoning for when you realize you have none. This recipe shakes out to be WAY less sodium than the packaged brands, so do yourself a favor and just make it yourself before you have a taco seasoning emergency. It takes all of about 3 minutes. I made 5x the amount (some math involved, hooray) and store it in a mason jar to keep any new emergencies at bay.

  • 1 Tbsp chili powder
  • 1/4 tsp garlic powder
  • 1/4 tsp onion powder
  • 1/4 ancho chili powder (this is an add in for more flavor, not necessary for “normal” flavor)
  • 1/4 tsp crushed red pepper flakes
  • 1/4 tsp dried oregano
  • 1/2 tsp paprika
  • 1.5 tsp ground cumin
  • 1/2 to 1 tsp sea salt (more or less to taste)
  • 1 tsp black pepper

1. In mason jar, measure out all items listed above and give it a little shake until well mixed. If you like it spicy, add more red pepper flakes or mess around a little and try some dried chipotle pepper, etc. This is totally customizable. Adapted from allrecipes.com and many other bloggers before me.

This slideshow requires JavaScript.

Strawberry Chia Freezer Jam

My friend Jen had to sell me on this idea big time as every other time I have had or used chia seeds except in a granola bar, I have come away feeling icky with bloating, and all those black seeds sticking in my teeth, gelling and [in my imagination] growing [cha, cha, cha chia]. This however, seems like an appropriate place for chia seeds-in freezer jam.

This recipe was adapted from Oh She Glows  and came together in a blender, in a blink. Since this is freezer jam, pop it into a freezer safe container AFTER you let it sit for a few hours and be sure to leave plenty of headspace for the chia to work it’s magic.

Ingredients

  • 6 C blended strawberries [AFTER blending you want 6 C which is about 12 C of whole berries]
  • 3 T maple syrup (or other sweetener of your choice)
  • 6-12 T water
  • 3 T chia seeds
  • 2-3 T lemon juice
  • zest from 2 lemons

Wash, hull, blend strawberries together, stir in syrup, chia, zest, juice and 6 of the T of water. Depending on the consistency you want from the jam, add up to 6 T more water. We added all 6 as our chia were already thickening past the point we really liked it while it was sitting waiting for us to scoop it into the jars.

Ladle into freezer safe jars, allow to sit 6-8 hours before putting in the freezer to gain perfect chia thickness. Store in freezer up to 6 months. The Mountain Mama Cooks adds vanilla to hers if you would like for a more “cooked” versus raw taste. If you are a purist, Eating Bird Food always has strong chia recipes even for the chia-shy like me.

This recipe tasted like a fresh picked strawberry with a kick. I will need that come winter.

This slideshow requires JavaScript.

Those who can, should…well, Can.

I love veggies. I mean it would be tough to be veganish and not adore vegetables (let’s just pretend that eggplant is a toxin because save eggplant, I love all veggies-I hate, no loathe, eggplant);  but veggies pickled? Well that has to be about as close to bliss as one can get eating summer food straight from a jar in the off season (if mine last that long).

My day job is as project director at a public relations firm, this past winter we retained a client called The Canning Diva. She came to our first meeting with a jar of salsa and even if she walked out the door as a client tomorrow, I would remain close friends with her. She’s “good people” as my friend Josh Hiller would say. I’ve drank the Kool Aid. I now measure and use ratios in the kitchen. The Canning Diva makes canning accessible and dare I say fun. She teaches preservation methods to all from novices to seasoned veterans and everyone in between, her enthusiasm for the art of canning is frankly unmatched. I mean she is TRULY excited about preserving food as art.

About a month ago, I invited The Canning Diva to my book group (we stopped reading books like years ago) and we created all sorts of delish cocktail delights like pickled Brussels sprouts, carrots, and asparagus; a session from which all members left feeling confident, inspired, and maybe a little drunk…we had to TRY the cocktail pickles The Canning Diva brought that showed us our finished product- I mean it was absolutely necessary we know what we were getting ourselves into, right? Sidebar: do not even get my friend Julie talking about the dry wine pickled garlic cloves…she might be having a love affair with them. They are exceptional.

I held off experimenting with pickling until Michigan asparagus came into season at my fave local farm, Krupp Farms, whereupon my gal pal Jen, her mom, Mrs. Jen, and I decided to take a cloudy summer Saturday and turn in into a canning extravaganza! We canned over 140 jars of delish summer surprises in one very full day.

While my goodies sit on a shelf, waiting to “cure”, I leave you with one of my favorite things to come out of a jar since peanut butter…The Canning Diva’s Pickled Asparagus recipe. I’ll share the strawberry recipes we worked on soon too.

The Canning Diva says: a great side to a frothy beer or an excellent alternative to celery in a Bloody Mary! If you would prefer a non-alcoholic splendor, they taste excellent in a salad or an addition to a relish tray.

Ingredients

  • 7 lbs asparagus
  • 5 cups white vinegar
  • 5 cups water
  • ½ cup pickling or canning salt
  • 6 cloves of garlic, whole
  • ½ tsp dill seed
  • ½ tsp mustard seed per jar
  • ½ tsp crushed red pepper flakes per jar

This slideshow requires JavaScript.

As usual, prepare all of your jars ahead of time and have your lids and rings setting in boiled water. If you don’t know how to do this…please, get with Diane, AKA The Canning Diva at one of her Canning 101 classes offered in GR. It will open a whole new world to you for food preserving and SAVING MONEY by preserving the summer harvest.

In a large stainless steel stock pot, combine vinegar, water and salt. Stir well and bring to a boil, stirring to dissolve the salt. Place a garlic clove, ½ tsp dill seeds, ½ tsp of hot pepper flakes and ½ tsp mustard seeds in each jar. Raw pack the asparagus into each jar leaving a generous ½” head space.

Ladle hot liquid into jars being sure to maintain the ½” headspace. Remove any air bubbles using your canning utensil or the handle of a wooden spoon. Adjust headspace if necessary.

Tip: If you run out of pickling liquid, use half the parts listed above, boil and fill jars accordingly. Never fill your remaining jars with just water – it will lessen the acidic level and cause food to spoil.

Using a warm wash cloth dipped in vinegar, wipe each rim and screw bands. Place lids and rings on each jar and hand tighten. Place jars in water bather and cover with water. Process the jars for 10 minutes. Remember, processing time doesn’t begin until the water is at a full rolling boil.

We canned 10 lbs of asparagus in varying sized jars from pint to half pint, so we doubled this recipe AND then needed an additional recipe of JUST pickling brine so we whipped up 3 brine recipes in all. Super simple to fix a brine error if it happens is what I’m getting at.

Full disclosure: The Canning Diva is one of my clients, I paid for a class as did a bunch of my gal pals about a month ago, then we were unleashed into the world of canning. I wrote this blog to share this info, a divine recipe, and help bring awareness to this craft during the Midwestern summer bounty, not necessarily to promote her business; however, if that also happens…AWESOME because this is a skill I should have learned a long time ago. Thanks Canning Diva!

Wheat Berry Spring Salad

A recipe doesn’t have to be very complex. Sometimes I just grab stuff that is either: 1) about to go bad in my fridge, 2) really fresh in my fridge, or 3) stuff that sounds good and hope it all tastes good together. This was #3 for a quick dinner and several more lunches.

Not rocket science, hell sometimes I don’t even measure…

Ingredients:

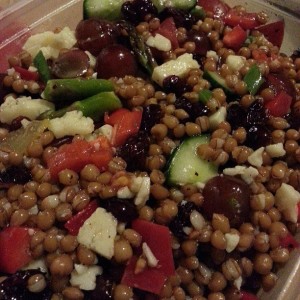
  • Everything in my fridge cut up (asparagus raw, tomato raw, english cucumber, dried cranberries, red grapes halved, a little romano cheese cut in chunks-0mit for vegans)
  • 2 c cooked wheat berries

Dressing :

  • 1/2 C apricot balsamic vinegar (or any other flavor really)
  • 1/8 C evoo
  • salt and pepper to taste

Tossed the dressing with the wheat berries and severed over microgreens. Tasted amazing the next day in a pita.

Wheatberry Salad

Fakin’ CheeseBurger (Vegan)

This slideshow requires JavaScript.

It’s summer. Flame broiled burger smells are in the air, and you are still eating burgers off a grill from the frozen food section of the local IGA? I’m sorry to break this to you, but you’re doing it all wrong. Take a few minutes, whip up your own burger and revel in the excitement that is all of the ordinary and none of the animal. Veggies, you know what I mean.

This recipe comes to you courtesy of The Best Veggie Burgers on the Planet (so far this book has proven to be true to the title).

Ingredients:

  • 1 C TVP granules
  • 1 scant C veggie broth
  • 1/4 C imitation bacon bits, store-bought or homemade
  • 1 C vital wheat gluten flour
  • 1/4 tsp liquid smoke
  • 1/2 C nutritional yeast
  • 1 T garlic powder
  • 1 T onion powder
  • 1/4 C peanut butter
  • 1/4 C pure maple syrup
  • 1/4 C vegetable oil (I got away with 1/8 C)
  • 1/4 C bbq sauce
  • salt and pepper
  • oil for frying/grilling

Directions:

In a large micro-safe bowl, mix together the TVP granules and the broth, cover tightly with plastic wrap or a lid and microwave for 5-6 minutes. Alternatively, bring the broth to a boil, pour over the TVP, cover, and let sit for 10 minutes.

Add the bacon bits, flour, liquid smoke, nutritional yeast, garlic powder, onion powder, peanut butter, maple syrup, oil, bbq sauce, salt and pepper to the bowl. Knead together for 5 minutes or so, then let sit a few minutes to thicken up.

Form into 4-6 patties. Refrigerate or freeze until ready to use.

Cook as desired. Panfry, grill or bake in a 350 oven until cooked through with a crisp-ish outer coating. They freeze well.

Roasted Veg Mini Pizzas

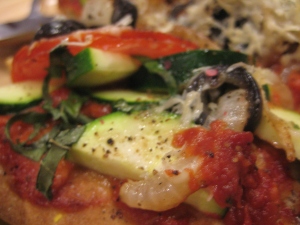
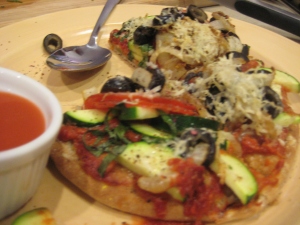
Shocked that I might be full after just half of this serving size. I continued to eat of course until I was stuffed of this goodness. Another yummy Happy Herbivore meal plan recipe that will now be a weekly staple at the Wonderful residence: Roasted Veg Mini Pizzas (serves 1)

  • 2 whole-wheat Pita Pockets
  • 1/2 C marinara sauce
  • 1 C zucchini
  • 1 tomato, diced
  • 1 onion, sliced
  • 3 1/2 T nutritional yeast or vegan parm
  • sliced black olives (optional)

Spread a thin layer of marinara sauce over the top of each pita. Not too much or you will just have soggy bread, icky. Top with squash, tomato and onion. Bake in 400 degree oven for about 10 minutes (check at 5) until everything is warmed and browning slightly. I placed my pitas directly on the oven rack to get a crispy “crust.” Sprinkle with olives, nutritional yeast, or vegan parm (shown in photos). Don’t forget the Frank’s Red Hot!

IMG_7310 IMG_7311 IMG_7308 IMG_7309 IMG_7307

418 calories for 2 pita pizzas, 4.8g fat, 77g carbs, 24g fiber, 20g sugars, 30g protein.

Chana Palak Masala – Easy for YOU to say!

I talked about the Happy Herbivore meal plans a few weeks ago in a post and I will again sing the praises that just $19.00 a month can bring you a little more peace into a crazed life by just telling you what to do and when to do it. I often like it when there is ONE area of life I don’t have to make yet another decision during they day and Lindsay Nixon is my beacon of hope in that regard.

Sometimes I look at a recipe in the meal plan and think, how in the world will that taste good? Fortunately I’m kinda brave and will mostly eat anything, this recipe surprised me at 1) how few calories it has, 2) how filling it is, 3) it really is delicious and 4) you can eat take-out like food at home in under 30 minutes.

Enough of my blabbering, here’s the recipe (2 servings):

  • 1 small onion, diced
  • 2 cloves garlic, minced
  • 12 oz peeled whole or diced tomatoes (canned)
  • 15 oz chickpeas (canned), drained and rinsed
  • 10 oz frozen baby spinach (fresh okay too)
  • 1 C low sodium veg broth or water
  • 1/2 tsp ground cumin
  • 1/2 tsp coriander
  • 1/2 tsp mild curry powder
  • 1/2 tsp tumeric
  • 1/4 tsp ground ginger (or double it with fresh)
  • dash of red pepper flakes
  • 1 tsp lemon juice (optional, but use it…it makes it better)
  • 1 tsp garam masala

Make magic:

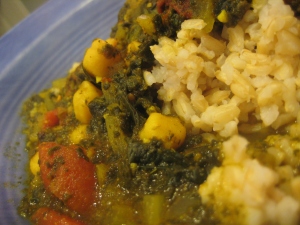
In a large pot, saute’ onions and garlic with a few tablespoons of water, instead of oil. Once the onion is translucent, add spinach, chickpeas, tomatoes with juices and broth. Cover and cook over medium until the spinach cooks down [I used frozen and didn’t drain and it came out fine]. Uncover and break up tomato bits. Add all spices except garam masala, add lemon juice at this point. Cover and cook for 3 minutes. Add 1/2 garam masala and cook for 2 more minutes more. Taste, adding additional garam masala if desired plus salt and pepper if needed. Turn heat off and allow to sit for 5 or so minutes. The dish will thicken as it stands. Start to finish, this took me about 30 minutes. I served about 1/4 of this recipe over brown rice.

Per serving: 283 calories, 58g carbs, 3g fat, 10g fiber, 7g sugar, 12g protein

IMG_7312 IMG_7314 IMG_7313

Butternut Black Bean Tacos

I could eat tacos every. single. day. Honestly.

Tacos as we know them in the Wonderful residence, typically are born from whatever is leftover in the fridge, or what can be tossed together before it goes bad in the fridge. I had a few onions that were about to sprout and take over the cupboard, so I used those for the base of these tacos. PS: anything on a tortilla tastes good. Knock yourself out in your own kitchen.

  • 2 C butternut squash mash (pulled from freezer) – okay to use from freezer section at store-cubed is fine too; heck use sweet potatoes if you want
  • 2 C black beans, cooked (pulled from freezer) – okay to use canned
  • 2 large yellow sweet onions
  • 1 tsp olive oil
  • 1 tsp Mexican oregano
  • 1 tsp powdered garlic
  • 1 tsp powdered cumin
  • 1 tsp chili powder
  • corn or flour tortillas, your choice
  • topping [obviously pickled jalapenos, arugula, salsa, and taco sauce]

Saute onions in olive oil until transparent or bronzed. Add smashed or cubed butternut squash and black beans to this mix along with all spices. Warm through. Serve on a tortilla.