Category Archives: Vegan

VeganGR Blog Take Over Part 1: Eggplant Gravy

I have a small problem: I bite off more than I can chew. This would explain a few things: 1) my 15 lb weight gain in the last two years, 2) my zest for ordering multiple appetizers and never being able to eat an entree at a restaurant, and 3) subscribing to multiple CSA’s in the summertime and then freaking out when it gets to July/August and I have like, triple of everything.

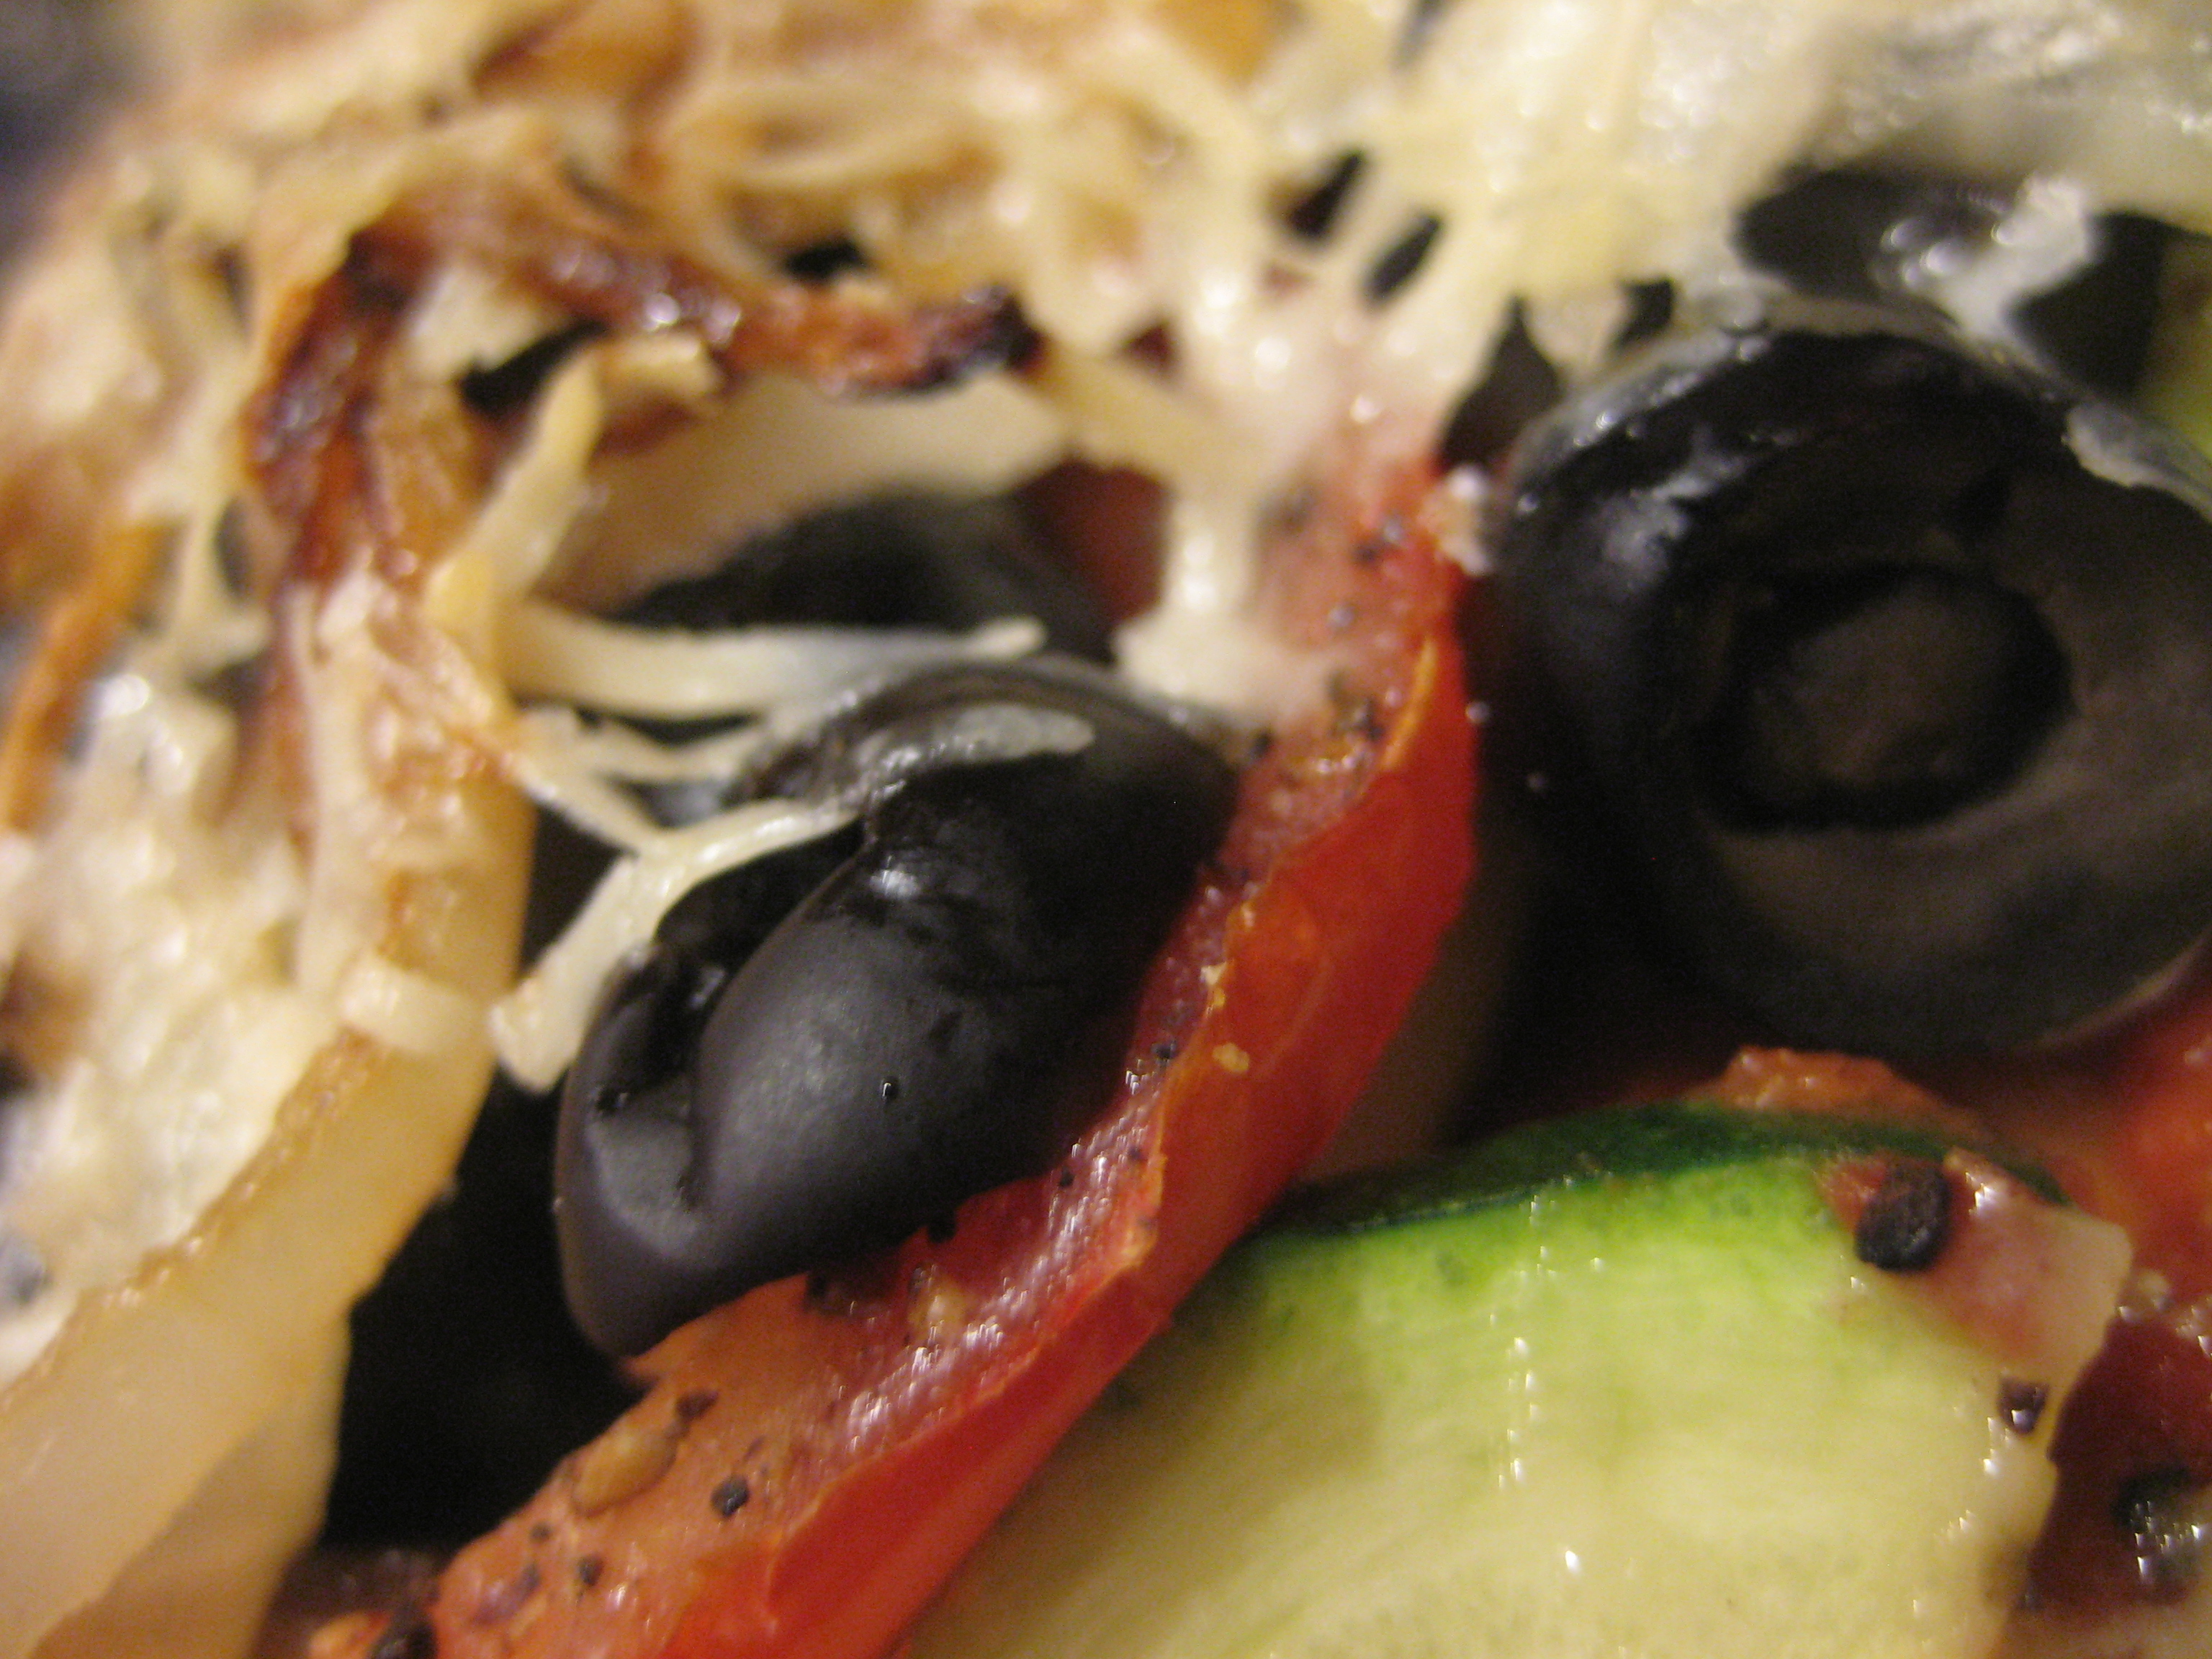
I hate letting good food go to waste so I act as veggie broker to my friends giving them extras of my goods that Mr. Wonderful and I will just watch shrink and die in the confines of our fridge. In the case of eggplants, luckily I can broker all of them off to friends. It’s the only veggie I do not like, well, at least I thought I didn’t until my friends at VeganGR got a hold of my surplus and made eggplant into gravy!

I told Jon Dunn to write a guest post for me and then I could keep my own mouth shut up there, so here’s what he has to say:

There are lots of advantages to being friends with Adrienne and Derek. But the best is that they give us veggies. LOTS of veggies.

Seriously, Adrienne has admitted she’s been overwhelmed with the summer haul from her three (3!!) CSA shares. So, she’s been kind enough to share the wealth. The only requirement was that we blog about what we did with them.

So today, let’s talk eggplant. Adrienne is not a fan, so it was an easy decision to slough them off on us. It’s a good thing, because I can’t get enough of them! I thought I’d share with you a unique recipe I created one time that was kind of an accident.

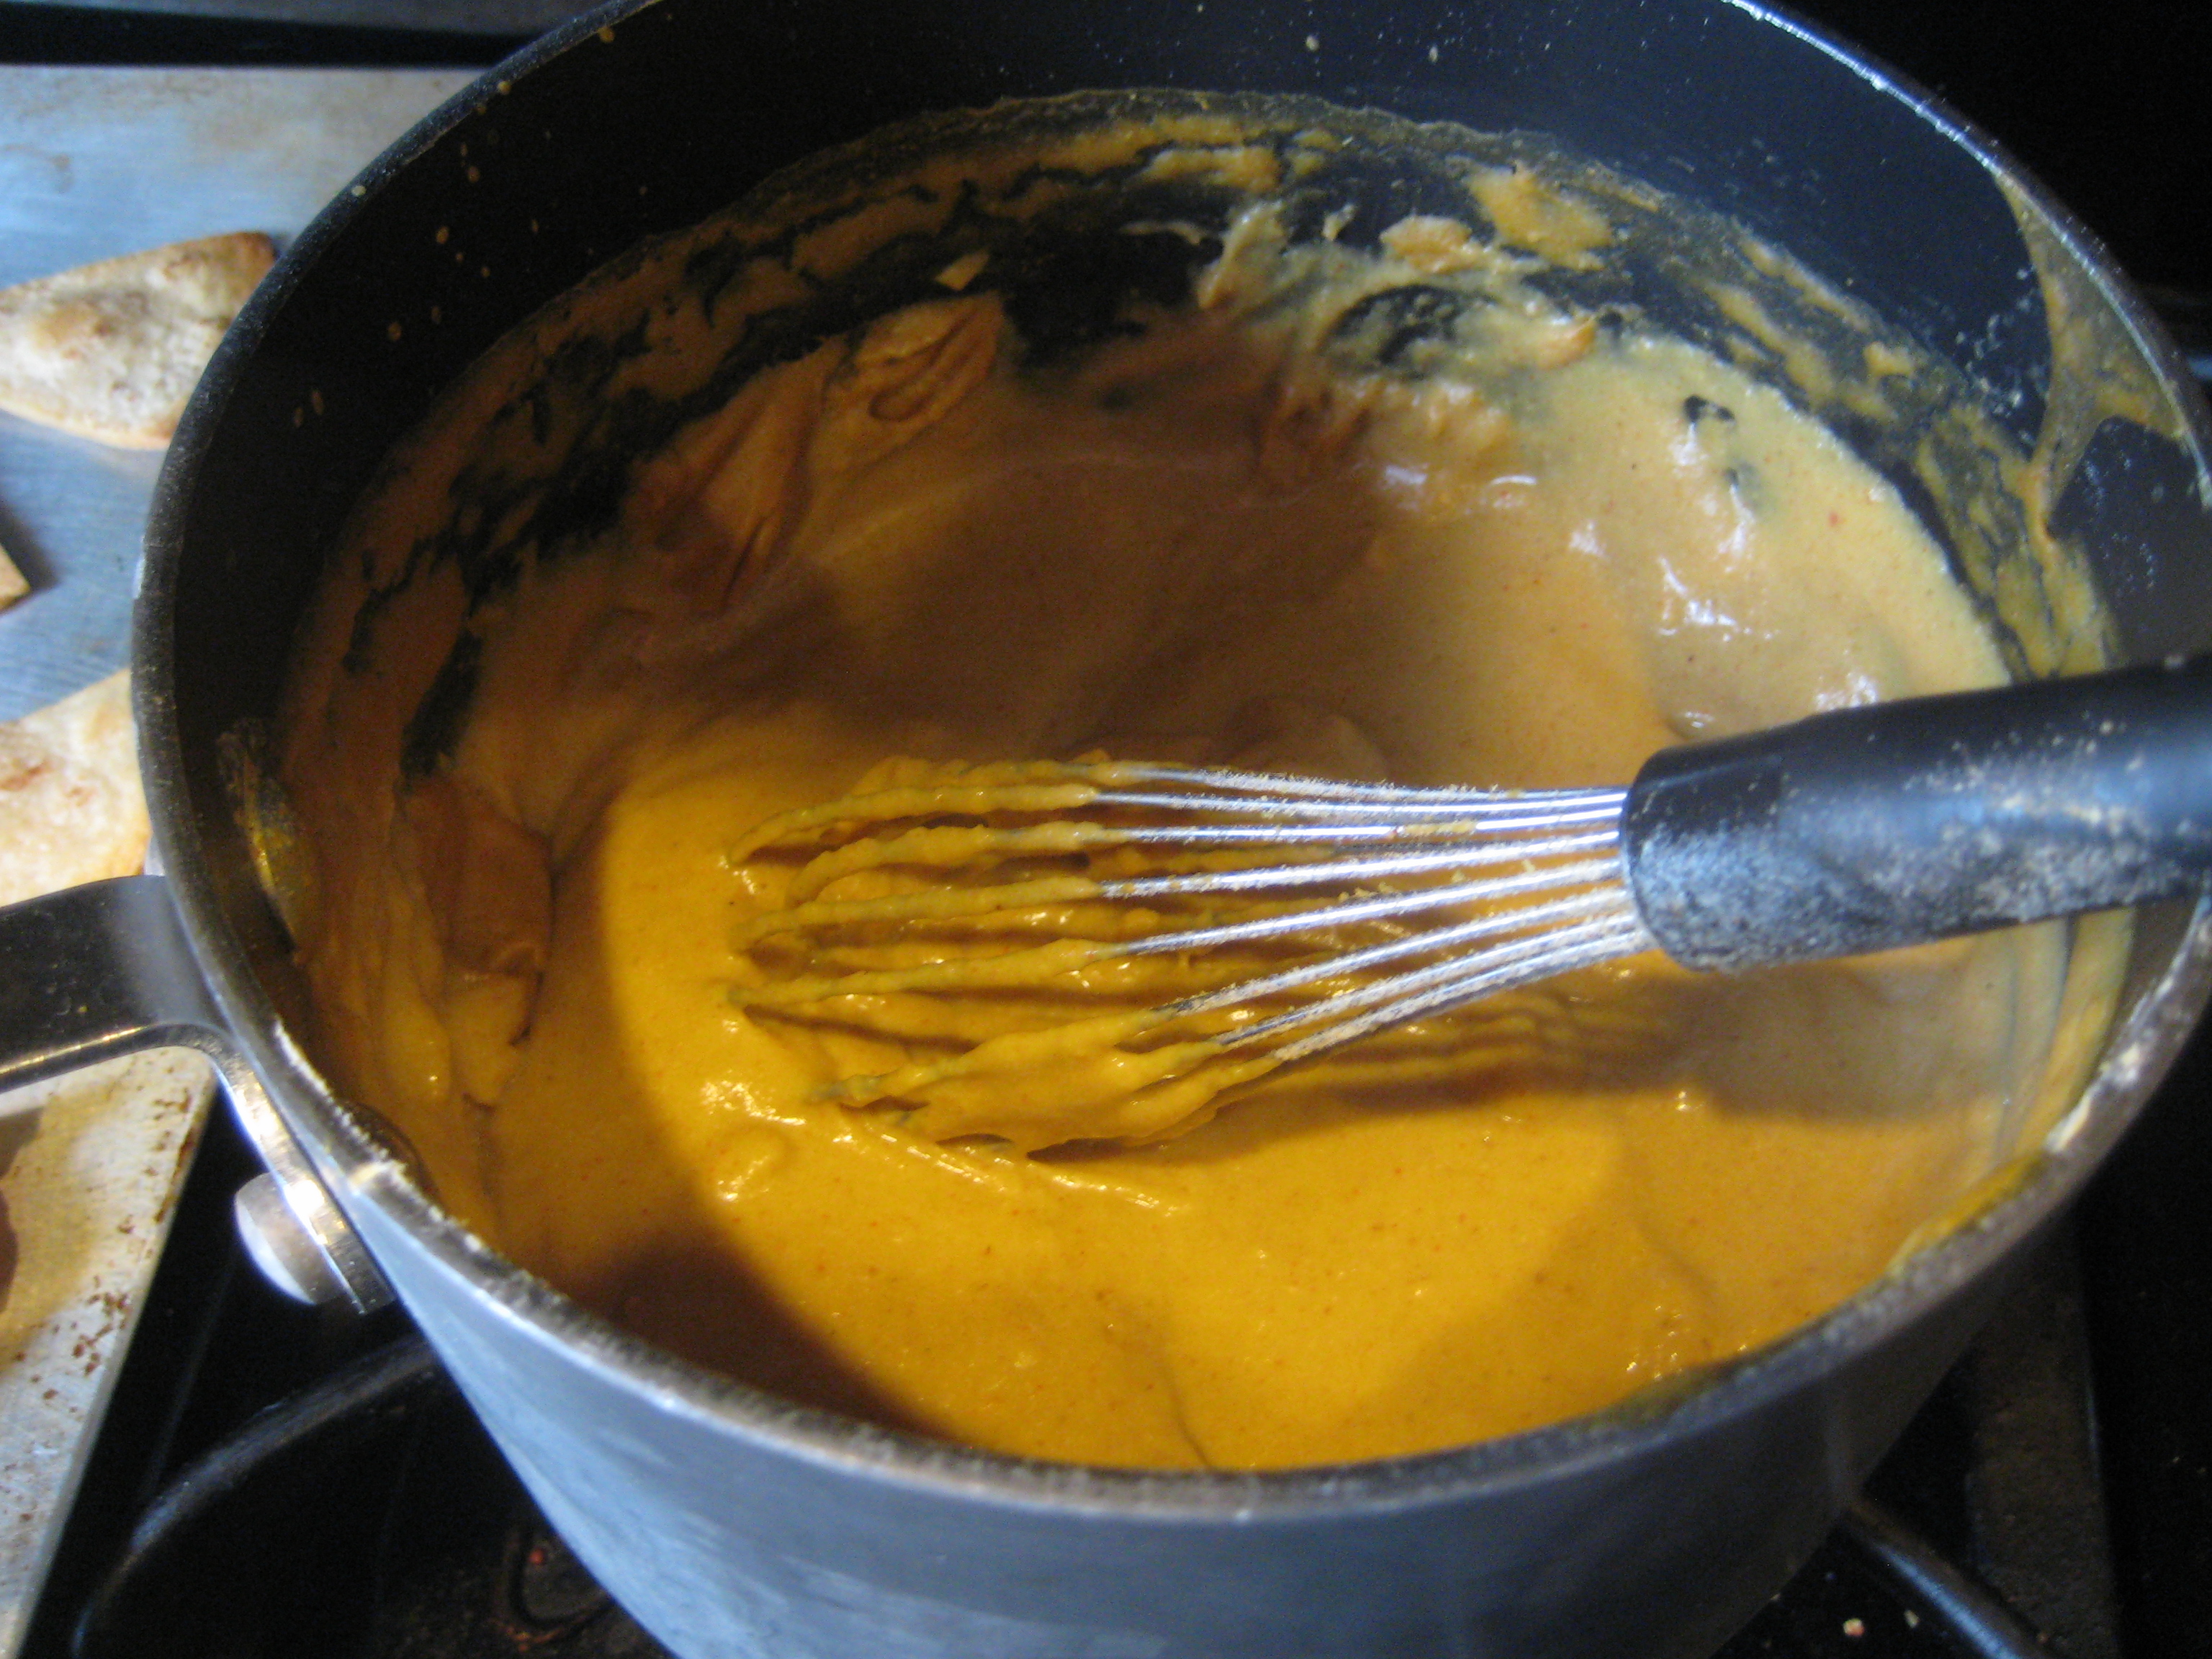
I had an eggplant, wasn’t sure what I was making for dinner, but threw it in the oven. Then I started making other foods that were ENTIRELY unrelated to an eggplant. So here I was, with a beautiful roasted eggplant and mashed potatoes. So naturally, I made gravy.

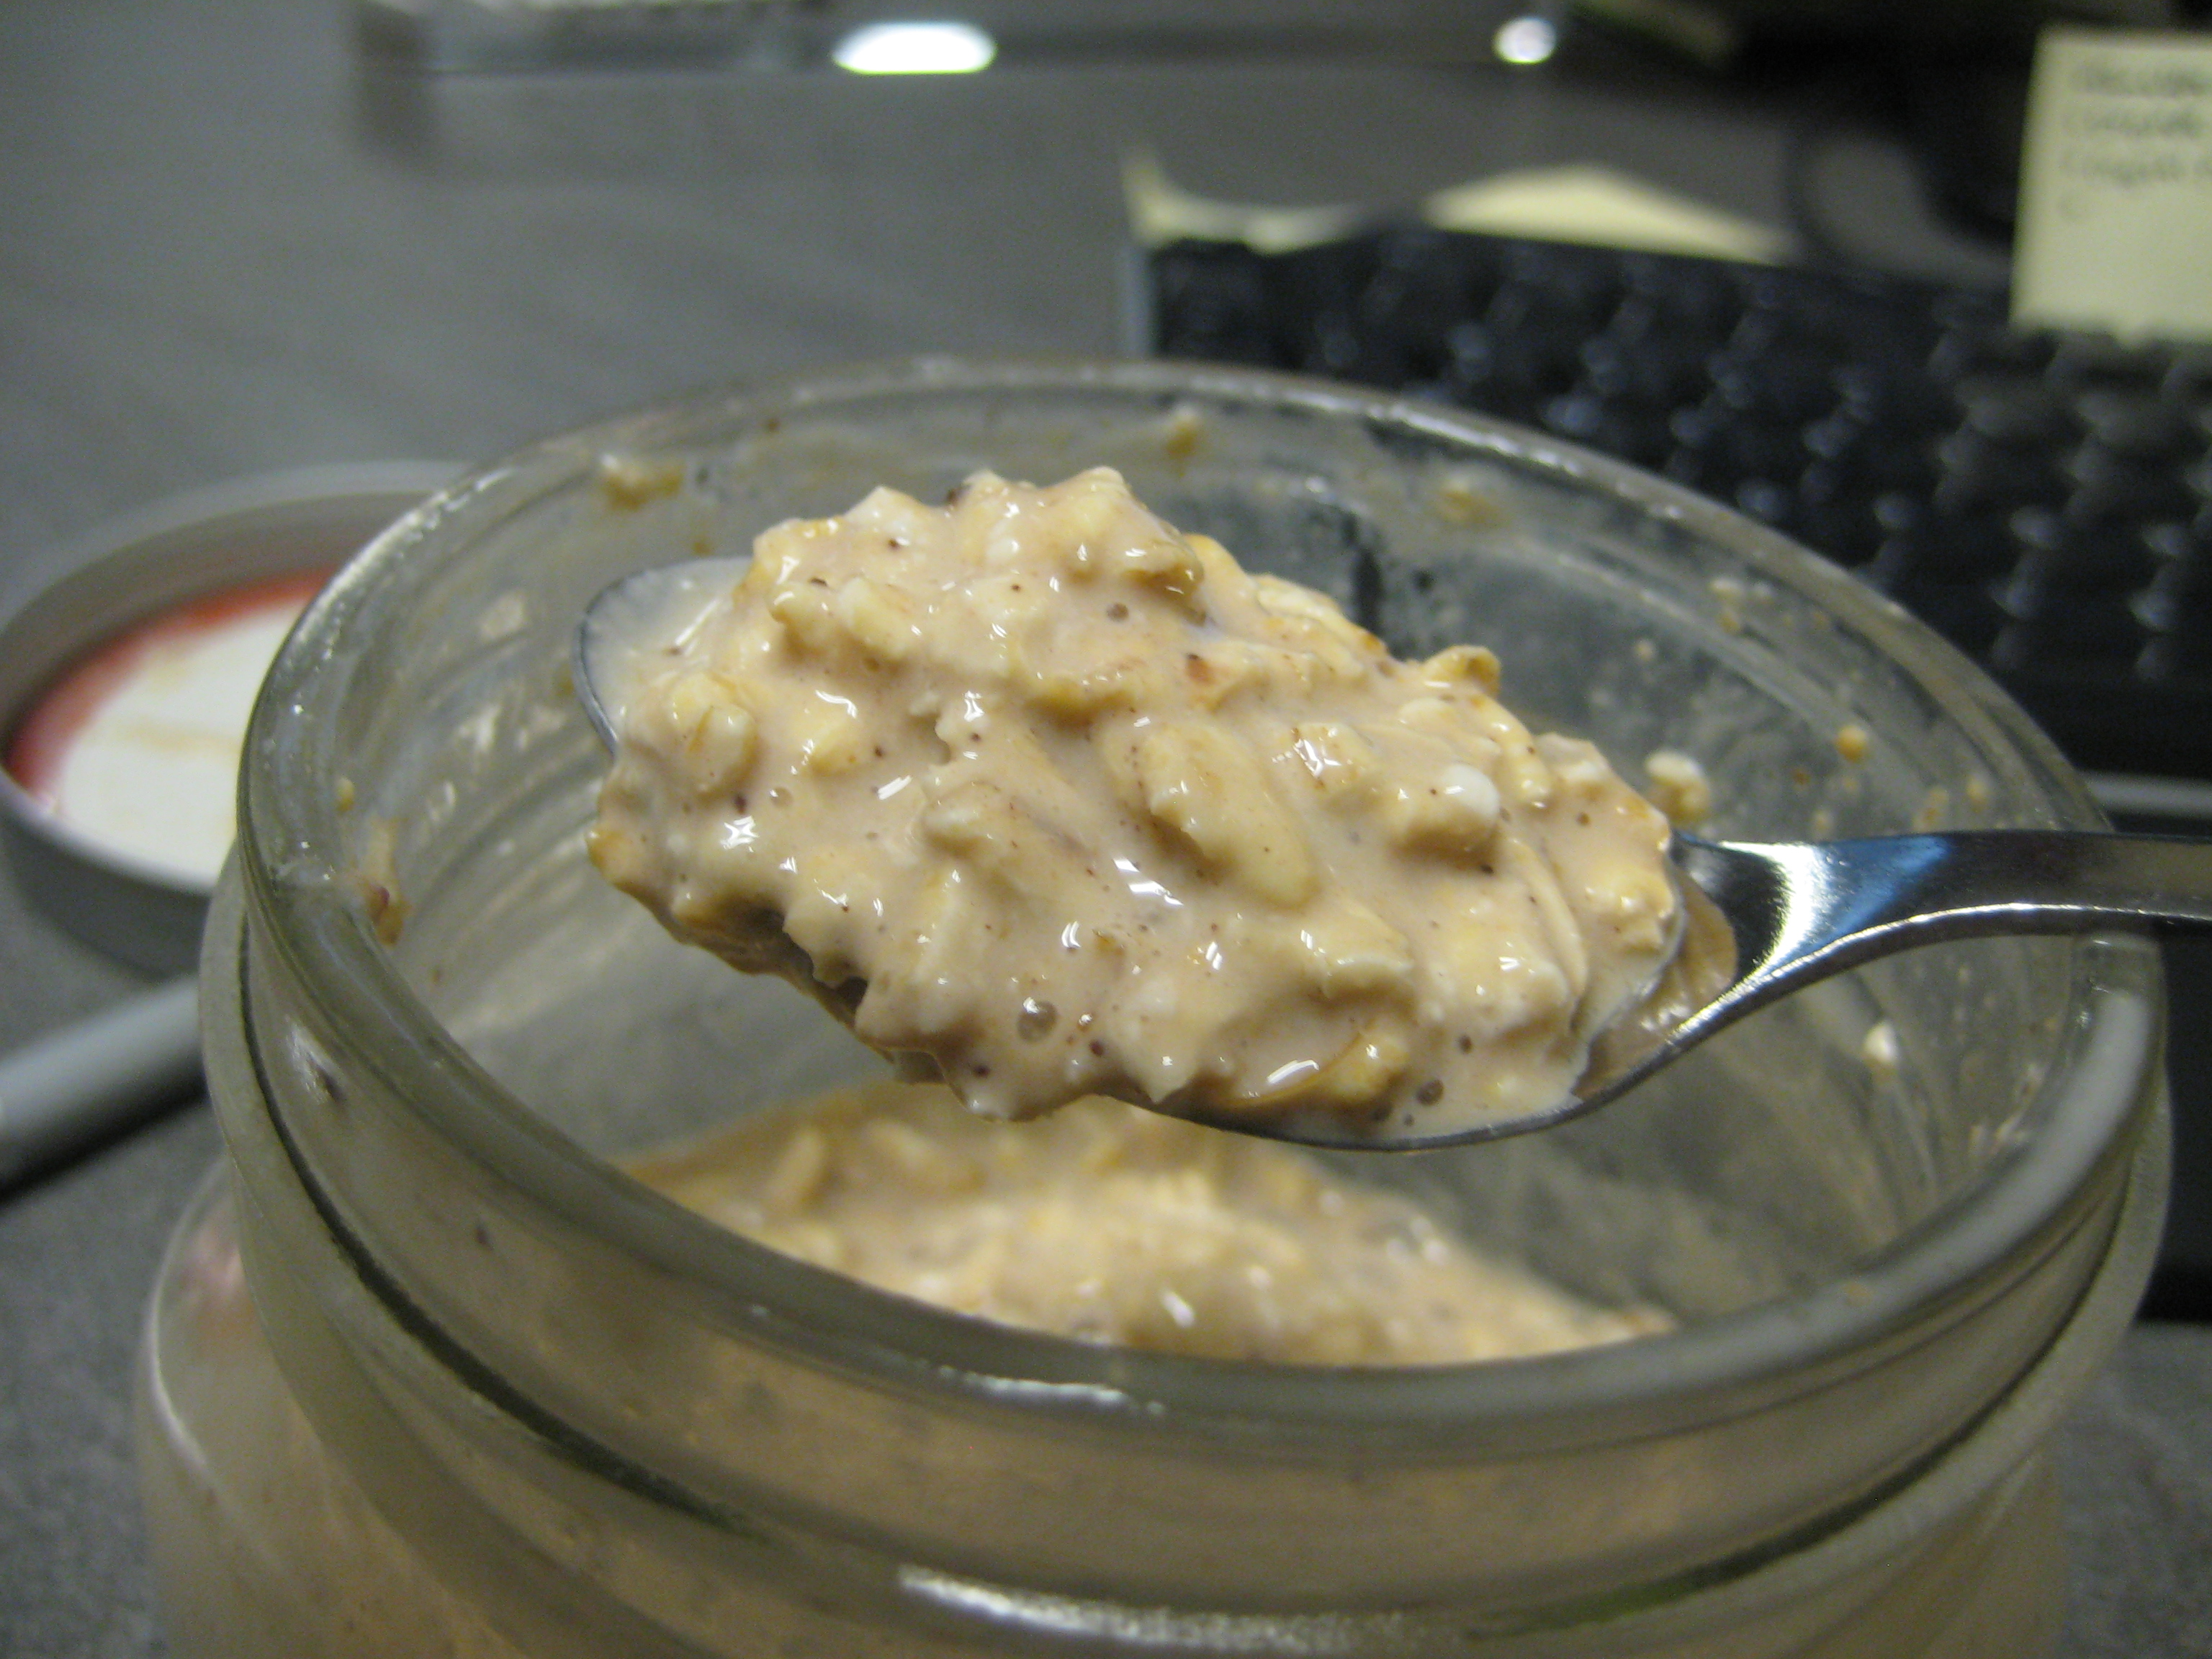
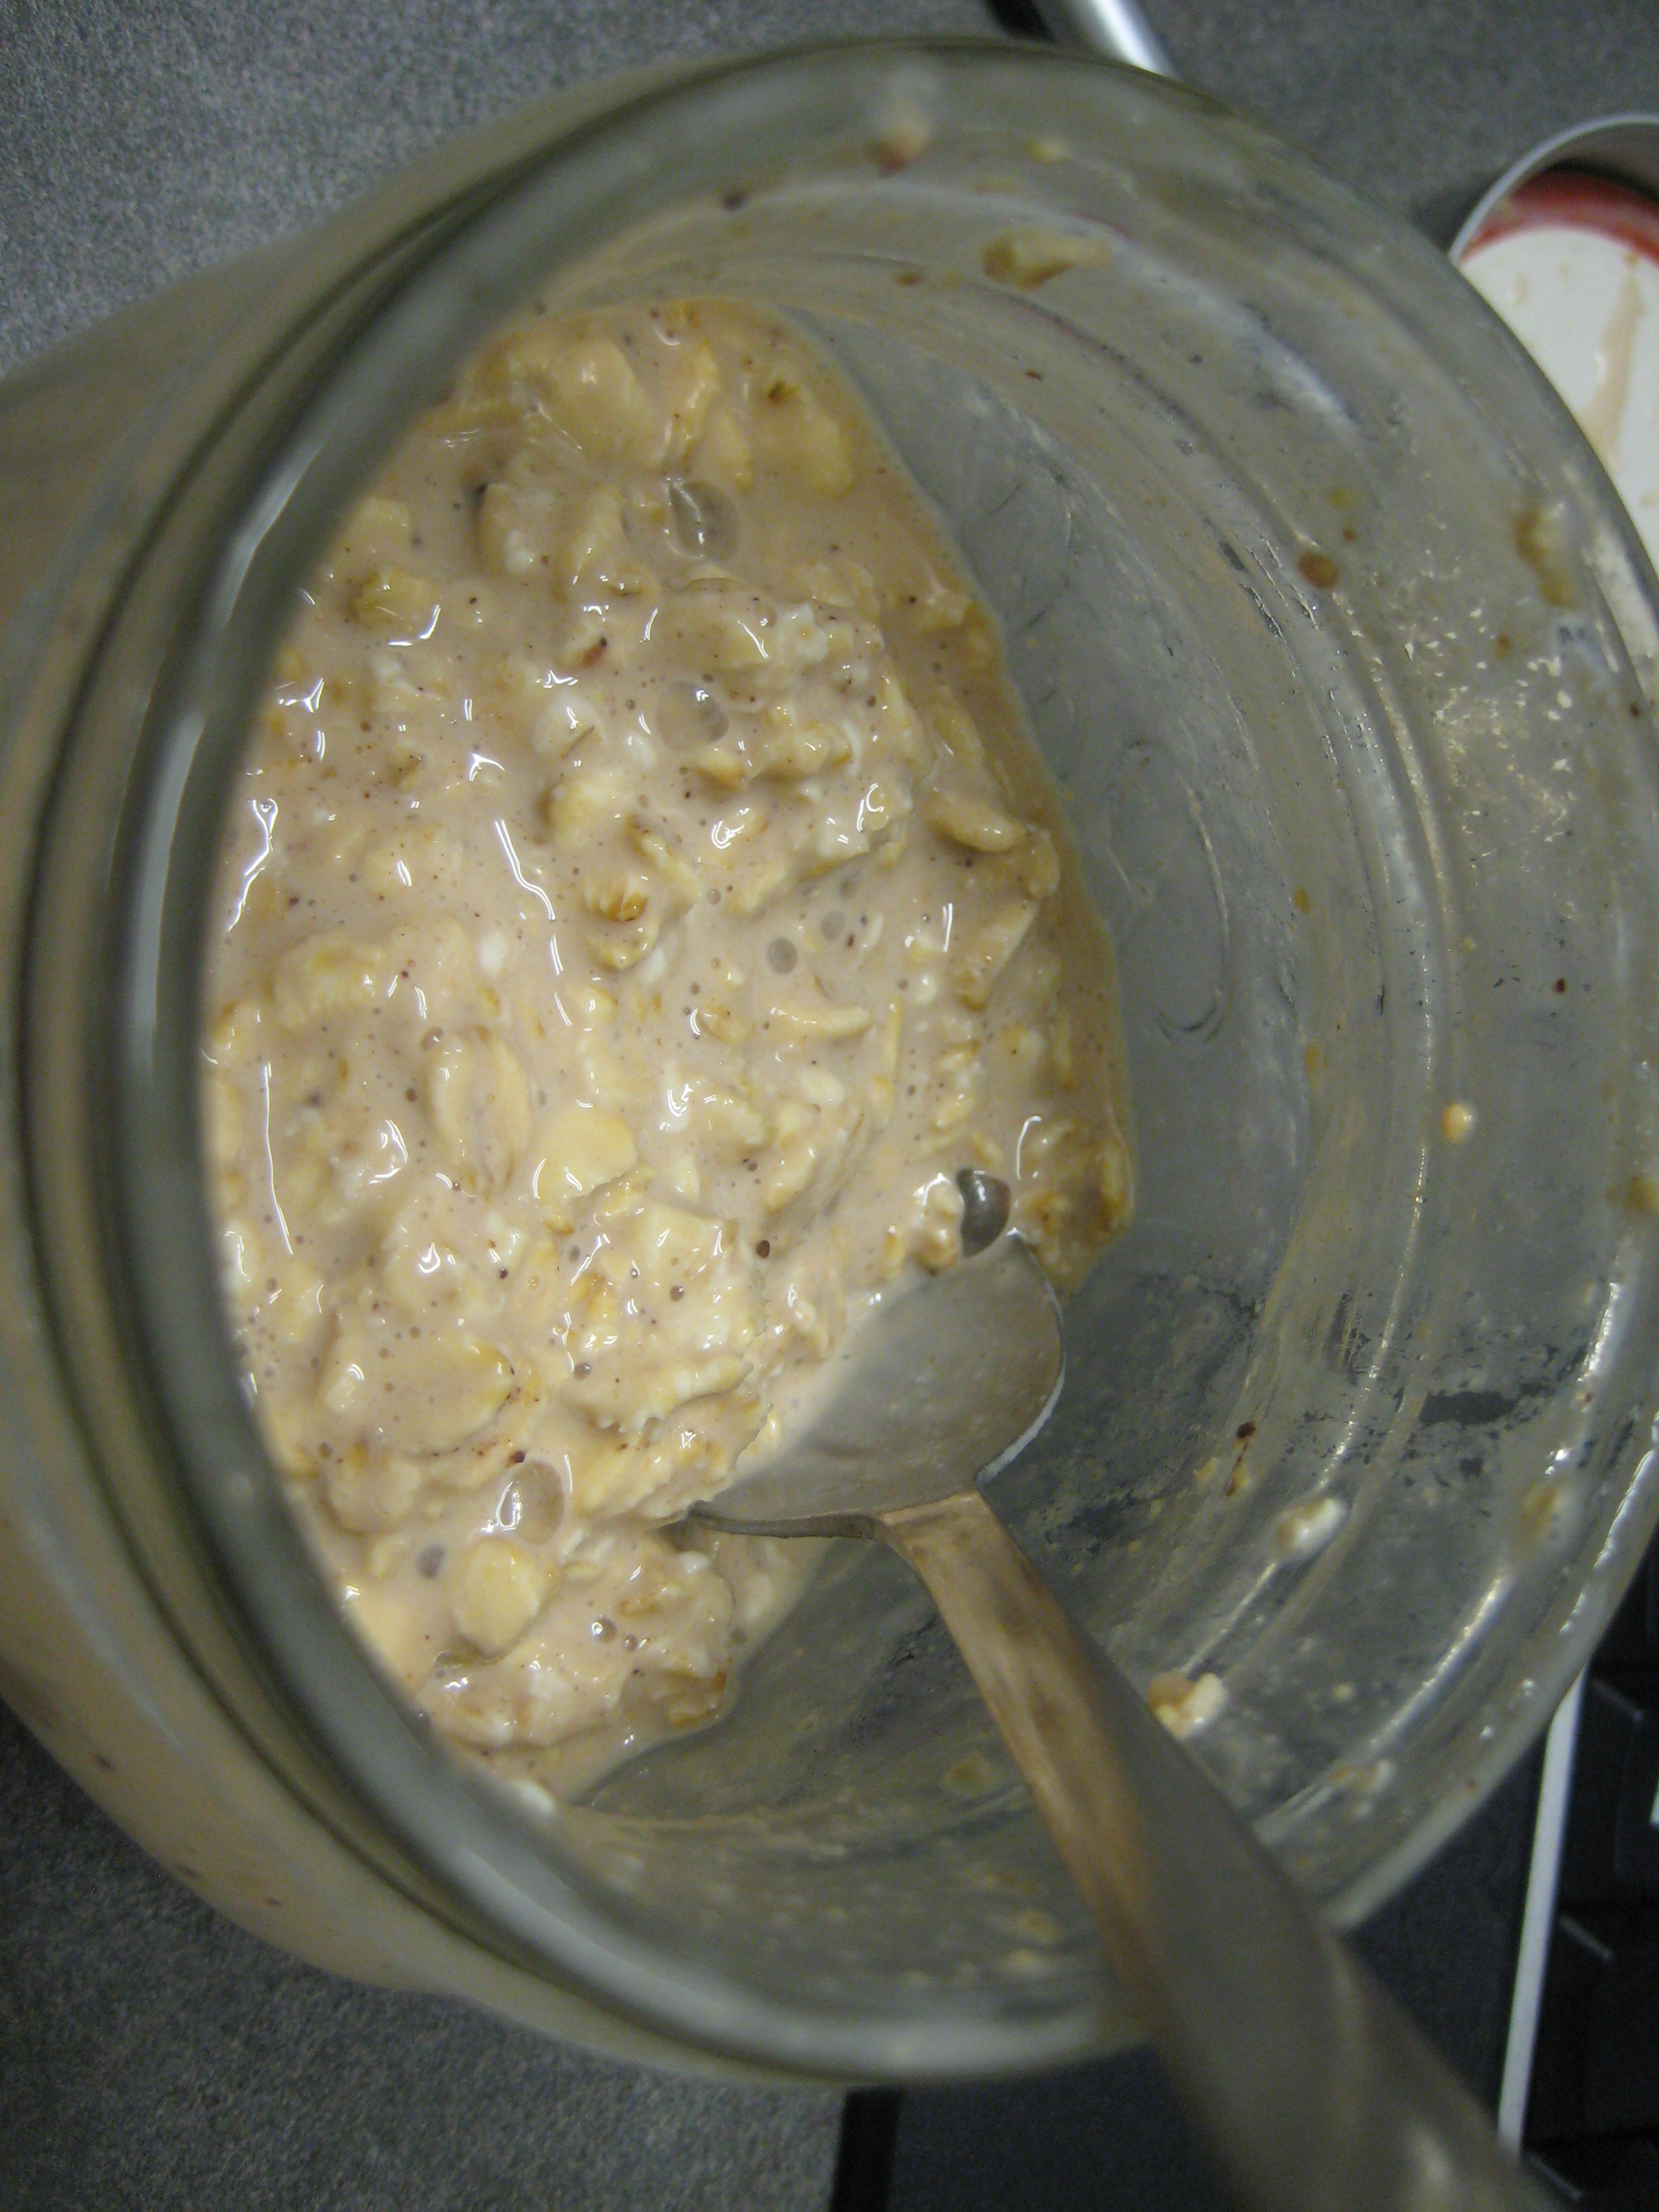
Combined with cashews, garlic, and a bit of herbs, the eggplant comes together in a really silky smooth gravy when you blast it in a high power blender. Make sure you fully roast that nightshade. Hopefully for those of you that hate this wonder-veg, that dread of seeing the eggplant in the CSA box will vanish with this recipe!

Ingredients:

  •  2 medium eggplants
  • ½ C raw cashews (these need to be soaked if you’re not using a high power blender such as a vitamix)
  • 1 C water
  • 2 cloves garlic, peeled
  • 1 tsp salt (more to your taste)
  • ½ tsp thyme
  • pepper to taste
  1.  Cut your eggplants in half lengthwise. Score the skin, and place on a baking sheet lined with parchment paper.
  2. Roast the eggplant in a 400 degree oven for 45 minutes. You’ll know it’s ready when the skin looks all nice and toasty.
  3. Remove eggplant from the oven and remove the skin (let that sucker cool a bit before you go burning yourself!).
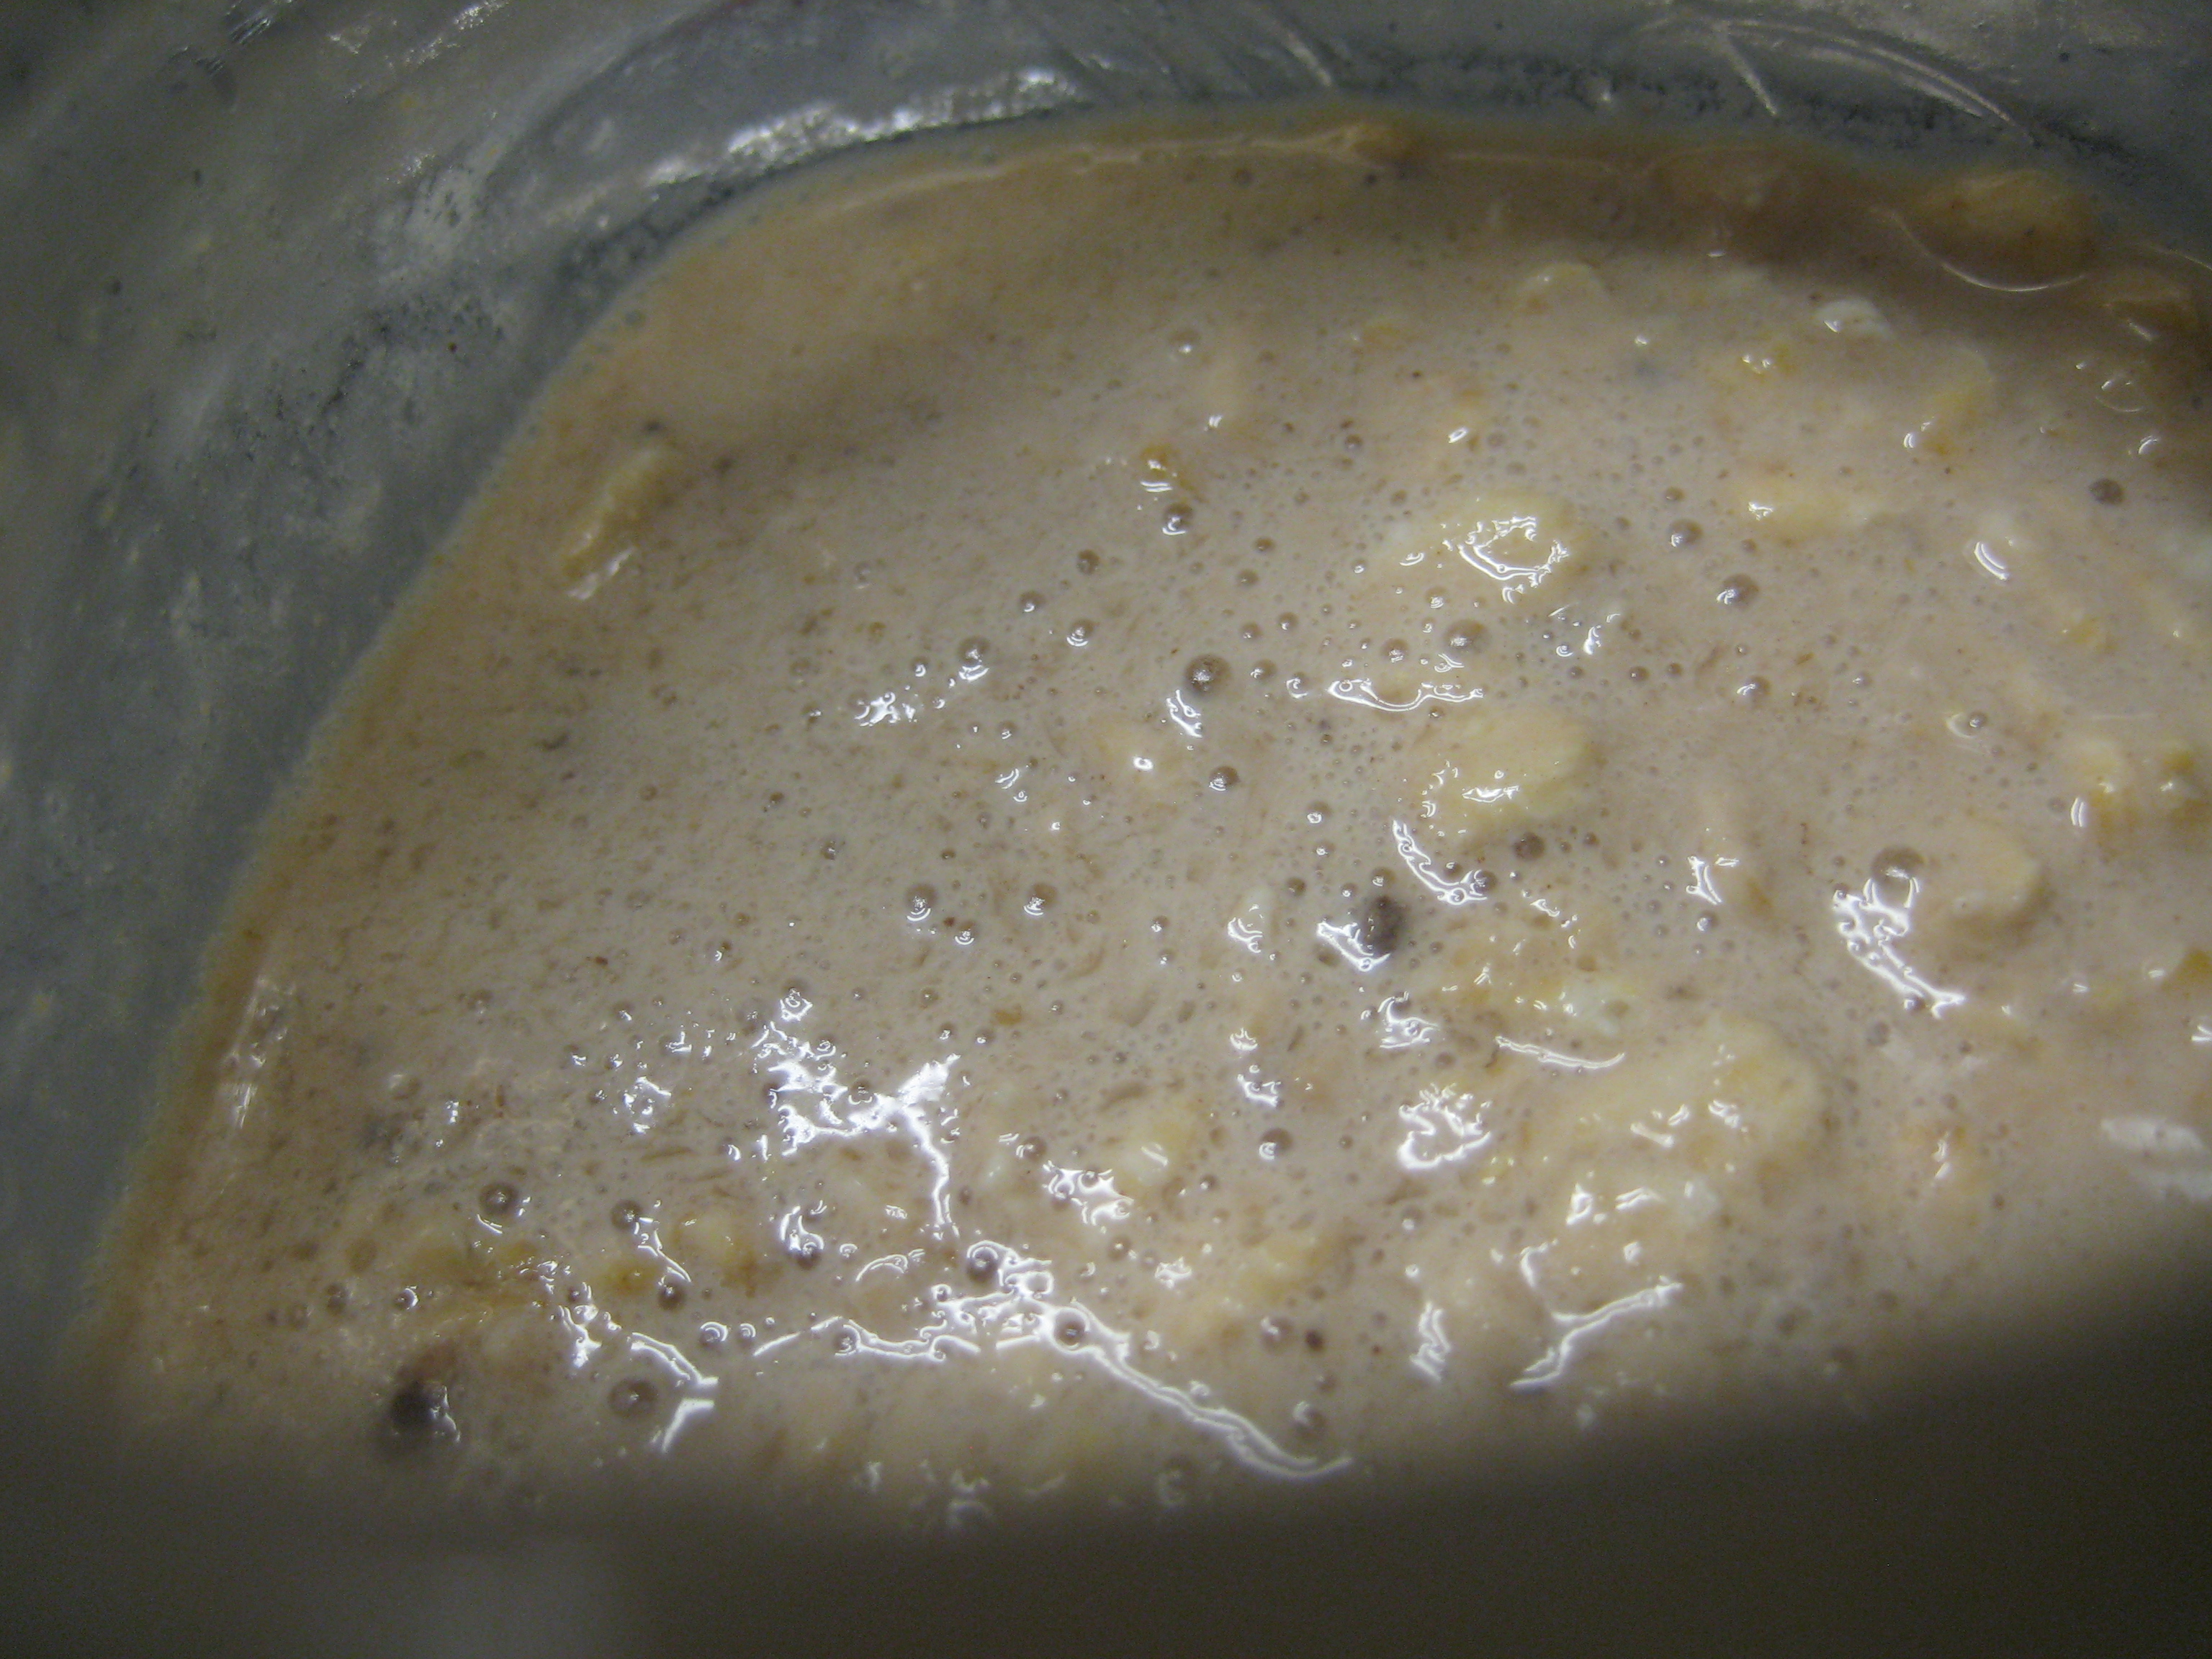
  4. Drop all the ingredients into your blender, set it to high and let it go for a couple of minutes. You’ll know when it’s ready when it’s all silky smooth.
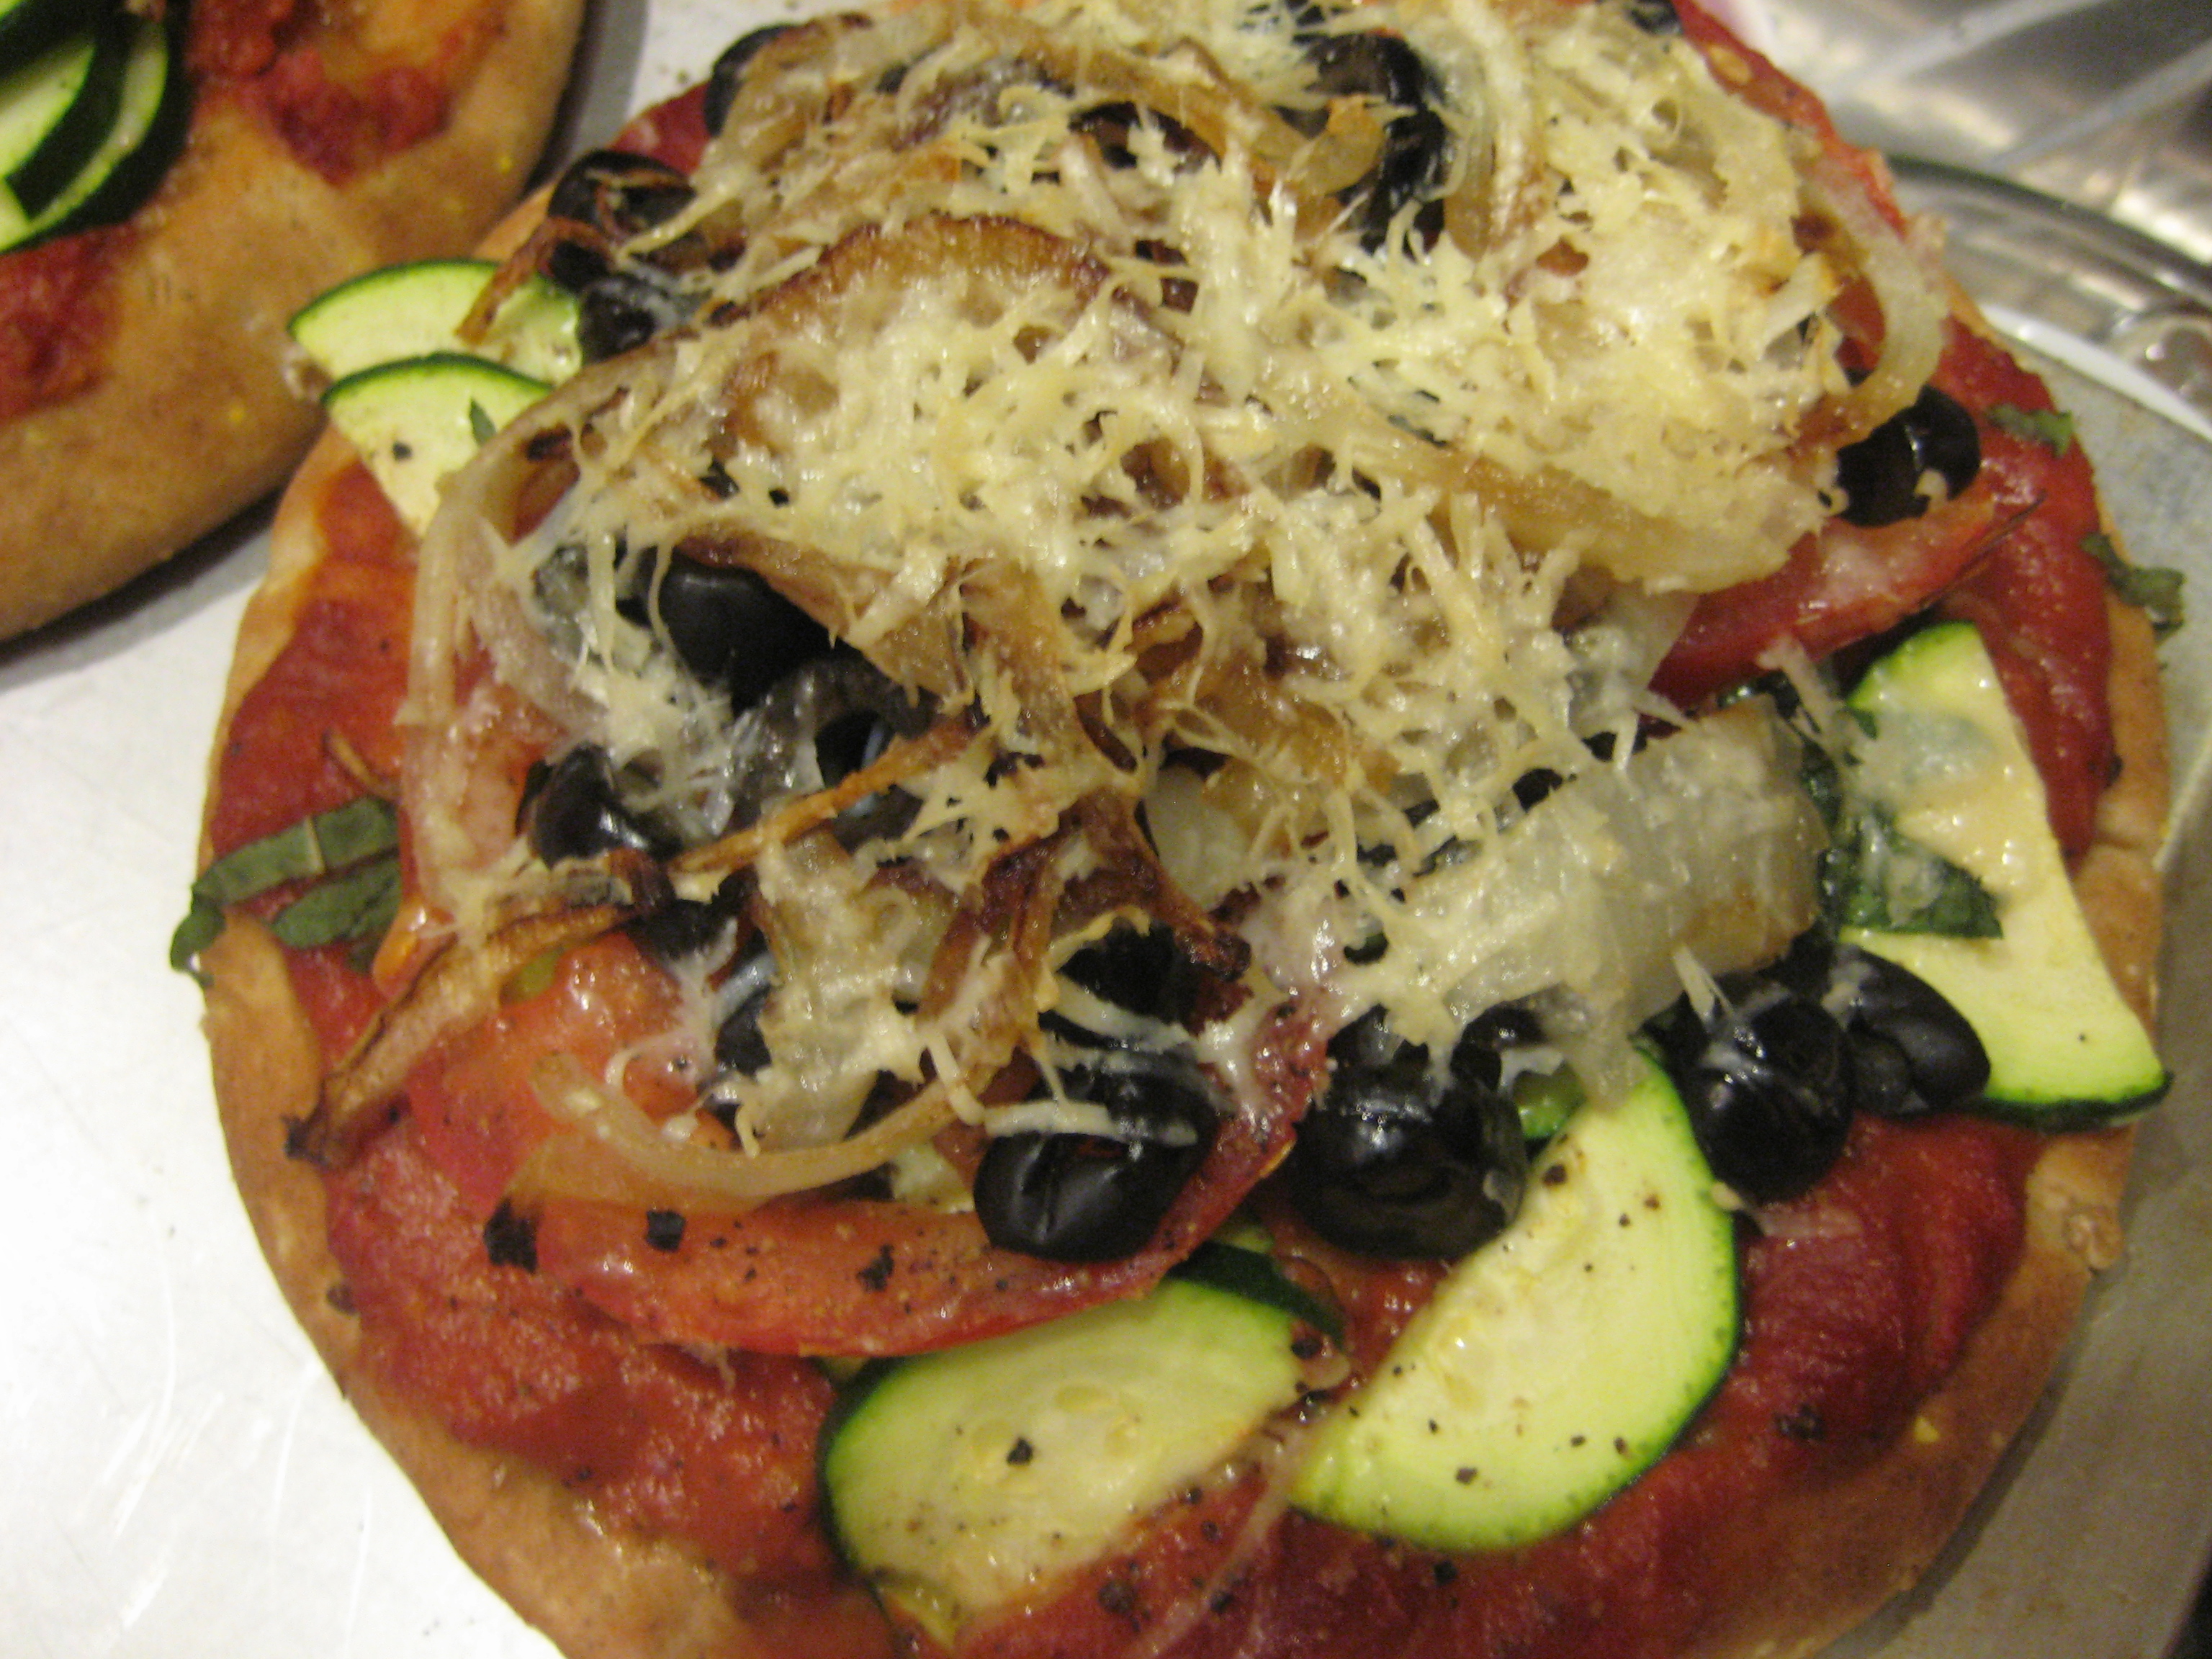
  5. Serve over mashed potatoes, baked tempeh, chicken fried tofu, or any other amazing food that begs for a nice home-style gravy.

This slideshow requires JavaScript.

Rustic Vegan Peach Crisp

I’m not a baker. It involves measuring, math, and patience. I’m not good at any of those things. Crisps are perfect for people who care not to measure. They are obviously a rebel dessert. It’s the end of peach season in Michigan and I could not put the siren sound of the white and flame peaches out of my head a second longer and so I bought maybe a few too many which resulted in sharing. I’m so good at sharing!

I give you a recipe for people who hate measuring (for those of you that can’t help yourself, approximate/actual measurements accompany my very scientific ones): Rustic Vegan Peach Crisp

Ingredients:

  • A dozen or so peaches, prepped in removal of skin and pit and sliced (I got 4-6 slices per half of peach-they were quite large-see very scientific here)
  • 2 handfuls of brown sugar (this is roughly 1/2 C total)
  • Sprinkle of cinnamon
  • Dash of salt
  • 4 handfuls of oats (use the real kind, not the quick ones-this is roughly 1 C total)
  • 1/2 stick Earth Balance, at room temperature (margarine-which is 1/4 C)

Directions:

Preheat oven to 375 degrees.

  1. Prep peaches, if you work quickly you don’t have to bother with lemon juice to keep them from browning. Put slices into a pie pan or other small baking pan you have. I made three batches, used 2 pie pans and an 8 x 8 baker.
  2. Sprinkle cinnamon and salt on prepped peaches.
  3. In large bowl combine, oats, Earth Balance (softened) and sugar. Squish around with your hands until chunky and mixed well-this is your “crisp.”
  4. Put crisp onto peaches in pans, you are making a little crust to seal in the peach juices.
  5. Bake x 15-20 minutes, until your peaches are tender and the crisp is well, crisp.

Note: With some crisps there is a bunch of juice associated with the fruit caused by adding lemon juice, or letting it sit for too long before baking. If you hustle you won’t have to add anything to thicken the juice (as there won’t be much to thicken) and you get pure fruit flavor with nothing to get between you and immediate bliss.

This slideshow requires JavaScript.

Categorizing this under “breakfast” and “dessert” as I did eat it for breakfast this AM-don’t judge me.

Curried Chard Vegan Frittata

Swiss chard is one of those greens I’m not wild about unless it is IN something else or heavily, heavily seasoned. This recipe is modified from Vegan Brunch in the spirit of curried scramble and can be customized with herbs and seasonings in just about any combination. It keeps well and tastes amazing tossed into a pita with arugula and garlic vegenaise for lunch the next day.

  • 1 tsp olive oil
  • 6 cloves garlic, thinly sliced
  • 1 bunch swiss chard, rough stems removed, chopped well (about 4 cups)
  • 2 tsp dried oregano
  • 1 pound firm or extra firm tofu
  • 1 T tamari or soy sauce (use tamari if gluten free)
  • 1/4 C chives, chopped
  • 1/4 tsp hot curry powder
  • 1/4 tsp sweet curry powder
  • 1/4 tsp granulated garlic
  • 1/4 tsp granulated onion
  • 1/4 tsp white pepper
  • 1/4 teaspoon tumeric
  • several dashes fresh black pepper
  • 1/4 cup nutritional yeast flakes
  • salt to taste

Preheat oven to 400 F.

Preheat a large heavy bottomed pan over low-medium heat. Add the oil and the garlic and cook for about 3 minutes, stirring occasionally. What you’re doing here is “blonding” the garlic, it’s ready when it’s turned a light amber color.

Add the chard, oregano, all spices, chives, and and turn the heat up to medium high. Saute for about 5 minutes, until chard is completely wilted/ Add splashes of water if needed to get the chard to cook down. Turn the heat off.

While the chard is cooking, prepare your frittata base. Give the tofu a squeeze over the sink to remove a little of the water. Use your hands to crumble and squeeze it in a large mixing bowl, until it has the consistency of ricotta cheese (about 3 minutes). Add the remaining ingredients to the tofu and mix well. When your chard is ready, incorporate it into the tofu. Be sure to get all of the garlic, but if there is any moisture in the pan try to avoid adding it to the tofu. Taste for salt.

Lightly grease an 8 inch pie plate and firmly press in your frittata mixture. Bake for 20 minutes, until firm lightly browned on top. Let cool for about 3 minutes, then invert onto a plate and serve.

This slideshow requires JavaScript.

A Tale of Two Vegan Ranch Dressings

We haven’t purchased dressing from a store since my discovery of flavored balsamic dressings years ago, but ranch was always hard to substitute for dips and faux chicken tenders. Ranch dressing to dip well just about any and everything in from french fries to carrot sticks has become an American obsession and being vegan-ish doesn’t make me long any less for a dressing for this same purpose!

For a long while I searched high and low for a store-bought veg ranch dressing that I could embrace and love a la Hidden Valley Ranch. Alas, I’m not willing to put up with high fructose corn syrup OR things with faces in my dressing anymore, so to the Internet I went. I have tried many shorter order ingredient lists to make vegan ranch dressing and they are okay [the second recipe is the best small ingredient list dressing I have found for ranch], but this first recipe, tastes like REAL ranch dressing. Drip some veggies in it or serve over a salad. Keeps for about a week in the fridge.

  • 1 C soy Greek-style yogurt
  • 1 C vegenaise
  • 1 C almond milk, unsweetened [plus 2 tsp white or apple cider vinegar]
  • 1/3 C vegan sour cream
  • 1 tsp garlic powder
  • 1 tsp onion powder
  • 1 heaping T freshly ground black pepper
  • 1 tsp kosher salt
  • 1 T white vinegar [apple cider vingar will work in a pinch too]
  • 1 T lemon juice
  • 3 T fresh parsley, finely chopped

Directions:

  • To make “buttermilk” mix almond milk with 2 tsp of vinegar until frothy, set aside for up to 5 minutes to develop buttermilk consistency.
  • Mix the soy yogurt, vegenaise, almond “buttermilk” and vegan sour cream together in a large bowl.
  • Stir in the garlic and onion powders and pepper, then add the salt, vinegar, lemon juice and parsley and stir until just combined. 
  • Cover and refrigerate until needed, up to a week.
  • Veganized from a Food Republic recipe.

ranchdressing_recipe

In a hurry? Try this recipe instead. Not quite as rich like regular ranch dressing but makes for a good schmear on a burger, sandwich, and dipping sauce.

  • 1 C vegenaise
  • 1/2 tsp garlic powder
  • 1/2 tsp onion powder
  • 1/4 tsp black pepper
  • 2 tsp parsley, chopped fresh or 1 tsp dry
  • 1/2 C unsweetened soymilk or almond milk
  • salt to taste

Directions:

  • Whisk all ingredients together and chill before serving. Add a little more nondairy milk if you need to thin dressing.

Tempeh, Lettuce, Tomato Sandwiches (TLT)

THE sandwich we eat just about once a week in the summer…sometimes more frequently 🙂 I’ll let the recipe do the talkin’ this time.

Thanks to 101 Cookbooks for the base recipe.

1/4 C soy sauce
2 T balsamic vinegar, I use Tangerine flavored
2 T pure maple syrup
3 T adobo sauce from a can of chipotle peppers

8 ounces of tempeh, cut into 1/3-inch thick strips

1 small basket of cherry tomatoes (2 cups)
1/4 C extra-virgin olive oil olive oil
1 T pure maple syrup
scant 1/2 teaspoon of salt

1 small head of romaine lettuce, cored, then cut into 1/4-inch ribbons
1-2 large avocados, mashed with a pinch of salt just before assembling
4 or 8 extra-thin slices of hearty whole grain bread, well toasted

Preheat oven to 350F degrees.

Whisk together the soy sauce, balsamic vinegar, maple and adobo sauce. Pour 1/3 of the tempeh marinade into an 8×8 baking dish (or something comparable) – you want a dish that is just big enough to hold the tempeh in a single layer – this way it will be fully enveloped by the marinade. Pour the remaining marinade over the top of the tempeh, cover and keep in the refrigerator for a couple hours, overnight or until ready to use.

While the tempeh is marinating, go ahead and roast the tomatoes. Cut each tomato in half and arrange them in a large oven-proof baking dish. Mix together the olive oil, sugar, and salt and pour this over the tomatoes. Gently toss them a bit, making sure they all get coated, finishing with each tomato facing cut-side up. Place in the oven and bake for 45 minutes or so, until the tomatoes are shrunken and sweet [I have also left them whole with no consequence].

When the tempeh is done marinating heat a large pan over medium-high heat and cook the tempeh slices for a few minutes on each side. You may need to do this in batches if you don’t have a big enough pan. Set the tempeh slices aside until you are ready to assemble the sandwiches.

To assemble each sandwich take one slice of bread and slather a generous layer of mashed avocado or vegenaise. Place a small helping of the shredded lettuce on top of the avocado, a few tomatoes, then a few slices of the tempeh, and more tomatoes. Enjoy either open faced or topped with another avocado-slathered bread slice.

Note: we call these tomatoes “crack tomatoes” in our house…they freeze amazingly, so go ahead and make a triple batch. They taste great on tacos, in chili, tortilla soup, etc.

And some nights you eat tomatoes for dinner…

Who can really argue with the taste of a Michigan tomato in July? I can’t. So in taking all the mystery out of this post…some nights you simply eat tomatoes for dinner. Shown below are heirloom varieties Green Zebra and Beefsteak from Good News Farm.

This slideshow requires JavaScript.

Ingredients:

  • Tomatoes
  • Salt
  • Pepper

Slice, cube or dice. Salt and pepper to taste. Noms.

Peanut Kohlrabi Slaw Wrap

Kohlrabi has been gathering in my crisper for weeks. It was beginning to outnumber the greens, which if you are a CSA member of any kind you know that greens are prolific this time of year while we wait for all of the other delish stuff to grow-so this was becoming an emergency situation. Mr. Wonderful and I wanted a quick dinner and this fit the bill. The recipe below is for peanut kohlrabi slaw, we served this slaw over Gardein Seven Grain strips on a reduced fat flour tortilla, it was like a salad in a tortilla. Super simple, fast, and made from the stuff I found in the fridge.

Need a few more recipes for the space-aged looking veg? Check out the kohlrabi archives…yep, they exist.

  • 1/2 head green or Asian cabbage (finely shredded about 1 lb)
  • 2 T peanut butter (smooth)
  • 1 T peanut oil
  • 2 T rice wine vinegar
  • 1 T soy sauce
  • 1/2 tsp brown sugar
  • 3 cloves clove garlic (minced)
  • 1 tsp powdered ginger
  • 1/4 tsp cayenne pepper (taste)
  • 2 kohlrabi (bulbs peeled and grated or Julienne 1 1/2 to 2 cups)
  • 3-4 large radishes, grated or minced
  • 1/4 C dry roasted peanuts (garnish)
  • 1/4 C dried currants
  • salt
  • pepper
  • sesame seeds (roasted, garnish)

Directions:

Make the dressing in a mason jar. Put all items but sesame seeds, peanuts, radishes, currants, kohlrabi, and cabbage into a jar, shake vigorously. Taste a few times and readjust seasoning as you wish.  Toss together with all other ingredients.

Good additions would be: grated carrot, green onion, water chestnuts, crispy rice noodles, and fresh grated ginger. Adapted from Food.com.

This slideshow requires JavaScript.

Shit! I don’t have any taco seasoning.

This is my second Shit! I don’t have any…. recipe blog post. My first had to do with chili powder. My anger level seems to have risen as this title involves an actual explicative and before I was just using a mild substitute; or maybe I just REALLY wanted to make tacos tonight…I digress and give you taco seasoning for when you realize you have none. This recipe shakes out to be WAY less sodium than the packaged brands, so do yourself a favor and just make it yourself before you have a taco seasoning emergency. It takes all of about 3 minutes. I made 5x the amount (some math involved, hooray) and store it in a mason jar to keep any new emergencies at bay.

  • 1 Tbsp chili powder
  • 1/4 tsp garlic powder
  • 1/4 tsp onion powder
  • 1/4 ancho chili powder (this is an add in for more flavor, not necessary for “normal” flavor)
  • 1/4 tsp crushed red pepper flakes
  • 1/4 tsp dried oregano
  • 1/2 tsp paprika
  • 1.5 tsp ground cumin
  • 1/2 to 1 tsp sea salt (more or less to taste)
  • 1 tsp black pepper

1. In mason jar, measure out all items listed above and give it a little shake until well mixed. If you like it spicy, add more red pepper flakes or mess around a little and try some dried chipotle pepper, etc. This is totally customizable. Adapted from allrecipes.com and many other bloggers before me.

This slideshow requires JavaScript.

Strawberry Salsa

So you went crazy this past weekend and picked a zillion berries and now you are worried that your fresh strawberries might not be so fresh by the time you want to use them? Here’s a little trick from The Canning Diva to buy you a little bit of time while you process those berries:

  • Put your strawberries in a large bowl and run cold water over them.
  • Add 1/4 cup of vinegar (distilled white or apple cider) to every 2 cups of water.
  • Let them soak for about 5 minutes.
  • Drain, rinse, and dry on a towel-lined cookie sheet.


Now get to work using the fruit of your labor in this unusual dish sure to delight at your next porch party or holiday party. In the dead of winter, if you pull out a jar of this to take for a dish to pass, you will look like a rock star. This past weekend, my friend Jen, her mom, Mrs. Jen and I went to work churning out two batches of this sweet and savory salsa. I can’t wait to try it over some vegan cream cheese on a cracker or a corn chip.

The Diva’s Signature Strawberry Salsa

  • 12 cups of bite-size chopped strawberries (about 4 quarts)
  • 1/2 cup Agave Sweetener
  • 5 cups of raw, unbleached sugar (if this huge amount freaks you out you can use more Agave, Stevia or Splenda, consistency will vary however-we used 3 C sugar and a mix for the rest)
  • 1 1/4 cups Vidalia onions, size is your preference (mine are diced small)
  • 1 cup diced red onion
  • 1 cup of jalapeno (if you want more heat, keep some seeds) I remove all seeds and chop fine in my small food processor
  • 4 ounces of fresh lime juice
  • 1/2 cup chopped fresh cilantro
  • 3/4 cup red bell pepper
  • 1/2 cup green bell pepper
  • 1/4 cup finely chopped mint
  • 1 tsp sea salt
  • 1 1/4 cups of apple cider vinegar

This slideshow requires JavaScript.


Directions from the Diva: Boil sugar, vinegar and agave sweetener until sugar has dissolved. Add all onions, peppers, herbs, lime juice and spices and bring to a boil. Turn off heat and add the strawberries. Mix well.

Using a slotted spoon, hot pack salsa into pint size jars being sure to include ample liquid in each jar so long as the salsa isn’t too watery. Leave a ½” of headspace for proper processing. (I filled 7 jars with salsa and had 1 pint left over that was pure liquid. Process the liquid the same as the salsa and use it as a marinade or the base of a sweet and savory cocktail)

As always, be sure to wipe your rims with a warm cloth to remove any liquid. Seal each jar with lids and rings and process in a hot water bath for 20 minutes. Processing doesn’t begin until after the water is at a rolling boil! 


Strawberry Chia Freezer Jam

My friend Jen had to sell me on this idea big time as every other time I have had or used chia seeds except in a granola bar, I have come away feeling icky with bloating, and all those black seeds sticking in my teeth, gelling and [in my imagination] growing [cha, cha, cha chia]. This however, seems like an appropriate place for chia seeds-in freezer jam.

This recipe was adapted from Oh She Glows  and came together in a blender, in a blink. Since this is freezer jam, pop it into a freezer safe container AFTER you let it sit for a few hours and be sure to leave plenty of headspace for the chia to work it’s magic.

Ingredients

  • 6 C blended strawberries [AFTER blending you want 6 C which is about 12 C of whole berries]
  • 3 T maple syrup (or other sweetener of your choice)
  • 6-12 T water
  • 3 T chia seeds
  • 2-3 T lemon juice
  • zest from 2 lemons

Wash, hull, blend strawberries together, stir in syrup, chia, zest, juice and 6 of the T of water. Depending on the consistency you want from the jam, add up to 6 T more water. We added all 6 as our chia were already thickening past the point we really liked it while it was sitting waiting for us to scoop it into the jars.

Ladle into freezer safe jars, allow to sit 6-8 hours before putting in the freezer to gain perfect chia thickness. Store in freezer up to 6 months. The Mountain Mama Cooks adds vanilla to hers if you would like for a more “cooked” versus raw taste. If you are a purist, Eating Bird Food always has strong chia recipes even for the chia-shy like me.

This recipe tasted like a fresh picked strawberry with a kick. I will need that come winter.

This slideshow requires JavaScript.

Those who can, should…well, Can.

I love veggies. I mean it would be tough to be veganish and not adore vegetables (let’s just pretend that eggplant is a toxin because save eggplant, I love all veggies-I hate, no loathe, eggplant);  but veggies pickled? Well that has to be about as close to bliss as one can get eating summer food straight from a jar in the off season (if mine last that long).

My day job is as project director at a public relations firm, this past winter we retained a client called The Canning Diva. She came to our first meeting with a jar of salsa and even if she walked out the door as a client tomorrow, I would remain close friends with her. She’s “good people” as my friend Josh Hiller would say. I’ve drank the Kool Aid. I now measure and use ratios in the kitchen. The Canning Diva makes canning accessible and dare I say fun. She teaches preservation methods to all from novices to seasoned veterans and everyone in between, her enthusiasm for the art of canning is frankly unmatched. I mean she is TRULY excited about preserving food as art.

About a month ago, I invited The Canning Diva to my book group (we stopped reading books like years ago) and we created all sorts of delish cocktail delights like pickled Brussels sprouts, carrots, and asparagus; a session from which all members left feeling confident, inspired, and maybe a little drunk…we had to TRY the cocktail pickles The Canning Diva brought that showed us our finished product- I mean it was absolutely necessary we know what we were getting ourselves into, right? Sidebar: do not even get my friend Julie talking about the dry wine pickled garlic cloves…she might be having a love affair with them. They are exceptional.

I held off experimenting with pickling until Michigan asparagus came into season at my fave local farm, Krupp Farms, whereupon my gal pal Jen, her mom, Mrs. Jen, and I decided to take a cloudy summer Saturday and turn in into a canning extravaganza! We canned over 140 jars of delish summer surprises in one very full day.

While my goodies sit on a shelf, waiting to “cure”, I leave you with one of my favorite things to come out of a jar since peanut butter…The Canning Diva’s Pickled Asparagus recipe. I’ll share the strawberry recipes we worked on soon too.

The Canning Diva says: a great side to a frothy beer or an excellent alternative to celery in a Bloody Mary! If you would prefer a non-alcoholic splendor, they taste excellent in a salad or an addition to a relish tray.

Ingredients

  • 7 lbs asparagus
  • 5 cups white vinegar
  • 5 cups water
  • ½ cup pickling or canning salt
  • 6 cloves of garlic, whole
  • ½ tsp dill seed
  • ½ tsp mustard seed per jar
  • ½ tsp crushed red pepper flakes per jar

This slideshow requires JavaScript.

As usual, prepare all of your jars ahead of time and have your lids and rings setting in boiled water. If you don’t know how to do this…please, get with Diane, AKA The Canning Diva at one of her Canning 101 classes offered in GR. It will open a whole new world to you for food preserving and SAVING MONEY by preserving the summer harvest.

In a large stainless steel stock pot, combine vinegar, water and salt. Stir well and bring to a boil, stirring to dissolve the salt. Place a garlic clove, ½ tsp dill seeds, ½ tsp of hot pepper flakes and ½ tsp mustard seeds in each jar. Raw pack the asparagus into each jar leaving a generous ½” head space.

Ladle hot liquid into jars being sure to maintain the ½” headspace. Remove any air bubbles using your canning utensil or the handle of a wooden spoon. Adjust headspace if necessary.

Tip: If you run out of pickling liquid, use half the parts listed above, boil and fill jars accordingly. Never fill your remaining jars with just water – it will lessen the acidic level and cause food to spoil.

Using a warm wash cloth dipped in vinegar, wipe each rim and screw bands. Place lids and rings on each jar and hand tighten. Place jars in water bather and cover with water. Process the jars for 10 minutes. Remember, processing time doesn’t begin until the water is at a full rolling boil.

We canned 10 lbs of asparagus in varying sized jars from pint to half pint, so we doubled this recipe AND then needed an additional recipe of JUST pickling brine so we whipped up 3 brine recipes in all. Super simple to fix a brine error if it happens is what I’m getting at.

Full disclosure: The Canning Diva is one of my clients, I paid for a class as did a bunch of my gal pals about a month ago, then we were unleashed into the world of canning. I wrote this blog to share this info, a divine recipe, and help bring awareness to this craft during the Midwestern summer bounty, not necessarily to promote her business; however, if that also happens…AWESOME because this is a skill I should have learned a long time ago. Thanks Canning Diva!

Wheat Berry Spring Salad

A recipe doesn’t have to be very complex. Sometimes I just grab stuff that is either: 1) about to go bad in my fridge, 2) really fresh in my fridge, or 3) stuff that sounds good and hope it all tastes good together. This was #3 for a quick dinner and several more lunches.

Not rocket science, hell sometimes I don’t even measure…

Ingredients:

  • Everything in my fridge cut up (asparagus raw, tomato raw, english cucumber, dried cranberries, red grapes halved, a little romano cheese cut in chunks-0mit for vegans)
  • 2 c cooked wheat berries

Dressing :

  • 1/2 C apricot balsamic vinegar (or any other flavor really)
  • 1/8 C evoo
  • salt and pepper to taste

Tossed the dressing with the wheat berries and severed over microgreens. Tasted amazing the next day in a pita.

Wheatberry Salad

Fakin’ CheeseBurger (Vegan)

This slideshow requires JavaScript.

It’s summer. Flame broiled burger smells are in the air, and you are still eating burgers off a grill from the frozen food section of the local IGA? I’m sorry to break this to you, but you’re doing it all wrong. Take a few minutes, whip up your own burger and revel in the excitement that is all of the ordinary and none of the animal. Veggies, you know what I mean.

This recipe comes to you courtesy of The Best Veggie Burgers on the Planet (so far this book has proven to be true to the title).

Ingredients:

  • 1 C TVP granules
  • 1 scant C veggie broth
  • 1/4 C imitation bacon bits, store-bought or homemade
  • 1 C vital wheat gluten flour
  • 1/4 tsp liquid smoke
  • 1/2 C nutritional yeast
  • 1 T garlic powder
  • 1 T onion powder
  • 1/4 C peanut butter
  • 1/4 C pure maple syrup
  • 1/4 C vegetable oil (I got away with 1/8 C)
  • 1/4 C bbq sauce
  • salt and pepper
  • oil for frying/grilling

Directions:

In a large micro-safe bowl, mix together the TVP granules and the broth, cover tightly with plastic wrap or a lid and microwave for 5-6 minutes. Alternatively, bring the broth to a boil, pour over the TVP, cover, and let sit for 10 minutes.

Add the bacon bits, flour, liquid smoke, nutritional yeast, garlic powder, onion powder, peanut butter, maple syrup, oil, bbq sauce, salt and pepper to the bowl. Knead together for 5 minutes or so, then let sit a few minutes to thicken up.

Form into 4-6 patties. Refrigerate or freeze until ready to use.

Cook as desired. Panfry, grill or bake in a 350 oven until cooked through with a crisp-ish outer coating. They freeze well.

“Take me to the beach” Vegan Granola Bars

Memorial Day weekend. First official beach weekend in Michigan which of course requires portable food. Gena Hamshaw of the blog Choosing Raw shares a recipe on HuffPost Taste every other Thursday and this one I have made several times since I discovered it. Perfect portable beach food.

The best part about this is recipe is that you can sub out just about anything you have in your kitchen for the dry components so long as you keep the wet component ratio (nut butter and agave or brown rice syrup) intact. The recipe doubles and triples well to boot.

Original Recipe:

  • 2 1/2 C rolled or quick oats
  • 1 C raw pumpkin seeds
  • 1/2 C raisins
  • 2/3 C nut butter
  • 1/2 to 2/3 C agave nectar or brown rice syrup (adjust based on how well things stick together)
  • 1/8 tsp sea salt (optional)
  1. Mix together oats, pumpkin seeds, and raisins in a large bowl.
  2. Whisk together nut butter, sweetener, and sea salt. Pour onto oat mix and mix well. If it is too dry add some more sweetner.
  3. Press mixture into a shallow baking dish lined with parchment to form one large bar. Cut into shapes after 4 hours and wrap up for individual serving. They last 2 weeks, covered in the fridge.

Recipe for Bars Pictured:

  • 2 1/2 C rolled oats
  • 1/2 C dried cranberries
  • 1/2 C mini carob chips
  • 1/3 C dried coconut
  • 1/3 C chia seeds
  • 1/3 C sunflower seeds
  • 2/3 C natural, crunchy peanut butter
  • 2/3 C brown rice syrup
  1. Mix together dried ingredients in a large bowl.
  2. Whisk together nut butter and sweetener (I didn’t need salt due to sunflower seeds and peanut butter). Pour onto oat mix and mix well-dig your hands into it if you must! If it is too dry to stick together properly add some more sweetener.
  3. Press mixture into a shallow baking dish lined with parchment to form one large bar. Cut into shapes after 4 hours and wrap up for individual serving. I can see this working out well as rolled spheres too. They have a great texture. Bars or balls will last 2 weeks, covered in the fridge.

This slideshow requires JavaScript.

How do I overnight oats? Let me count the ways….

My first encounter with overnight oats contained chia seeds which I love in smoothies, but loathe in anything that is required to set and then eat or drink. the consistency is well, cha, cha, cha, chia…and if you are a child of the 80’s then you will know exactly what this means – gel-like, icky, sticky and gross.

This recipe and countless variations becomes breakfast at least 4 days a week. With an unlimited amount of creations you can concoct with this base, it is sure to become a morning staple in your home too. I put these oats together at night before bed, pop in the fridge, then grab while I’m running out of the house like my hair is on fire in the AM. I eat them at the office while I’m checking email and making coffee.

Overnight Oat Base:

  • 1/3-1/2 C rolled oats ( I use Bob’s Red Mill, thick cut ) – not instant here – if you like it a little runny opt for less oats
  • 2/3 C any non dairy milk ( my go to is unsweetened almond milk )

Typically I add:

  • 2 T PB2
  • 1 sliced banana ( just before I eat the oats )

My next fave is:

  • 2 tsp maple syrup
  • 1 T reduced fat coconut
  • 1 C sliced strawberries (just before I eat the oats)

I also really love:

  • 2 tsp maple syrup
  • 1/2 C blueberries (just before I eat the oats)

Sometimes I even get really crazy and add:

  • 2/3 C unsweetened chocolate almond milk ( instead of the unsweetened plain milk in the recipe above )
  • 2 T Chocolate PB2
  • 1 sliced banana

Directions: combine oats and any add in EXCEPT fruit, then pop in the fridge overnight. 6 or so hours they are ready to consume. Add fruit before eating. If you add fruit the night before the water escapes into the oats and make them watery and icky. A very technical term, icky.

Pictured below is the “really crazy” variety minus the banana. My fave jar to use is pictured. Seems to be the perfect size for 1) the spoon and eating and 2) the oats for soaking in the milk.

IMG_7296 IMG_7295 overnight oats in ball jar from side top overnight oats in jar from top overnight oats in ball jar side view overnight oats in ball jar on desk with computer overnight oats in ball jar macro side IMG_7291 overnight oats close up

VOTE! Virtual Vegan Potluck: Peanut Soba Noodle Salad

vvpLOGO

UPDATE: The potluck is over, but the voting for faves just started! Below find my entry in the Virtual Vegan Potluck then click on over to cast your vote for Veg Bon Vivant for salad winner!

++++++++++++++++++++++++++++++++++++++++++++++++

I’m part of a GLOBAL plant-based potluck today. Doesn’t that sound super impressive? Over 170 of my virtual vegan friends have committed to participation in Virtual Vegan Potluck, a twice-a-year, orderly, and yummy way to expose their blog followers to new recipes and new vegan blogs. I am so excited about the blogroll itself I can hardly stand it. New reading! My “dish to pass” is a salad. A tried and true salad that never has leftovers and leaves everyone shocked that they just ate Thai food. Hey, eat more veggies while you are at it.

I relish all of the different flavor combinations that comprise regional foods and on occasion I like to make up my own recipes from the most awesome parts of other recipes.  I love peanut sauce in Thai restaurants; however it is not good for you. At. All. I modified a recipe I found online cutting out the non-veg ingredients, pinched a little of the fat (bye-bye oil) and yet maintained a “dressing” consistency suitable for a salad instead of satay duty. Paired with a few of my fave salad ingredients including the beloved soba noodle, I dropped in a spicy protein too to give you a delightfully filling and portable salad that could hold its own at a REAL potluck. Hello summer!

Peanut Dressing:

  • 3/4 cup creamy peanut butter
  • 1/4 cup (brown) rice vinegar
  • 1 T tamari or soy sauce
  • 1 tsp to 1 T chopped, ground, or pre-chopped ginger (test along the way)
  • 2 cloves garlic, crushed and chopped
  • drizzle of toasted sesame oil (keep it to less than a tsp)
  • big pinch of crushed red pepper flakes or 1 tsp-1T of hot sauce, your choice
  • 1/4-1/2 cup hot water

Salad:

  • 1 package soba noodles prepared according to package instructions
  • 2 carrots, peeled, grated
  • 4 radishes, chopped
  • 1 head napa cabbage, shredded
  • 1/4 C crushed peanuts or cashews, toasted
  • a handful of bean spouts per salad
Mix dressing ingredients together in the food processor, let set 10-20 minutes to develop in flavor intensity, reserve 1/4 C dressing for topping salad.  Shred cabbage, toss with chopped radishes and grated carrot, mound in 3-4 salad bowls.  Toss soba noodles in the peanut sauce until coated nicely, divide and add to cabbage salad, top with 1/4 C reserved dressing and crushed peanuts or cashews and fresh bean spouts.  Serve immediately.

This slideshow requires JavaScript.

Well you know how a potluck works right? So that was JUST my dish to pass, scoot on over to the next blog for another delish salad and start filling up that plate! Just make sure you save room for dessert….I went through the blogroll today and down the line are some vegan desserts you will not want to miss!
Click “go forward” for the next salad from Yum for Tum or depending on how you found this post, you might have missed the one before me at Mojo Central. Happy potluck!
go_forward-300x243go_bck-300x257
Pictured with salad ginger/garlic/soy marinated baked tofu (recipe below):
  • 1 package extra firm tofu, drained, sliced in half (thickness wise) and pressed (after pressing 20-30 minutes, cut into pieces about the size of a pinky finger-sorry, that’s kinda gross!)
  • 3 cloves garlic, minced
  • 1/2 C soy sauce
  • 2 inches ginger, peeled and grated
  • 1 tsp sesame oil
  • 1 pinch red pepper flakes
Marinate tofu in mixture of the ingredients above for 30 minutes to overnight. Bake tofu on a foil lined, lightly greased, rimed baking sheet at 375 or grilled until firm in texture, turning every 5-10 minutes.  Serve with the salad.
thanks2-300x176

Sometimes you just need chocolate cupcakes…like at 11pm for example

The title is true. Sometimes you just need chocolate cupcakes….like at 11pm for example. I posted this delish cake recipe some time ago and then a few nights ago when a chocolate cupcake craving hit…well, I made cupcakes at 11pm.

The cupcake recipe can be found here: Vegan Chocolate Cupcakes [this late night craving wanted coffee/chocolate so I added 1 T espresso powder to the chocolate batter for an espresso chocolate cupcake]

For the “frosting”:

  • 1 ripe banana
  • 1-2 C powdered sugar
  • 1 tsp vanilla

Smash the ripe banana in a large bowl with vanilla. Gently whisk in powdered sugar until you reach your desired frosting consistency. Pop in the fridge. Will keep for up to one week. Bonus, tastes really good on toast.

IMG_7321 IMG_7319 IMG_7320 IMG_7317 IMG_7318 IMG_7315 IMG_7316

Virtual Vegan Potluck: Peanut Soba Noodle Salad

vvpLOGO

I’m part of a GLOBAL plant-based potluck today. Doesn’t that sound super impressive? Over 170 of my virtual vegan friends have committed to participation in Virtual Vegan Potluck, a twice-a-year, orderly, and yummy way to expose their blog followers to new recipes and new vegan blogs. I am so excited about the blogroll itself I can hardly stand it. New reading! My “dish to pass” is a salad. A tried and true salad that never has leftovers and leaves everyone shocked that they just ate Thai food. Hey, eat more veggies while you are at it.

I relish all of the different flavor combinations that comprise regional foods and on occasion I like to make up my own recipes from the most awesome parts of other recipes.  I love peanut sauce in Thai restaurants; however it is not good for you. At. All. I modified a recipe I found online cutting out the non-veg ingredients, pinched a little of the fat (bye-bye oil) and yet maintained a “dressing” consistency suitable for a salad instead of satay duty. Paired with a few of my fave salad ingredients including the beloved soba noodle, I dropped in a spicy protein too to give you a delightfully filling and portable salad that could hold its own at a REAL potluck. Hello summer!

Peanut Dressing:

  • 3/4 cup creamy peanut butter
  • 1/4 cup (brown) rice vinegar
  • 1 T tamari or soy sauce
  • 1 tsp to 1 T chopped, ground, or pre-chopped ginger (test along the way)
  • 2 cloves garlic, crushed and chopped
  • drizzle of toasted sesame oil (keep it to less than a tsp)
  • big pinch of crushed red pepper flakes or 1 tsp-1T of hot sauce, your choice
  • 1/4-1/2 cup hot water

Salad:

  • 1 package soba noodles prepared according to package instructions
  • 2 carrots, peeled, grated
  • 4 radishes, chopped
  • 1 head napa cabbage, shredded
  • 1/4 C crushed peanuts or cashews, toasted
  • a handful of bean spouts per salad
Mix dressing ingredients together in the food processor, let set 10-20 minutes to develop in flavor intensity, reserve 1/4 C dressing for topping salad.  Shred cabbage, toss with chopped radishes and grated carrot, mound in 3-4 salad bowls.  Toss soba noodles in the peanut sauce until coated nicely, divide and add to cabbage salad, top with 1/4 C reserved dressing and crushed peanuts or cashews and fresh bean spouts.  Serve immediately.

This slideshow requires JavaScript.

Well you know how a potluck works right? So that was JUST my dish to pass, scoot on over to the next blog for another delish salad and start filling up that plate! Just make sure you save room for dessert….I went through the blogroll today and down the line are some vegan desserts you will not want to miss!
Click “go forward” for the next salad from Yum for Tum or depending on how you found this post, you might have missed the one before me at Mojo Central. Happy potluck!
go_forward-300x243go_bck-300x257
Pictured with salad ginger/garlic/soy marinated baked tofu (recipe below):
  • 1 package extra firm tofu, drained, sliced in half (thickness wise) and pressed (after pressing 20-30 minutes, cut into pieces about the size of a pinky finger-sorry, that’s kinda gross!)
  • 3 cloves garlic, minced
  • 1/2 C soy sauce
  • 2 inches ginger, peeled and grated
  • 1 tsp sesame oil
  • 1 pinch red pepper flakes
Marinate tofu in mixture of the ingredients above for 30 minutes to overnight. Bake tofu on a foil lined, lightly greased, rimed baking sheet at 375 or grilled until firm in texture, turning every 5-10 minutes.  Serve with the salad.
thanks2-300x176

Mint Chocolate No Bake Cookie Bites

I do a lot of reading. For school, for work, for fun, I’ve always liked reading. Sometimes I read a recipe and it bypasses the bookmark function and gets me straight away into the kitchen, particularly when I have all the ingredients on hand and want to eat cookies. I mean really, when I want to eat cookies. I’m a big fan of no bake items particularly those that don’t require chemistry to work and you can kind of “eye-ball” the measurements. When these didn’t come together just as planned with the original recipe I improvised a little with the natural sweetness of maple syrup and a few extra dates. I dare you to eat just one.

  • 1 cup rolled oats
  • 1 cup raw cashews
  • 12-16 medjool pitted dates
  • 3 T dark cocoa powder
  • 2-4 T nondairy milk
  • 1/4-1/2 tsp peppermint extract 
  • 1 tsp maple syrup
Dough should just stick together out of the food processor

Dough should just stick together out of the food processor

IMG_7490

A perfect scoop

A perfect scoop

Use a scoop to portion out the dough

Use a scoop to portion out the dough

Roll into balls after you measure out the dough

Roll into balls after you measure out the dough

Nondairy milk, dates and cocoa powder

Nondairy milk, dates and cocoa powder

In a food processor mix the cashews and oats until they are a powdery consistency. Then add the dates, cocoa powder, 2 T milk and peppermint extract and mix until a dough starts to form. If the dough looks dry, add a bit more milk. Roll into balls and place on a parchment lined baking sheet. Set in the fridge to firm up. I got 25 bites out of my batch using a small pampered chef scoop to form the cookie bites.

Adapted from My Whole Food Life

Roasted Veg Mini Pizzas

Shocked that I might be full after just half of this serving size. I continued to eat of course until I was stuffed of this goodness. Another yummy Happy Herbivore meal plan recipe that will now be a weekly staple at the Wonderful residence: Roasted Veg Mini Pizzas (serves 1)

  • 2 whole-wheat Pita Pockets
  • 1/2 C marinara sauce
  • 1 C zucchini
  • 1 tomato, diced
  • 1 onion, sliced
  • 3 1/2 T nutritional yeast or vegan parm
  • sliced black olives (optional)

Spread a thin layer of marinara sauce over the top of each pita. Not too much or you will just have soggy bread, icky. Top with squash, tomato and onion. Bake in 400 degree oven for about 10 minutes (check at 5) until everything is warmed and browning slightly. I placed my pitas directly on the oven rack to get a crispy “crust.” Sprinkle with olives, nutritional yeast, or vegan parm (shown in photos). Don’t forget the Frank’s Red Hot!

IMG_7310 IMG_7311 IMG_7308 IMG_7309 IMG_7307

418 calories for 2 pita pizzas, 4.8g fat, 77g carbs, 24g fiber, 20g sugars, 30g protein.

Chana Palak Masala – Easy for YOU to say!

I talked about the Happy Herbivore meal plans a few weeks ago in a post and I will again sing the praises that just $19.00 a month can bring you a little more peace into a crazed life by just telling you what to do and when to do it. I often like it when there is ONE area of life I don’t have to make yet another decision during they day and Lindsay Nixon is my beacon of hope in that regard.

Sometimes I look at a recipe in the meal plan and think, how in the world will that taste good? Fortunately I’m kinda brave and will mostly eat anything, this recipe surprised me at 1) how few calories it has, 2) how filling it is, 3) it really is delicious and 4) you can eat take-out like food at home in under 30 minutes.

Enough of my blabbering, here’s the recipe (2 servings):

  • 1 small onion, diced
  • 2 cloves garlic, minced
  • 12 oz peeled whole or diced tomatoes (canned)
  • 15 oz chickpeas (canned), drained and rinsed
  • 10 oz frozen baby spinach (fresh okay too)
  • 1 C low sodium veg broth or water
  • 1/2 tsp ground cumin
  • 1/2 tsp coriander
  • 1/2 tsp mild curry powder
  • 1/2 tsp tumeric
  • 1/4 tsp ground ginger (or double it with fresh)
  • dash of red pepper flakes
  • 1 tsp lemon juice (optional, but use it…it makes it better)
  • 1 tsp garam masala

Make magic:

In a large pot, saute’ onions and garlic with a few tablespoons of water, instead of oil. Once the onion is translucent, add spinach, chickpeas, tomatoes with juices and broth. Cover and cook over medium until the spinach cooks down [I used frozen and didn’t drain and it came out fine]. Uncover and break up tomato bits. Add all spices except garam masala, add lemon juice at this point. Cover and cook for 3 minutes. Add 1/2 garam masala and cook for 2 more minutes more. Taste, adding additional garam masala if desired plus salt and pepper if needed. Turn heat off and allow to sit for 5 or so minutes. The dish will thicken as it stands. Start to finish, this took me about 30 minutes. I served about 1/4 of this recipe over brown rice.

Per serving: 283 calories, 58g carbs, 3g fat, 10g fiber, 7g sugar, 12g protein

IMG_7312 IMG_7314 IMG_7313

Faux Cheese Heaven

IMG_7196

IMG_7197

I know. Cheese. It’s the only think that separates you from vegan, right?

Well, this will certainly help bridge the gap. Faux nacho cheese.

I’m not a huge fan of nutritional yeast, it sorta weirds me out and it’s super salty, but I put fear aside for the sake of cheese-sperimentation and well, I’m super glad I did. This Happy Herbivore meal plan cheese sauce could make just about anything taste good; however I chose a homemade corn tortilla chip with sea salt to complete my cheese taste test. I doused my chips in black beans, olives, this sauce, onion, and some hot sauce, and it felt so, so dirty and wrong, yet I knew it was so right. Give it a try for yourself. This sauce also reheats nicely and would taste killer on some whole grain macaroni for a quick mac and cheese fix.

Quick Queso (by Happy Herbivore)

  • 1 C unsweetened almond milk
  • 1/3 C nutritional yeast
  • 3 T white whole-wheat flour
  • 1 tsp onion powder, granulated
  • 1/2 tsp garlic powder, granulated
  • 1/2 tsp ground cumin
  • 1/4 tsp paprika
  • 1/4 tsp chili powder or cayenne (I used chipotle)
  • 1/4 tsp salt (optional, I didn’t need it with a salty chip)

Whisk all ingredients together in a saucepan. Bring to boil over medium heat, stirring often.

Yeah, it’s that easy.

Butternut Black Bean Tacos

I could eat tacos every. single. day. Honestly.

Tacos as we know them in the Wonderful residence, typically are born from whatever is leftover in the fridge, or what can be tossed together before it goes bad in the fridge. I had a few onions that were about to sprout and take over the cupboard, so I used those for the base of these tacos. PS: anything on a tortilla tastes good. Knock yourself out in your own kitchen.

  • 2 C butternut squash mash (pulled from freezer) – okay to use from freezer section at store-cubed is fine too; heck use sweet potatoes if you want
  • 2 C black beans, cooked (pulled from freezer) – okay to use canned
  • 2 large yellow sweet onions
  • 1 tsp olive oil
  • 1 tsp Mexican oregano
  • 1 tsp powdered garlic
  • 1 tsp powdered cumin
  • 1 tsp chili powder
  • corn or flour tortillas, your choice
  • topping [obviously pickled jalapenos, arugula, salsa, and taco sauce]

Saute onions in olive oil until transparent or bronzed. Add smashed or cubed butternut squash and black beans to this mix along with all spices. Warm through. Serve on a tortilla.

Vegan Chocolate Chip Cookies

My friends Jon and Kolene over at VeganGR are always making vegan chocolate chip cookies and slipping them into non-vegan events with great results. By great, I mean no one can detect the damn difference between the vegan chocolate chip cookies and “normal” chocolate chip cookies.

I’m not wild about any butter/margarine substitute, so I took a crack at an Earth Balance free recipe posted on the Post Punk Kitchen instead. I was not disappointed. The texture was a little crazy, but not in a bad way. The tops of these guys were like crackly almost, flaky certainly, but honestly, a great way to satisfy your sweet tooth in a cruelty free way.

A little bonus: in using canola or veg oil, you don’t have to fight that battle of getting the butter/margarine “room temperature” which ultimately ends up in me making margarine soup in the microwave because I don’t have the patience to zap it slowly and/or I didn’t plan to make cookies at 9am that morning and now it’s officially an emergency at 10pm to get a cookie crammed into my pie hole before I hit the hay. Don’t pretend you have not experienced this same emergency before. It’s a real problem.

Makes two dozen two inch cookies or about 16 three inch cookies

  • 1/2 brown sugar
  • 1/4 white sugar
  • 2/3 cup canola oil (it’s a lot, I know…but no other oil is used)
  • 1/4 cup unsweetened almond milk (or your favorite non-dairy milk)
  • 1 tablespoon tapioca flour (I used Arrowroot and still had sound results)
  • 2 teaspoons pure vanilla extract
  • 1 1/2 cups all purpose flour
  • 1/2 teaspoon baking soda
  • 1/2 teaspoon salt
  • 3/4 cups chocolate chips (vegan)

Preheat oven to 350 F. Lightly grease two large light metal baking sheets.

Mix together sugars, oil, milk and tapioca flour in a mixing bowl. Use a strong fork and mix really well, for about 2 minutes, until it resembles smooth caramel. There is a chemical reaction when sugar and oil collide, so it’s important that you don’t get lazy about that step. Mix in the vanilla.

Add 1 cup of the flour, the baking soda and salt. Mix until well incorporated. Mix in the rest of the flour. Fold in the chocolate chips. The dough will be a little stuff so use your hands to really work them in.

PPK directions: For 3 inch cookies, roll the dough into about ping pong ball size balls. Flatten them out in your hands to about 2 1/2 inches. They will spread just a bit. Place on a baking sheet and bake for about 8 minutes – no more than 9 – until they are just a little browned around the edges. I usually get 16 out of these so I do two rounds of eight cookies. Let cool on the baking sheet for about 5 minutes then transfer to a cooling rack.

For 2 dozen two inch cookies roll dough into walnut sized balls and flatten to about 1 1/2 inches and bake for only six minutes.

I found however, it took a little longer to produce a cookie that was cooked through. Check on them every minute or so to insure you don’t burn ’em until they are to your liking.

Lost an hour? Gain a few back.

Forget about Daylight Savings Time. The Happy Herbivore, Lindsay Nixon, fellow chickpea lover, has found a way to give you back a few hours of your week. Previously, I would spend a few hours a week, typically either on a Sunday as a diligent planner, or via freaking out when I get home from work worrying about what will go on the grocery list, or what I will cook for dinner, etc. The Happy Herbivore has eliminated the planning, digging, guessing, grocery list making, contemplating out of my weekly food equation with 7-Day meal Plans.

With this service, which is around $20.00 a month, I get a pdf link weekly with a calendar for meals, all the recipes in one place, a premade grocery list, calorie counts for all food consumed, and suggested snack ideas. Each day falls into the 1,200 calorie range so you can add snacks or decrease snacks as needed and the meals are interchangable with other weeks and other meals. She does a pretty good job of recycling ingredients through the week in different ways so you don’t feel like you are always eating say quinoa in the same way. Today for example, we ate quinoa for breakfast in chocolate *pudding* form with blueberries. Even I was skeptical, and I spend most of my waking life thinking about what I am going to next eat. Turns out, taking the thinking portion out of food is what I need during this part of life. I sometimes don’t want to make another decision that day which typically translates into take-out which is not good for my weight OR my checking account.

The Happy Herbivore has cookbooks too of course, so you could pull out a recipe and swap it for another if you so choose. At any rate. I’d be happy to share a week with you if you are scared of the initial investment-just leave me a comment including your email address below and I’ll send it out to you. Just one per person though, I want this service to continue and for that to happen, Lindsay has to be compensated for her time. I’m sure you will find, it’s worth all $18.88 per month to regain a few extra hours a week and a plan after you try.

Curious what Chocolate Espresso Quinoa Pudding is? Try it.

  • 1/4 C quinoa (rinsed)
  • 3/4 C unsweetened chocolate almond milk
  • 1 1/2 T pure maple syrup
  • 1 T unsweetened cocoa powder (I mixed 1/2 special dark and 1/2 regular)
  • 1/8 tsp espresso powder
  • 1/8 tsp vanilla extract
  • 1/2 C blueberries (fresh or frozen)

In a saucepan, combine quinoa, chocolate milk and espresso. Cover, bring to a boil, reduce to low and simmer until quinoa is cooked and fluffy, about 15-20 minutes. Stir in maple syrup, vanilla, and cocoa [I made a quick paste of this before putting into quinoa], plus another splash of chocolate milk. Taste, add more maple syrup if you need it a little sweeter. Top with fresh fruit. Serve warm.